make the BRACES

The pattern was copied to the cedar brace blank referencing one straight edge on the board.

The 45 degree edge of the speed square is used to align the pattern before tracing. This is repeated for the second larger brace. To save material I nest the braces into each other on the board. Alternating them if possible depending on any rough sections or large knots in the red cedar.
And just like the patterns, the braces are cut on the miter saw then the bandsaw.
Cutting 45 degree Miters

This could also be done with a speed square, circular saw, then jigsaw.

Cedar Curved Pergola Outdoor Structure
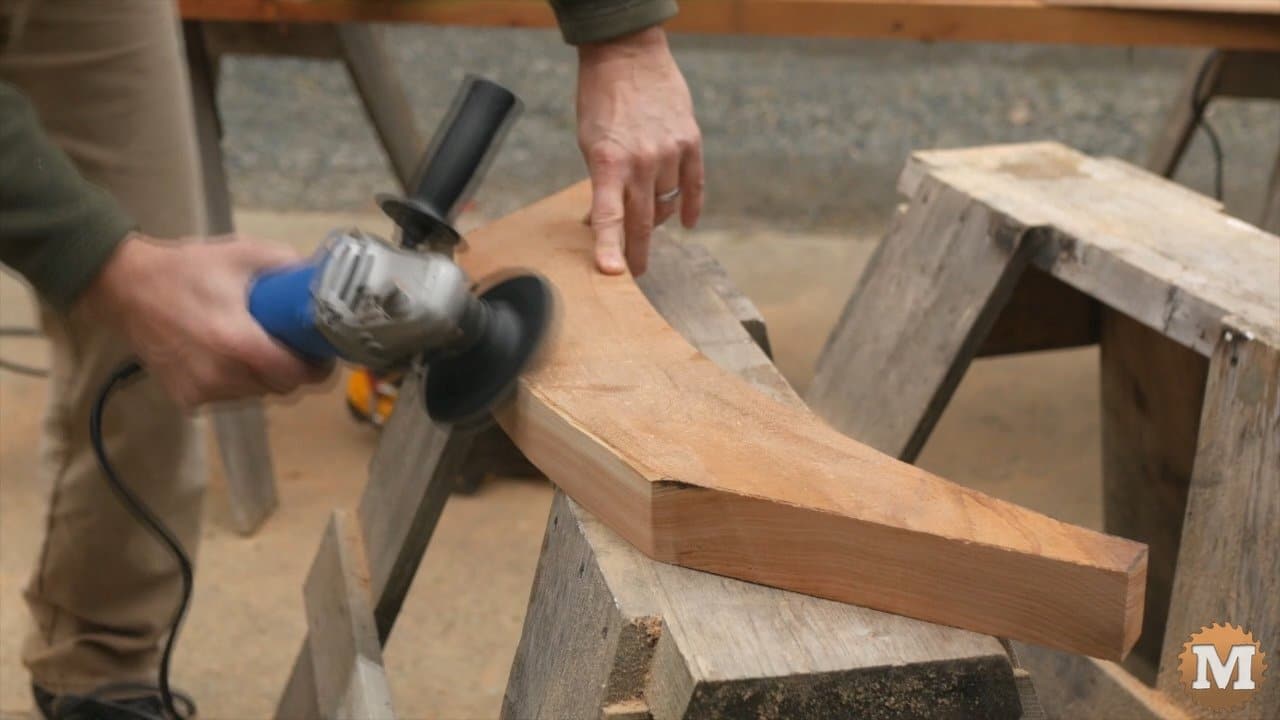
After sanding the curves smooth on a hobby belt sander I bevel the edges with a sanding disc on my angle grinder.
The last step in prepping the braces is to drill holes for the lag bolts.

I mark a point half way along the flat section of the brace where it mates to a post, beam, or rafter. I draw a line 90 degrees to that point, then another 20 degrees off that.

This way the lag bolts will pull the brace into the corner.
Now I copy this mark to the brace. Then mark the center of that location.

I tilt the table of my drill press to 20 degrees.
Drill Press for Lag Bolt Pilot Holes

And clamps some stops to the table to help hold the brace. With a forstner bit in the chuck I counterbore a hole on each end of the brace.
(Disclaimer: As an Amazon Associate I earn from qualifying purchases. Thank you for helping to support my content this way. )

Swap the bit, then drill through for the shank of the lag bolt and washer.
Stack of Curved Braces

These larger braces had one additional cut that was done on site. The brace was laid in place against the rafter and scribed. This piece was then removed so the brace would fit tightly to the shape of the rafter.

To attach the small braces I hold them in place and drill into a post then beam. Then with an impact driver I run in the galvanized lag bolt. This is a clip from my woodshed build where I used a similar curved brace.
BRACES on the CAD Model

Eight of these braces are required for the sides of the pergola and attach to the posts and 6×6 beams.

This process was repeated for the larger braces that are secured to the posts and rafters.
Now all the temporary bracing is removed.
The LOUVERS
The three louvers, or more if needed, are made from 2×4 stock. The pergola design called for them to be simply cut to length then chamfered. They are positioned over the rafters and screwed in place.

And that is it. The curved pergola is done. Let me know what you think by dropping a note in the comment section. I try to reply to as many questions as I can.

Thank you so much for reading!

And thanks to everyone who has supported our channel through Patreon. It’s very much appreciated.
I have a full set of plans available for download.
If you have any questions, please leave them in the comments below. Thanks for reading
See also: Shed Style Garden Pavilion
Pictures after 5 Years
Here’s some pictures taken last November to show how the pergola design has aged. I think it’s holding up very well. It’s the worse time of year for any flattering photos but maybe that’s okay.


There’s a long crack in one beam but that’s all I could find of any significance.


And that’s all. Thanks!

