Build your own Timber Frame Garden Pavilion. Plans available for download in PDF Format.
Part 1 of 3
See the How to Video.
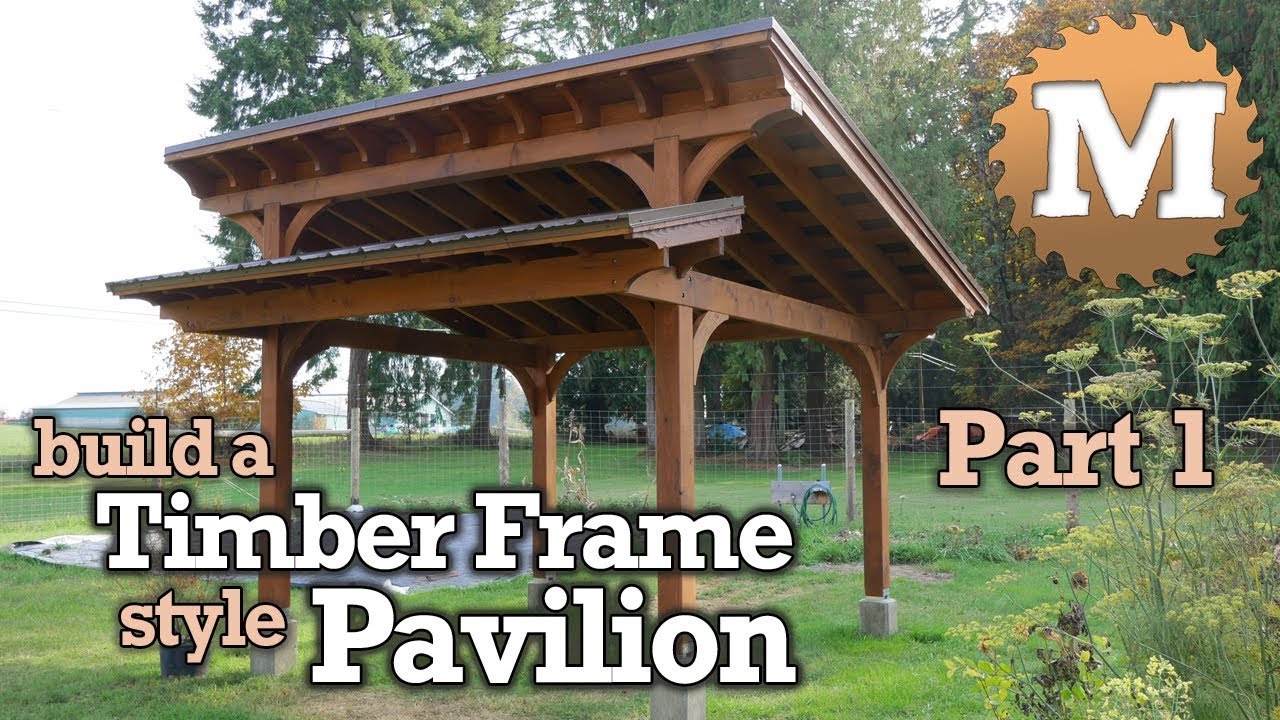
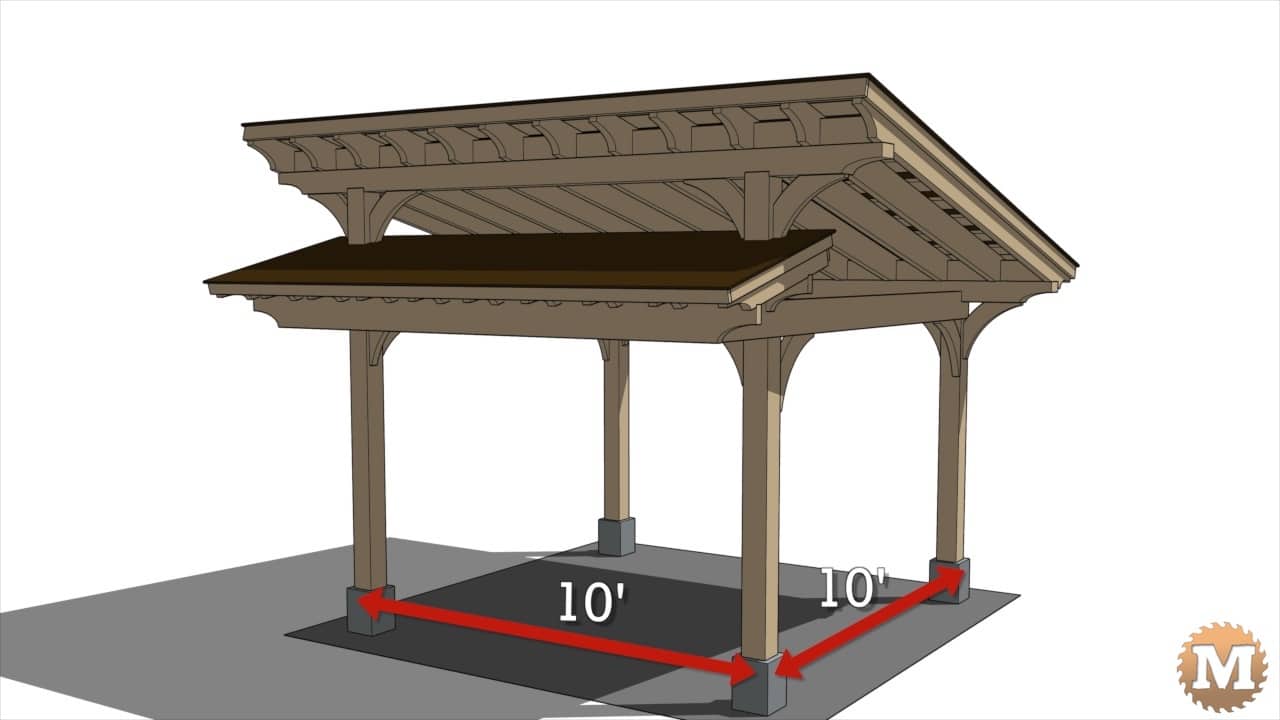
We wanted to build an open structure as a center piece for our garden and as a shady spot to sit, work, or socialize. I wanted it to be built in a timber frame style with simple joinery and posts on 10 by 10 centers.
Part 1 – Build the Timber Frame Pavilion
Timber Frame Style Design
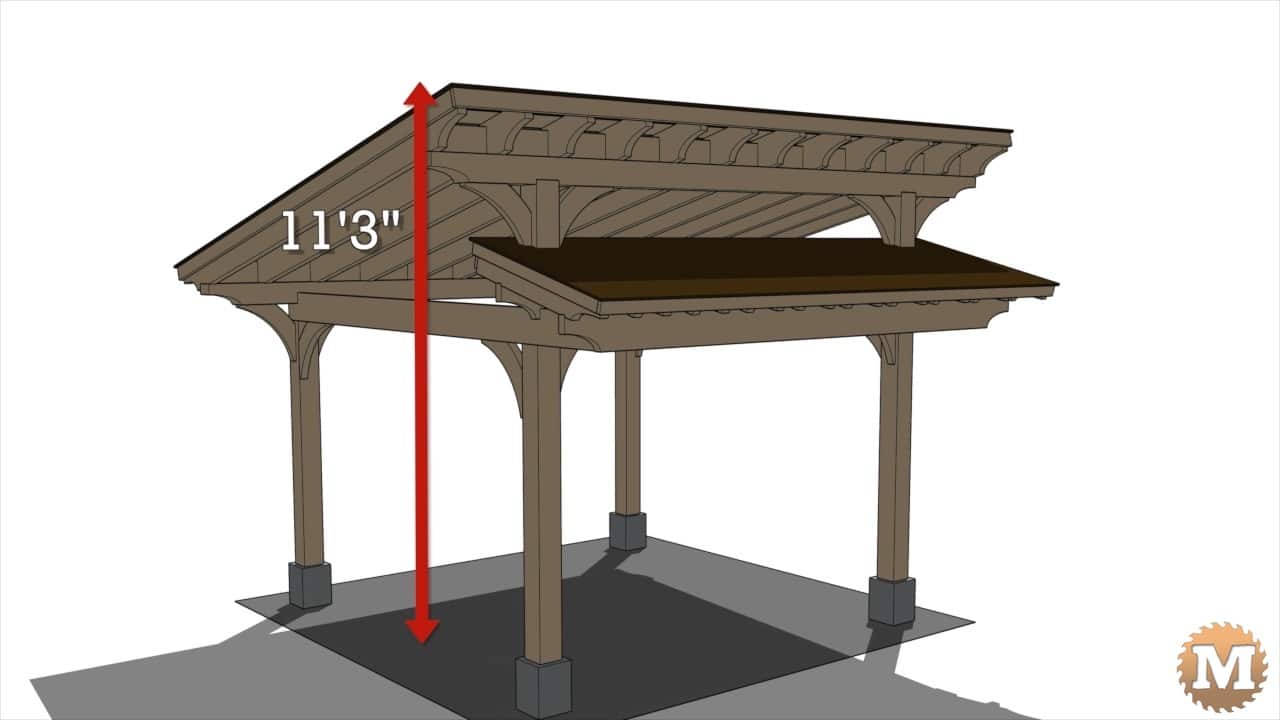
Here’s the 3D model I created in Sketchup.
The peak height of the pavilion is 11’3″. The large sloping shed roof faces the south with another smaller roof on the front facing north with a clerestory type opening above. The structure is built from red cedar and fir, and topped with a metal roof.
I’ll add a rain gutter off the back to collect water for the garden. The rafters and beam ends have a quarter ellipse profile in the same fashion as the woodshed I built earlier in the summer. The head clearance is 7 feet and in the future I’ll add a wooden deck or concrete patio.
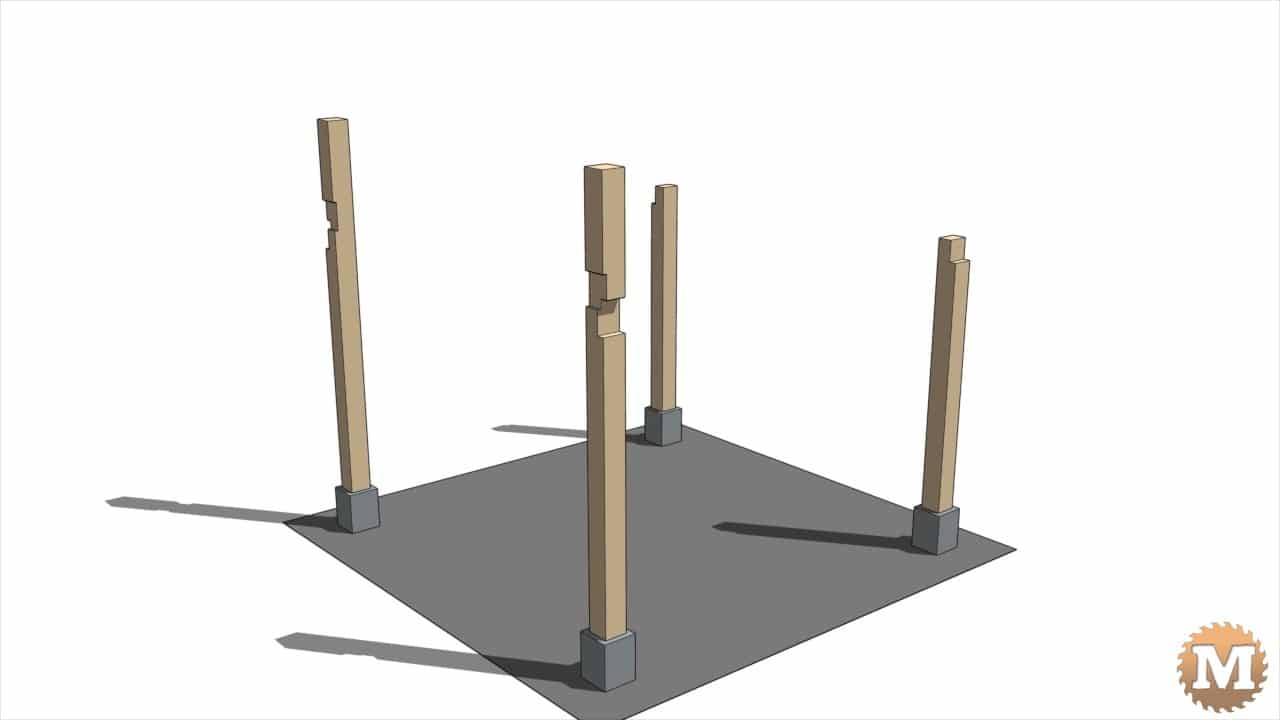
The posts will sit on galvanized metal saddles attached to an anchor bolt embedded in a 9×9 inch concrete pier. The footings are dug down below the frost line and sit on a hard clay layer.

Connecting the posts are 2×8 side girts. These extend past the front posts.
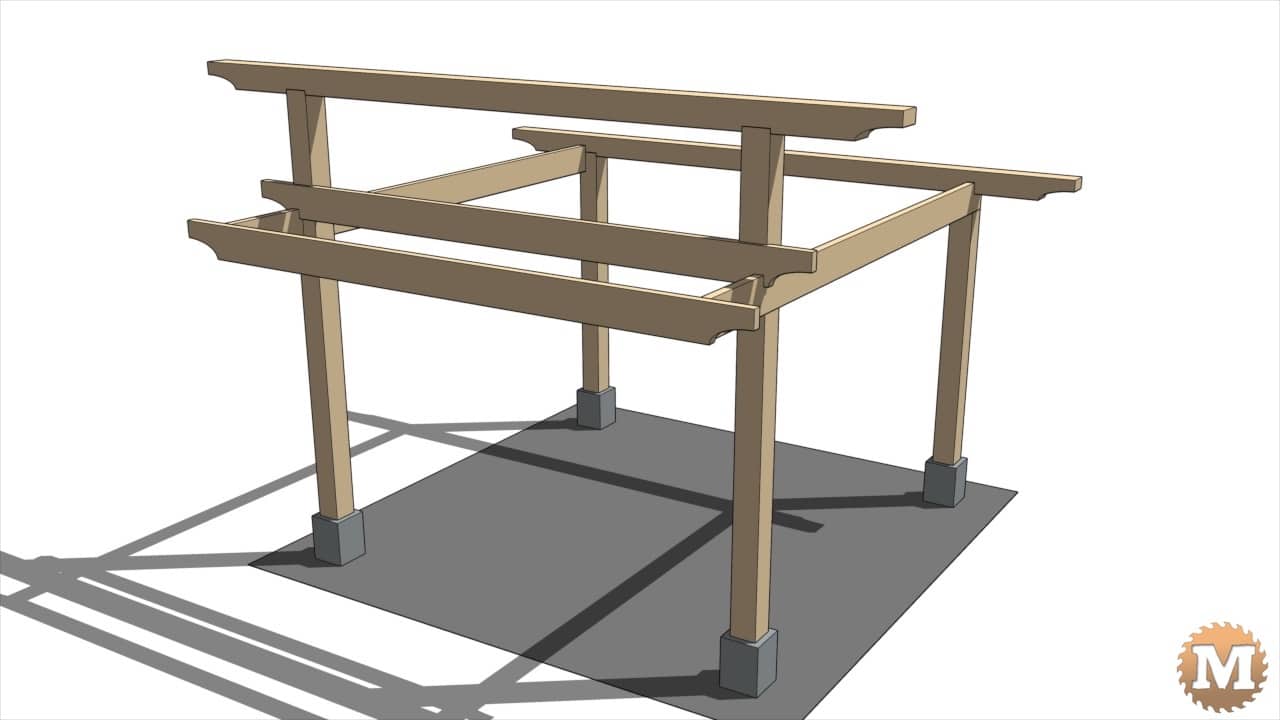
And will allow me to build a small front roof section angled opposite to the main roof.
(Disclaimer: As an Amazon Associate I earn from qualifying purchases. Thank you for helping to support my content this way. )

CAD Model – Beams
Topping the posts are two 6×6 beams. A pair of 2×8 beams will support the front roof section.
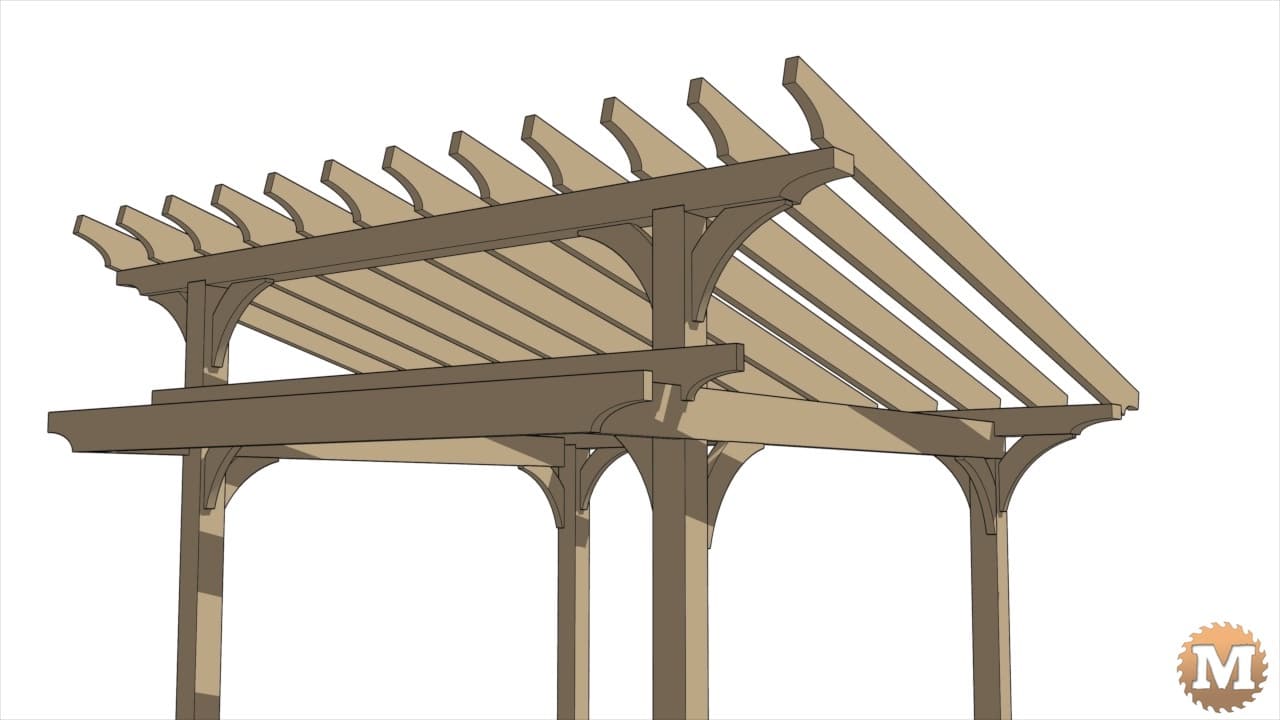
14 curved corner braces will give rigidity to the frame. 2×8 rafters span the top beams with blocking added between them for lateral strength.

Over the front beams sit 2×6 rafters topped with 1×6 strapping.
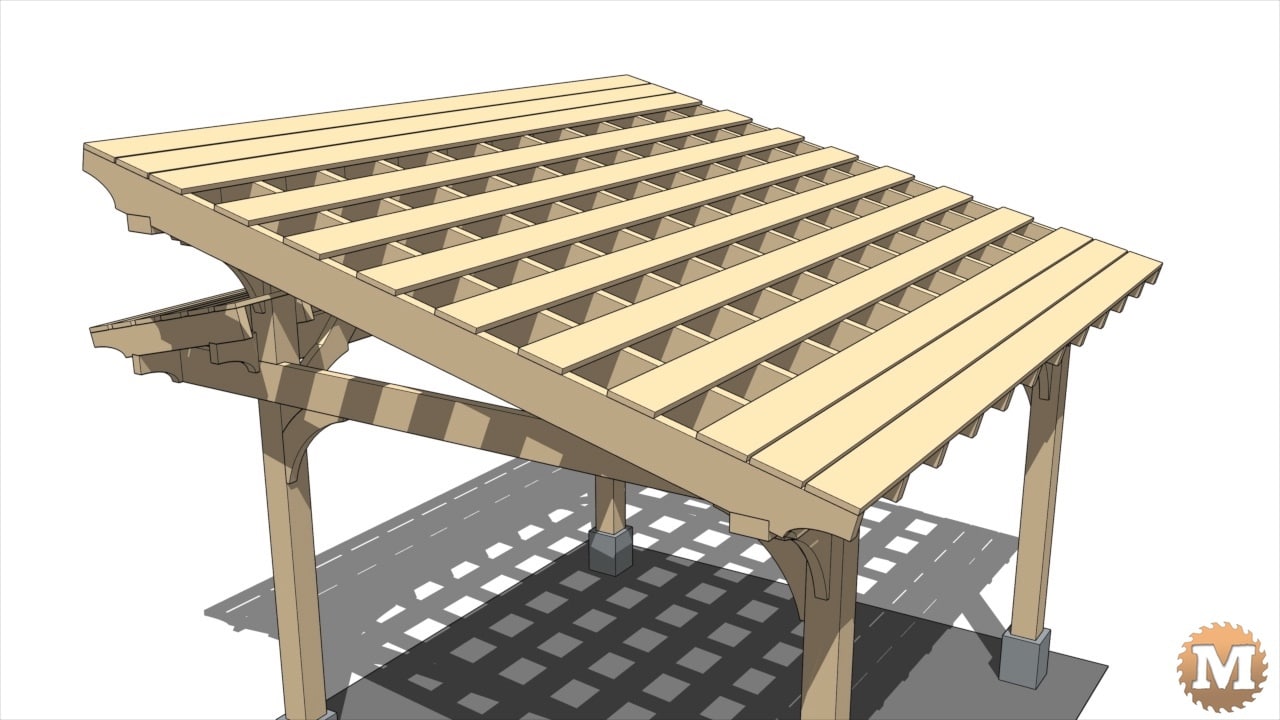
On the back I have 1×8 strapping over the main roof rafters.
I’ll trim out both roofs with cedar 1×4’s before installing tar paper and metal roofing.

