Build your own Curved Rafter Cedar Pergola. This pergola design incorporates curved sawn rafters made of Western Red Cedar. Plans available for download in PDF Format.
See the How to Video.
For this blog post I’d like to go back and revisit a curved pergola I built with my friend Doug a few years ago. As far as pergola designs go I think this one is unique.
the Pergola Design

The Sketchup Model
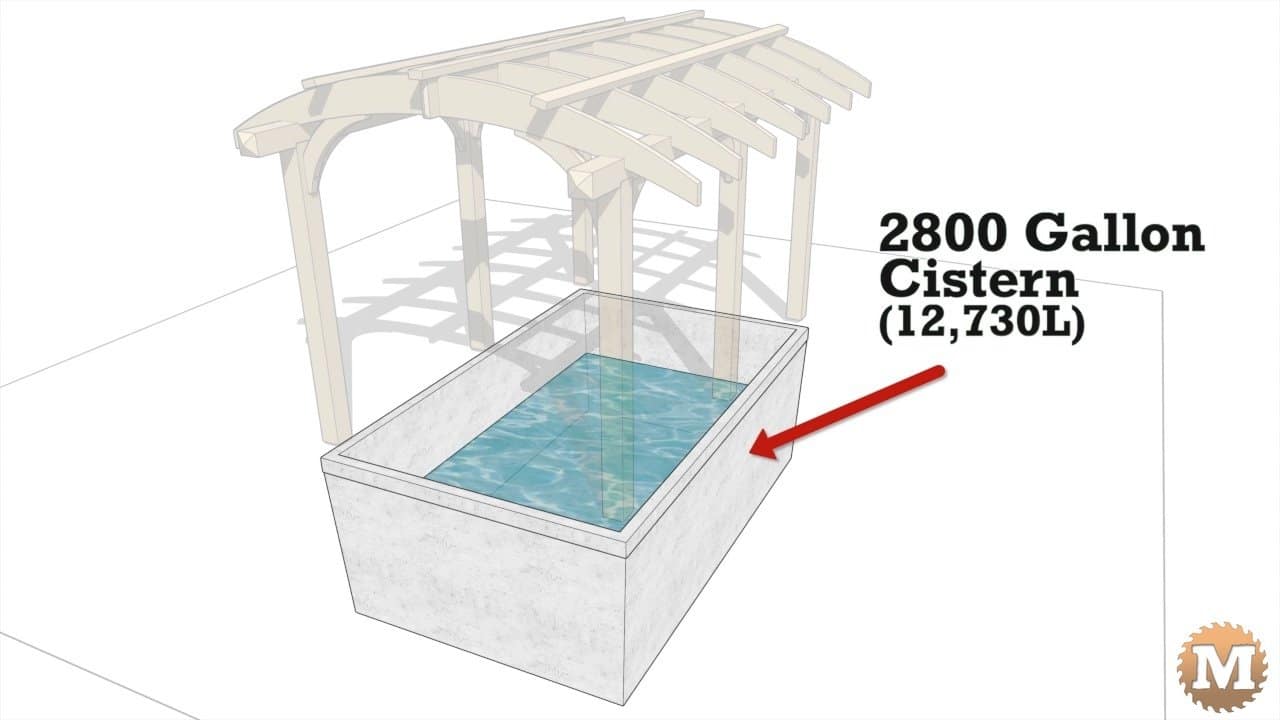
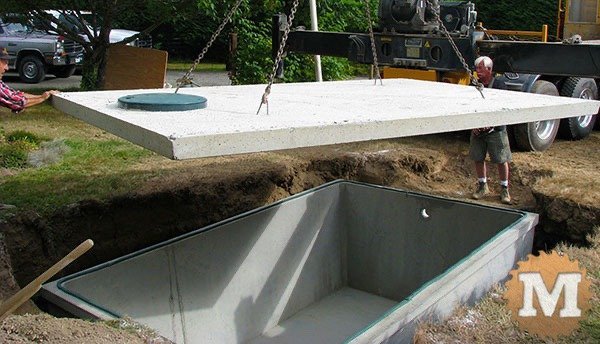
The pergola is made from rough sawn Western Red Cedar and sits on the lid of an underground 2800 gallon concrete cistern. The homeowners collect rainwater in the cistern for use on their gardens in the summer months.
Overall Pergola Dimensions
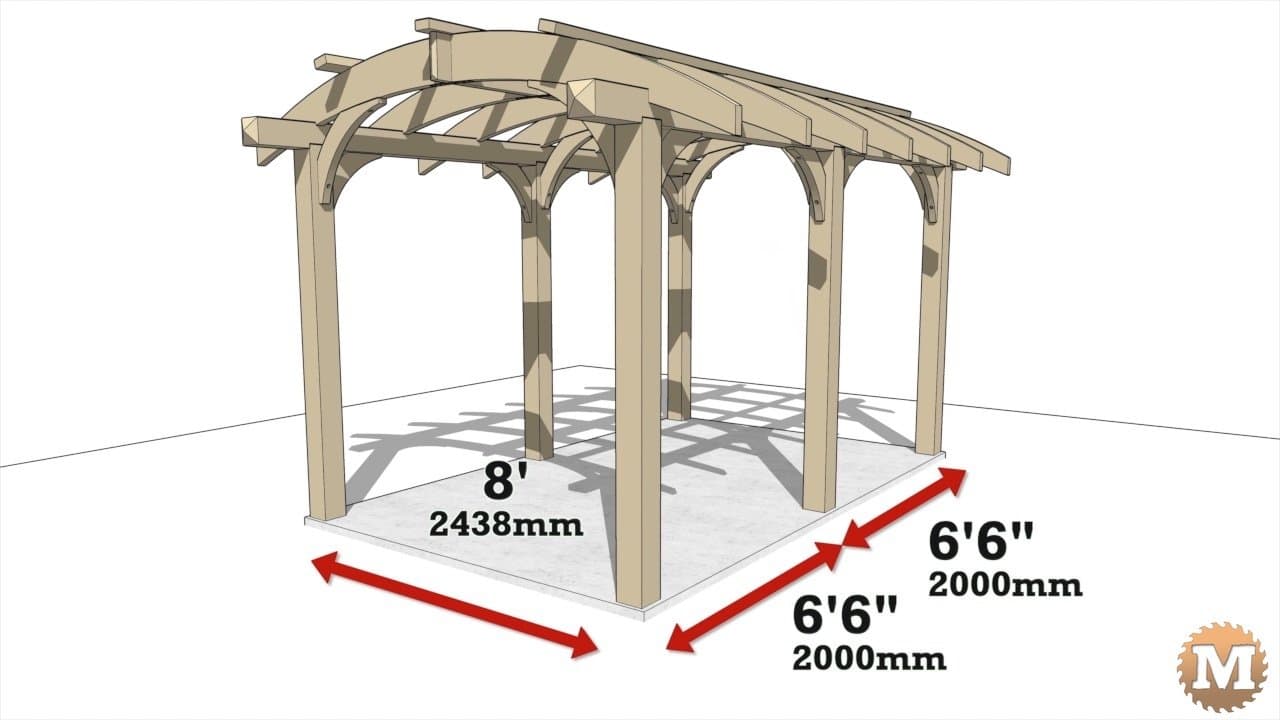
The six posts are spaced 8′ apart across the front, and about 6’6″ on the sides.
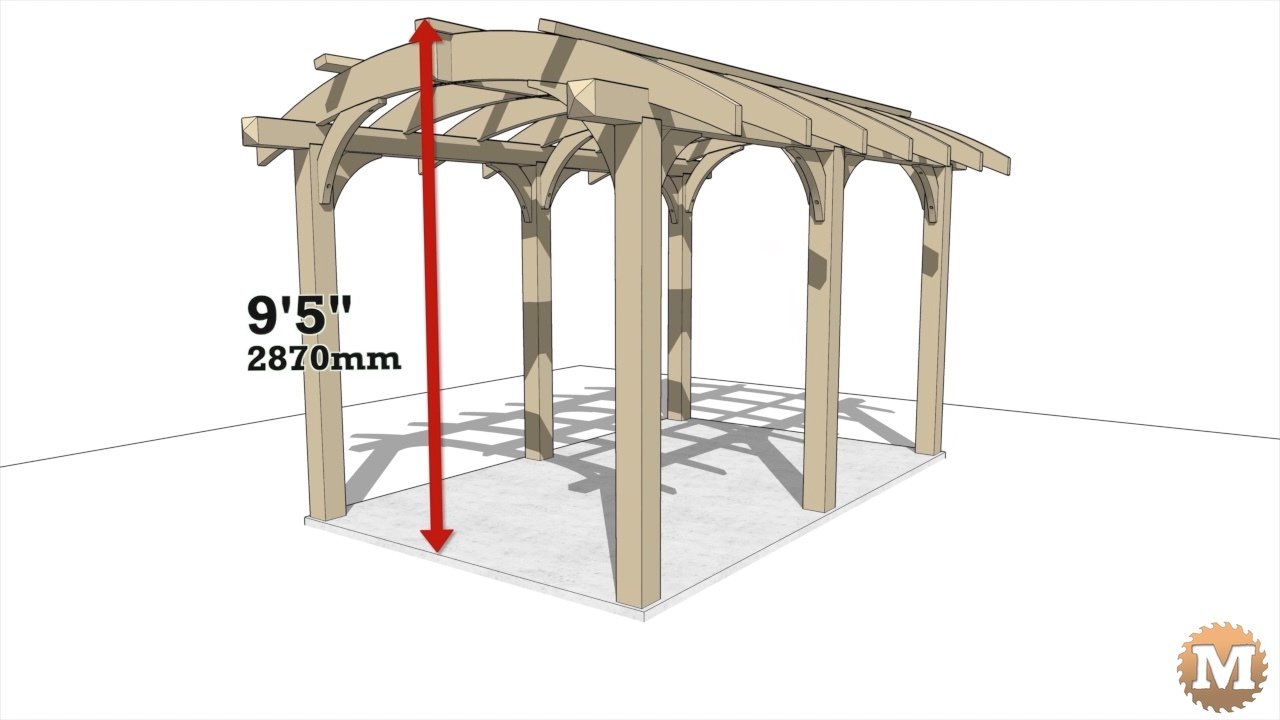
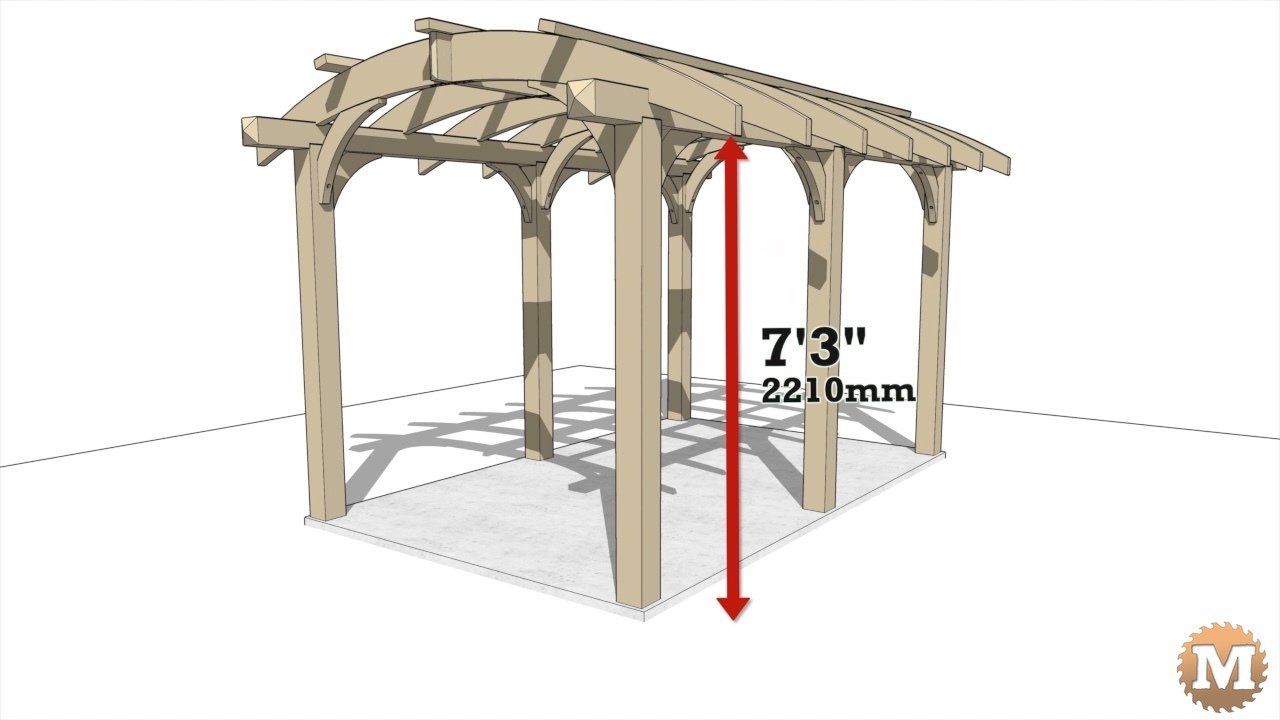
The overall height of the curved pergola is 9’5″ with a head clearance of 7’3″.
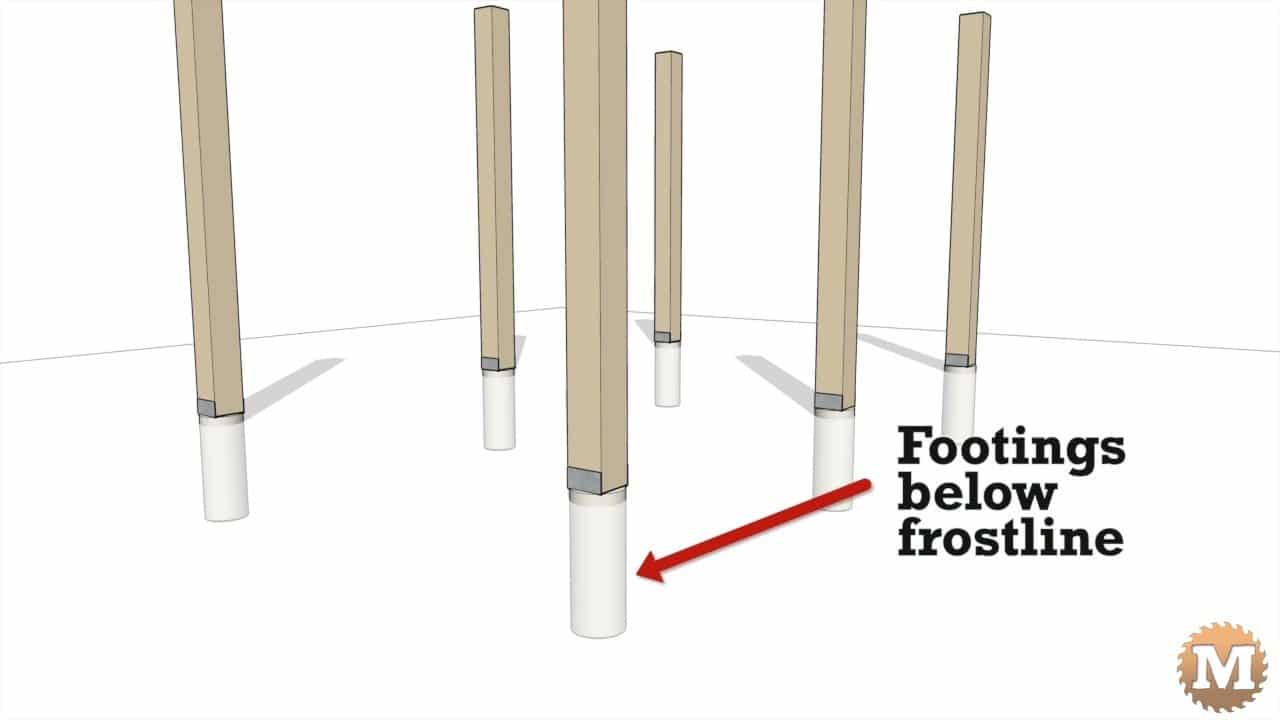
The posts are 6×6 and, in this particular installation, simply are held in place by weight and galvanized alignment rods that are set in shallow holes in the concrete lid and up into the bottom of each post.
Post attachments
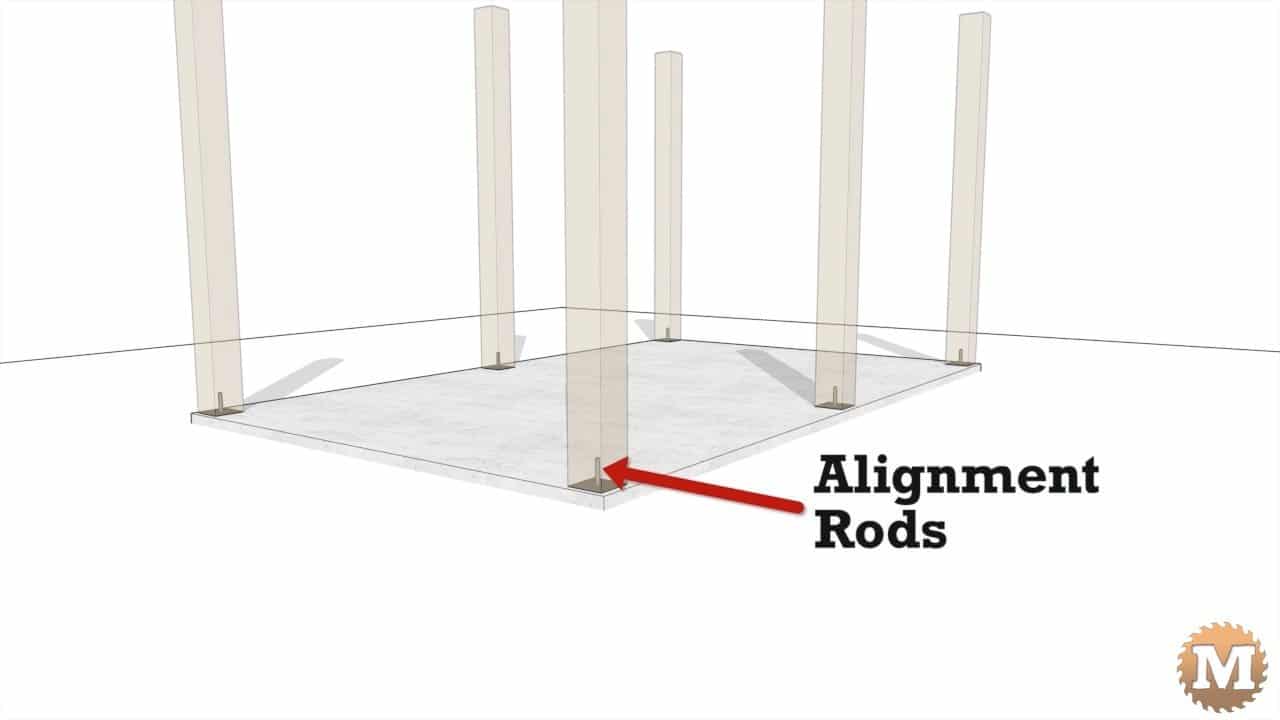
Alternatively the posts could be attached to concrete footings with galvanized saddles.
Two 6×6 beams are bolted to the posts and run North to South.
(Disclaimer: As an Amazon Associate I earn from qualifying purchases. Thank you for helping to support my content this way. )
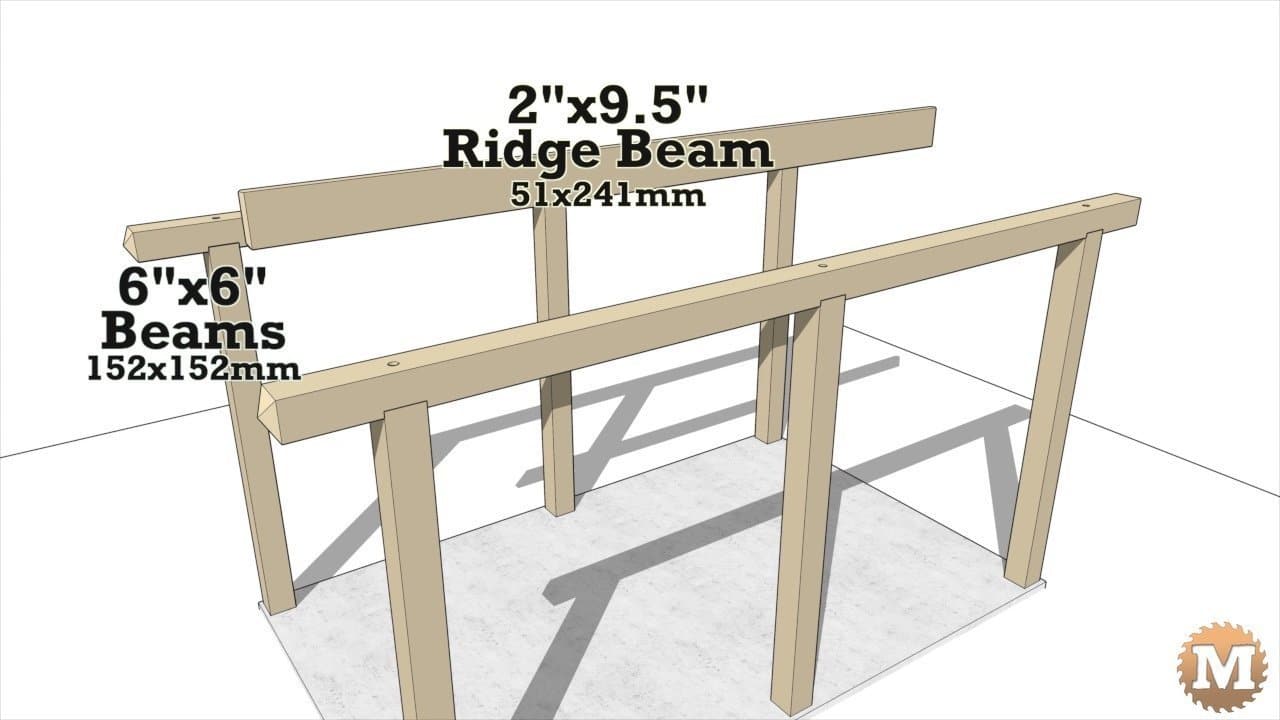
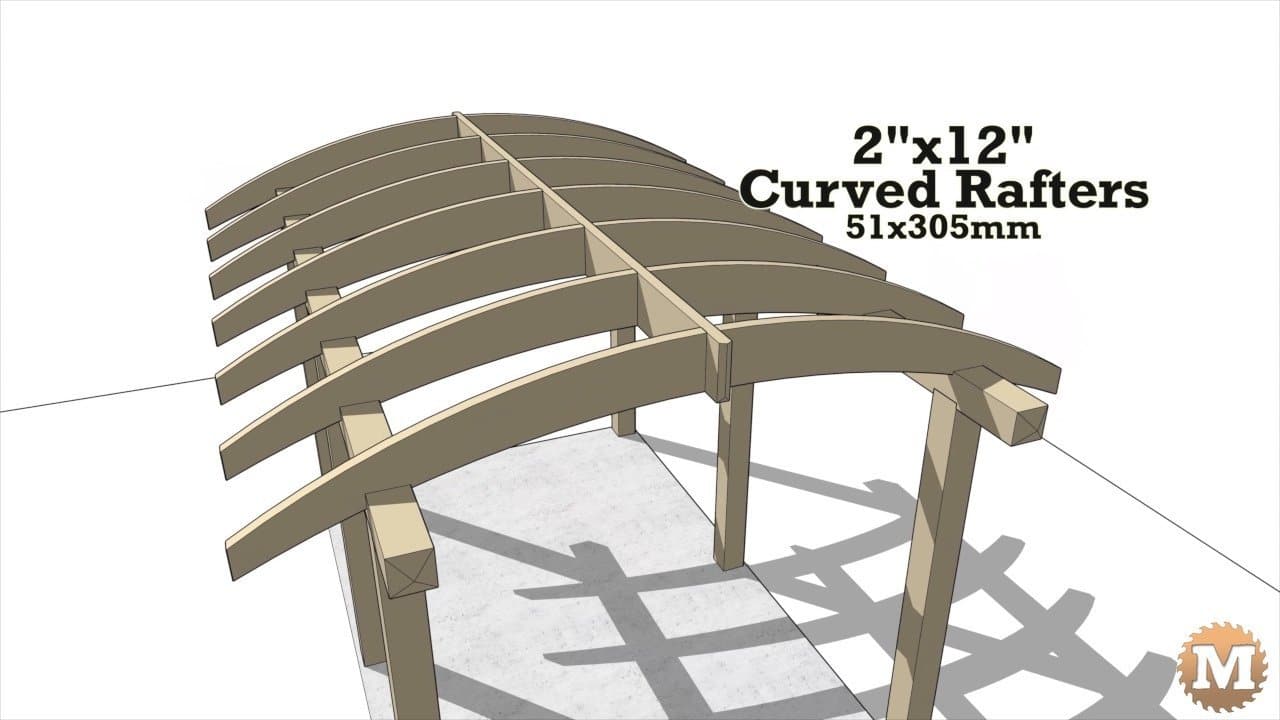
Fourteen curved rafters are attached to a 6×6 beam and a 2 by 9-1/2″ ridge beam.
Along the sides of the pergola are 8 curved corner braces.
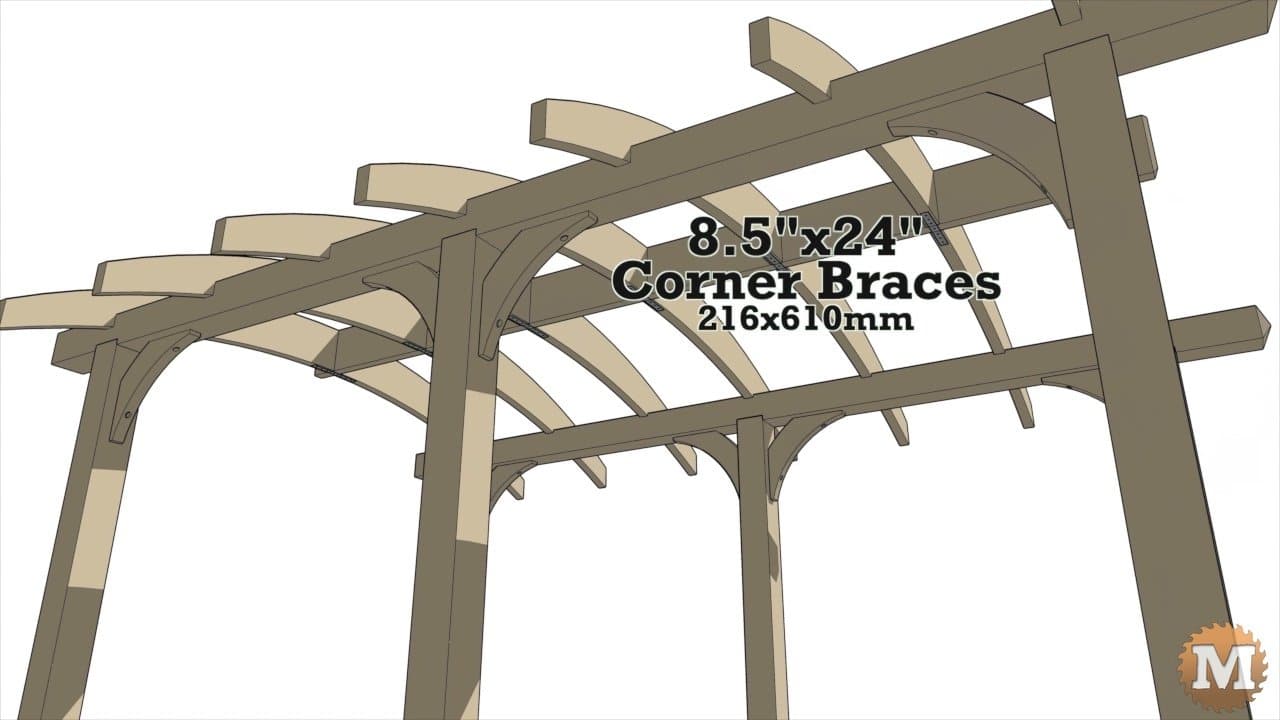
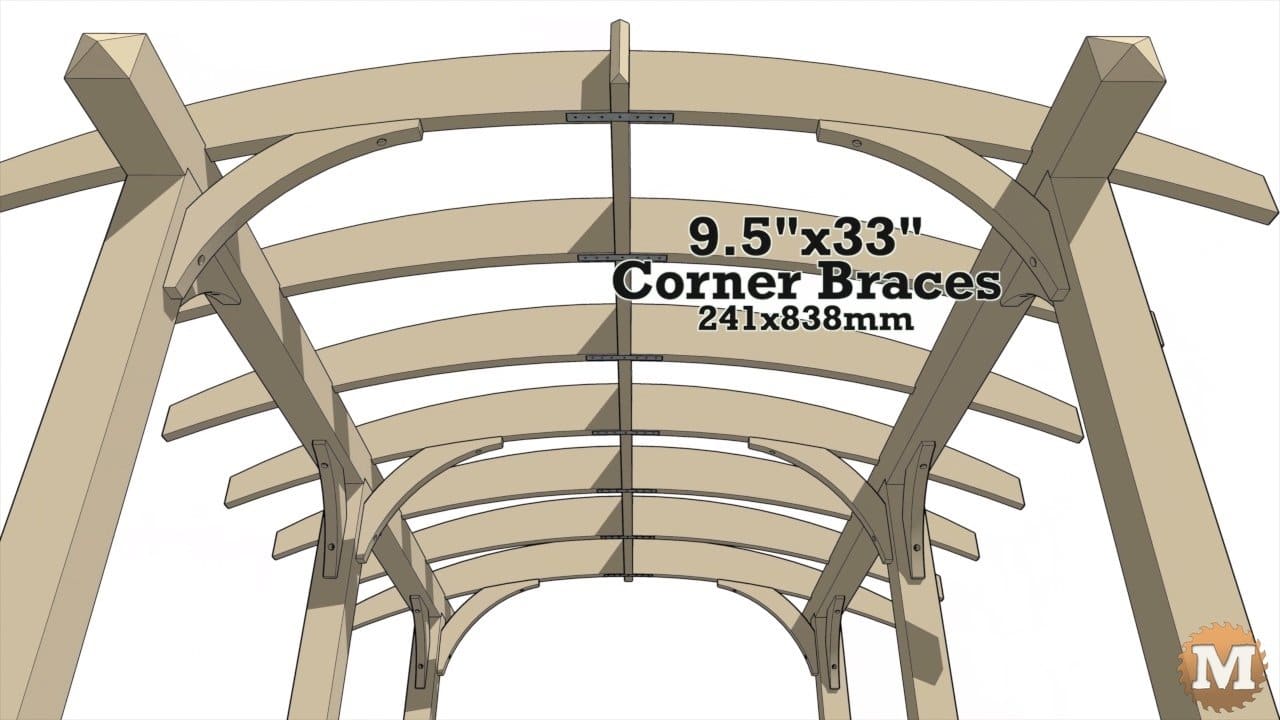
There are 6 slightly larger curved braces that stiffen the structure side to side and add support to the rafters.
Topping the structure are three 2×4 louvers.
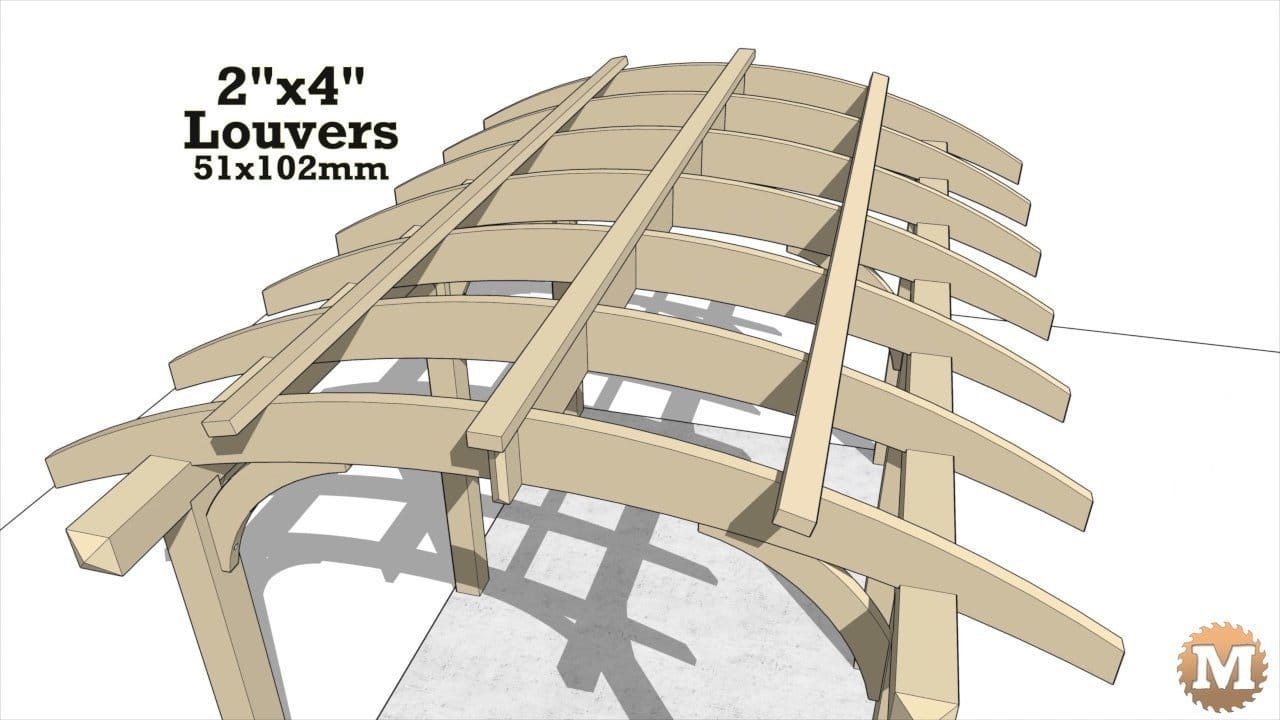
The number and spacing of the louvers can be changed to increase the shade under the pergola.
The Pergola Design – Making the POSTS
The posts, and all other parts, true full dimension.

The posts are 6″ x 6″ and cut to length with a circular saw.

For this video I have enough lumber around from other projects to show the steps to make each part of the curved pergola

I draw a pencil line around the post with a speed square. If the post is square and true then the lines will meet.
I make 4 cuts with a circular saw. Rotating the post a quarter turn each time. Then finish the cut with a hand saw.
They are then chamfered using a power plane. A sanding disc on an angle grinder will work for this as well.
Alignment Rod

A hole is drilled in the center of the bottom of each post for the galvanized rod.

This rod will keep the post in position. I use a drill guide for this to ensure the hole is square to the end of the post.
If you want to see how to lay out the post locations for pouring concrete footings have a look at my previous pergola video.
A shingle is added between the concrete and post as a moisture barrier.

Stakes are driven in and temporary braces are added as we set each post in place, then plumbed with a spirit level.
Temporary Braces

The layout and size of this pergola was determined by the size and dimensions of the concrete cistern lid.

The lid was found to be square and level so this made everything easier.

