Build your own Firewood Cutting Jig! See the Video on YouTube and download the Plans.
Make a Firewood Cutting Jig – Processor for Sawmill Offcuts
Background for the Firewood Cutting Jig Project
Built a Firewood Cutting Jig! This Firewood Cutting Jig is a fast and easy way to cut firewood from small stripped branches or sawmill slab wood. Can be used as a processor of slab-wood sawmill off-cuts too.
In our back field I came across an old Firewood Cutting Jig and I have used it a few times to cut wood stove length material to heat the house. It is a great firewood processor, of a sort. Over the years, this jig has suffered from the weather here on the west coast and the slots can get cut away after each use.

How to cut firewood fast:
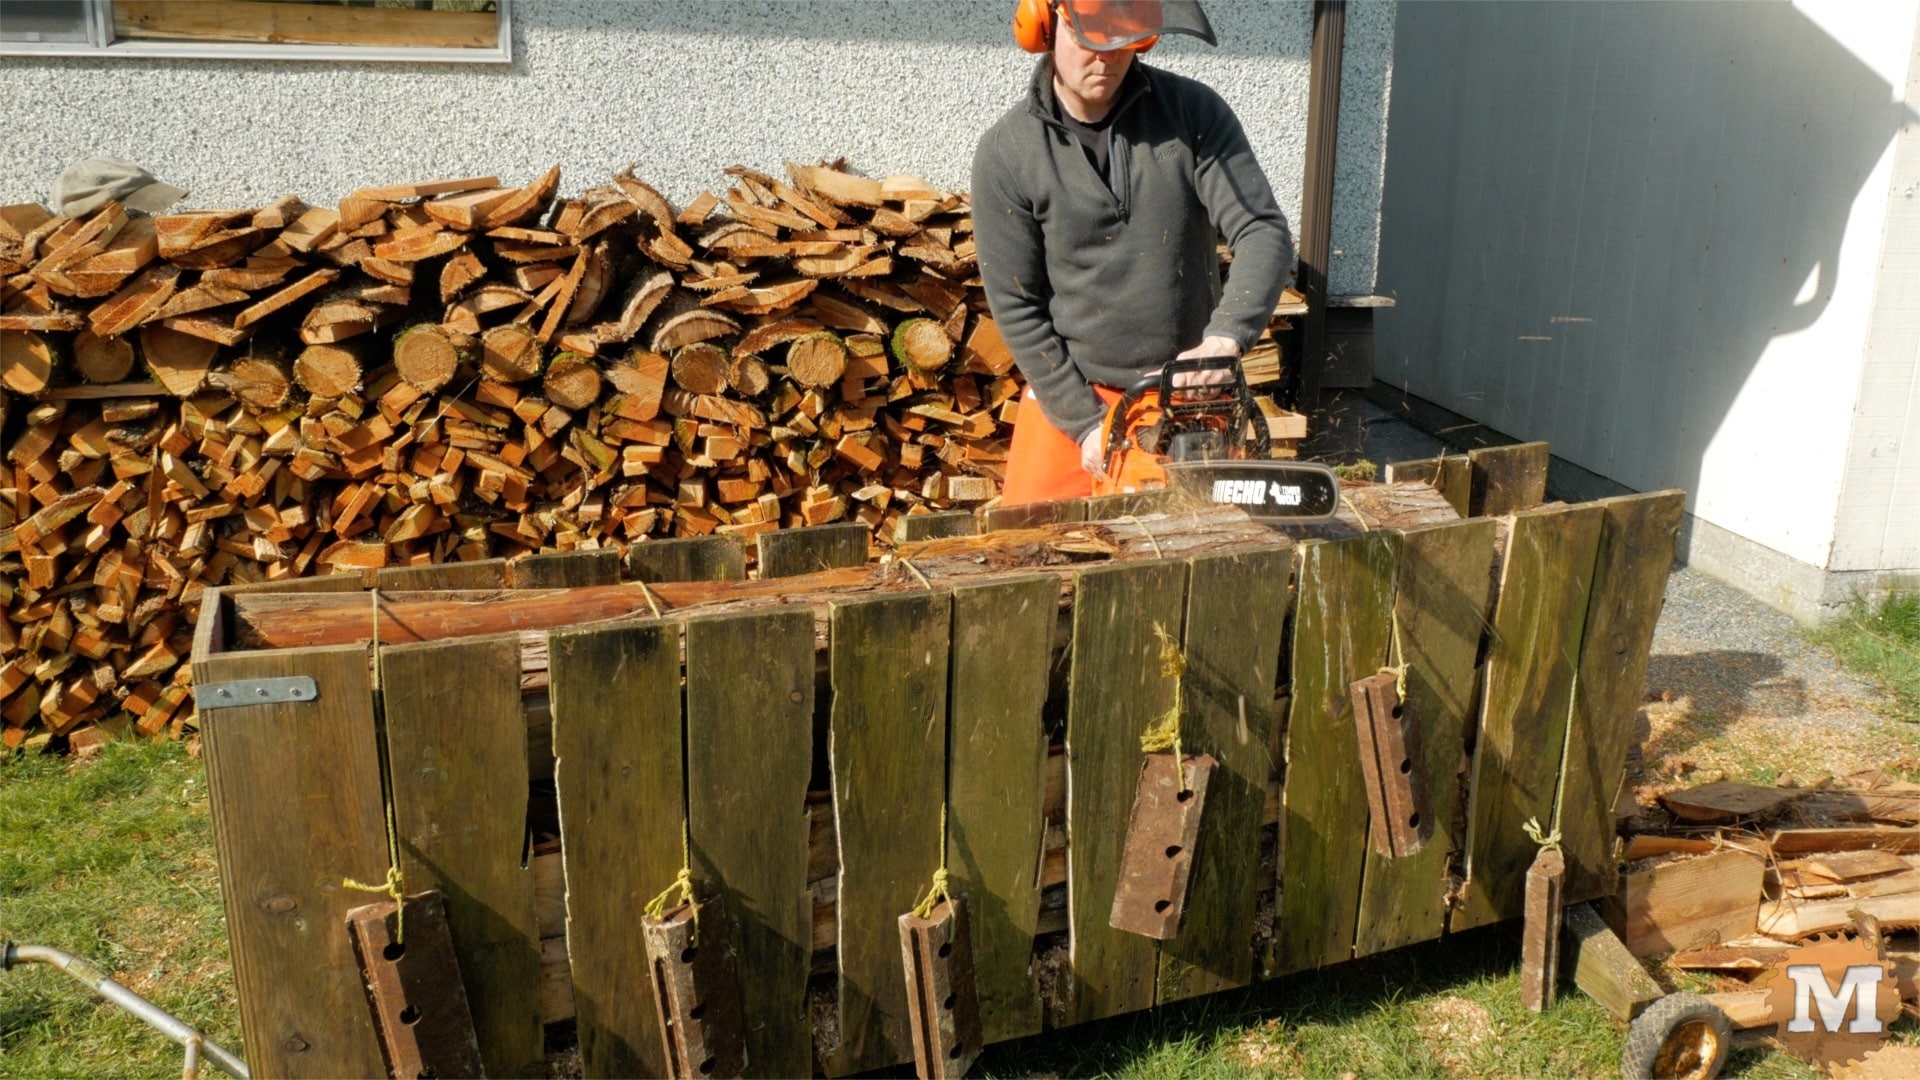
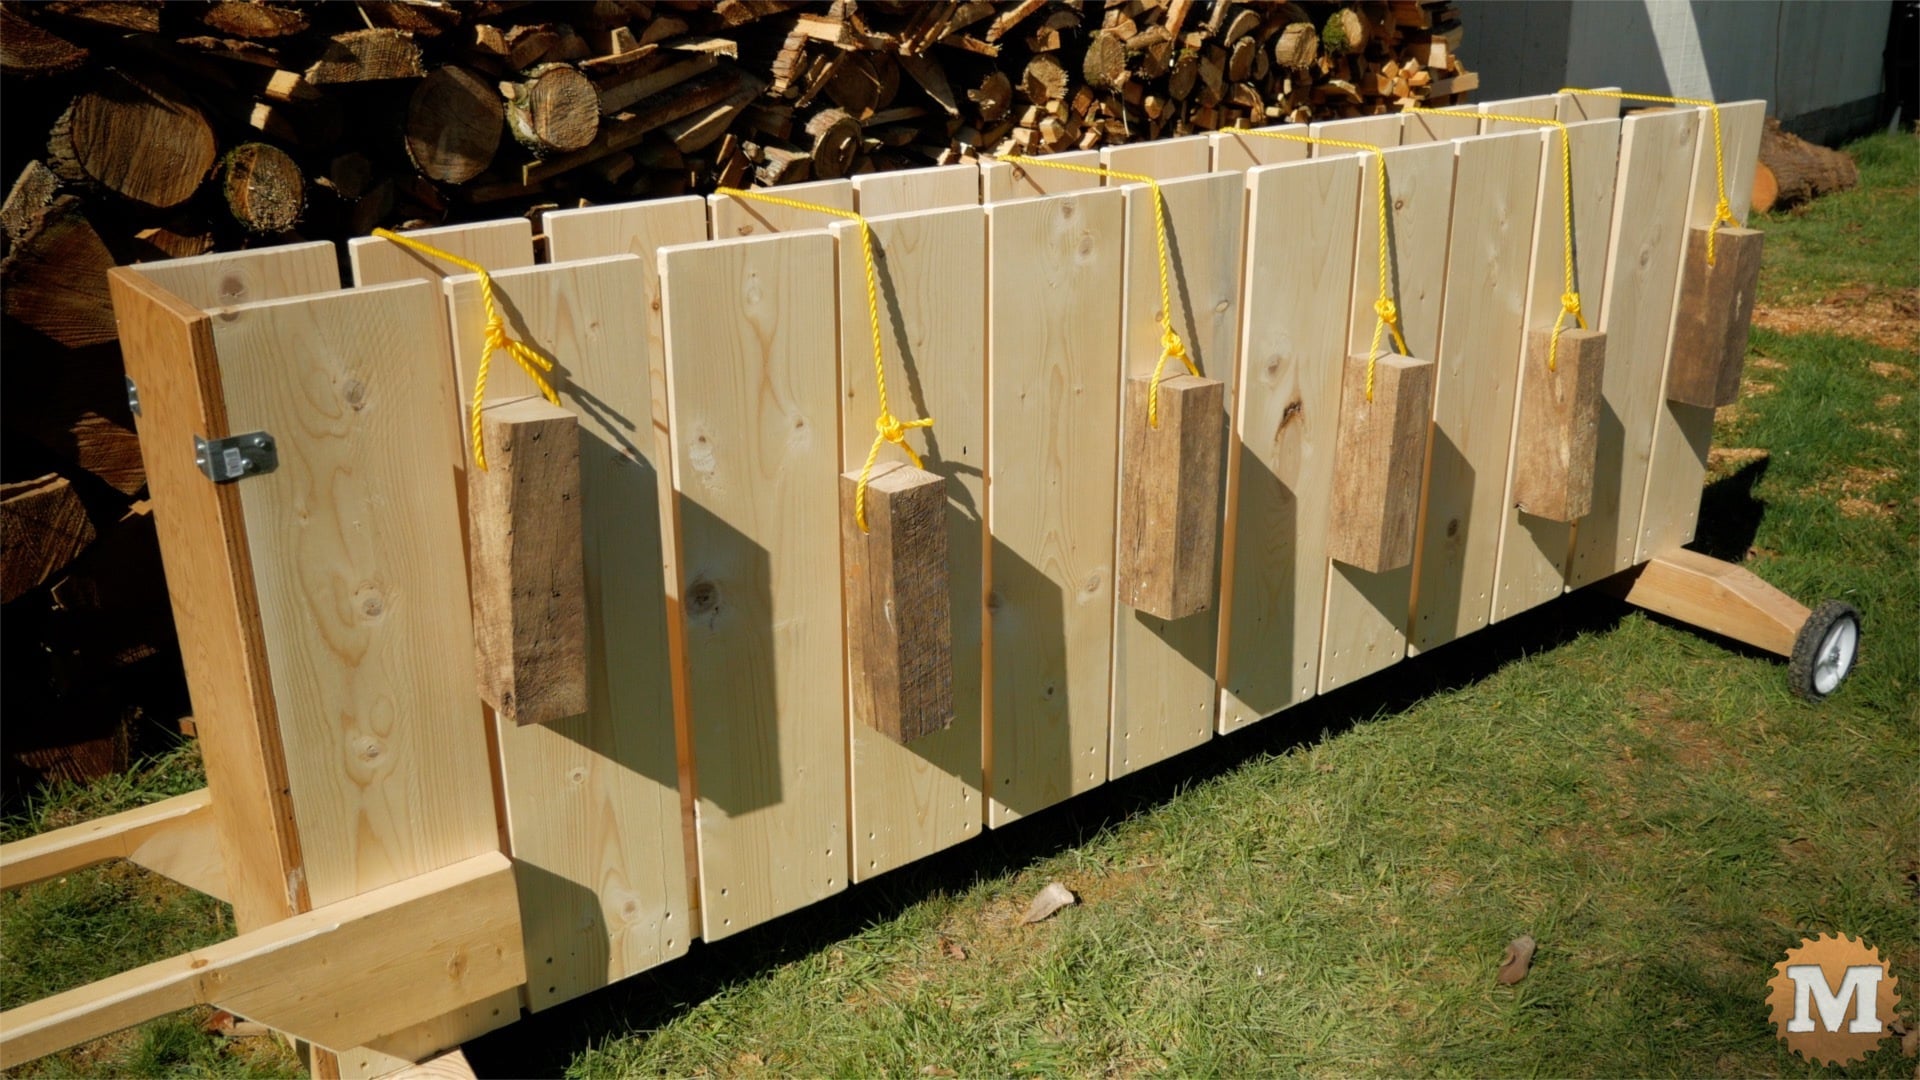
I thought it would be a good time to build a new firewood cutting jig based on this design. It’s simple, portable, and very efficient at turning long branches or slab wood off-cuts from a sawmill into firewood. You simply load it up, drop the roped weights over the stack, and run your chainsaw down the slots.
This is a good option to hold wood while chainsawing. I find it one of the best ways to cut branches for firewood. And, it’s a portable chainsaw wood cutting rack.
An excellent log holder for cutting firewood.
The firewood jig is made from these main components: A front and rear support made from 4×4 lumber. A base made from a pair of 2×10’s. Sides made from 1×8’s. Handles made from a 2×6. And weights attached with ropes made from salvaged materials.
Firewood Cutting Jig – The Supports
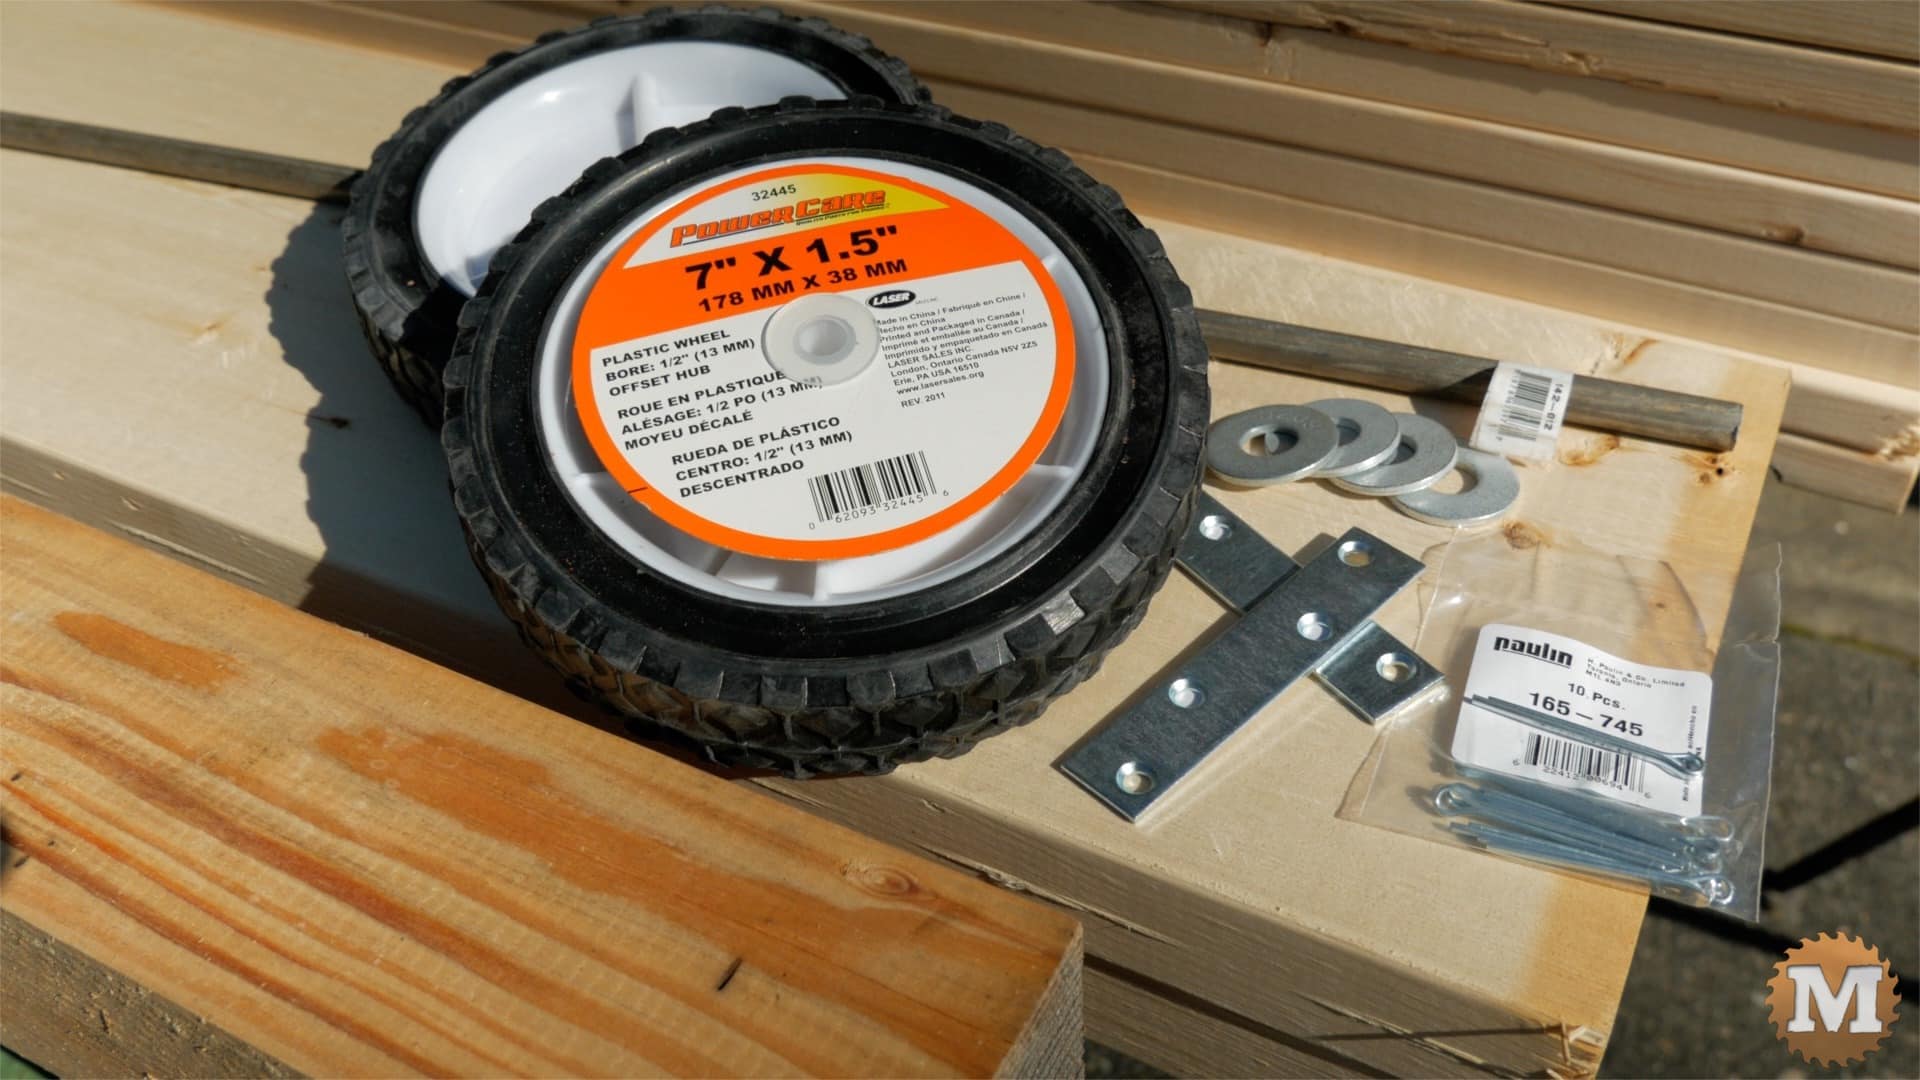
Start with the two bases made from a 4×4. For the rear base I’ll need lawnmower wheels, a half inch steel axle rod, some galvanized washers, small mending plates, and cotter pins.
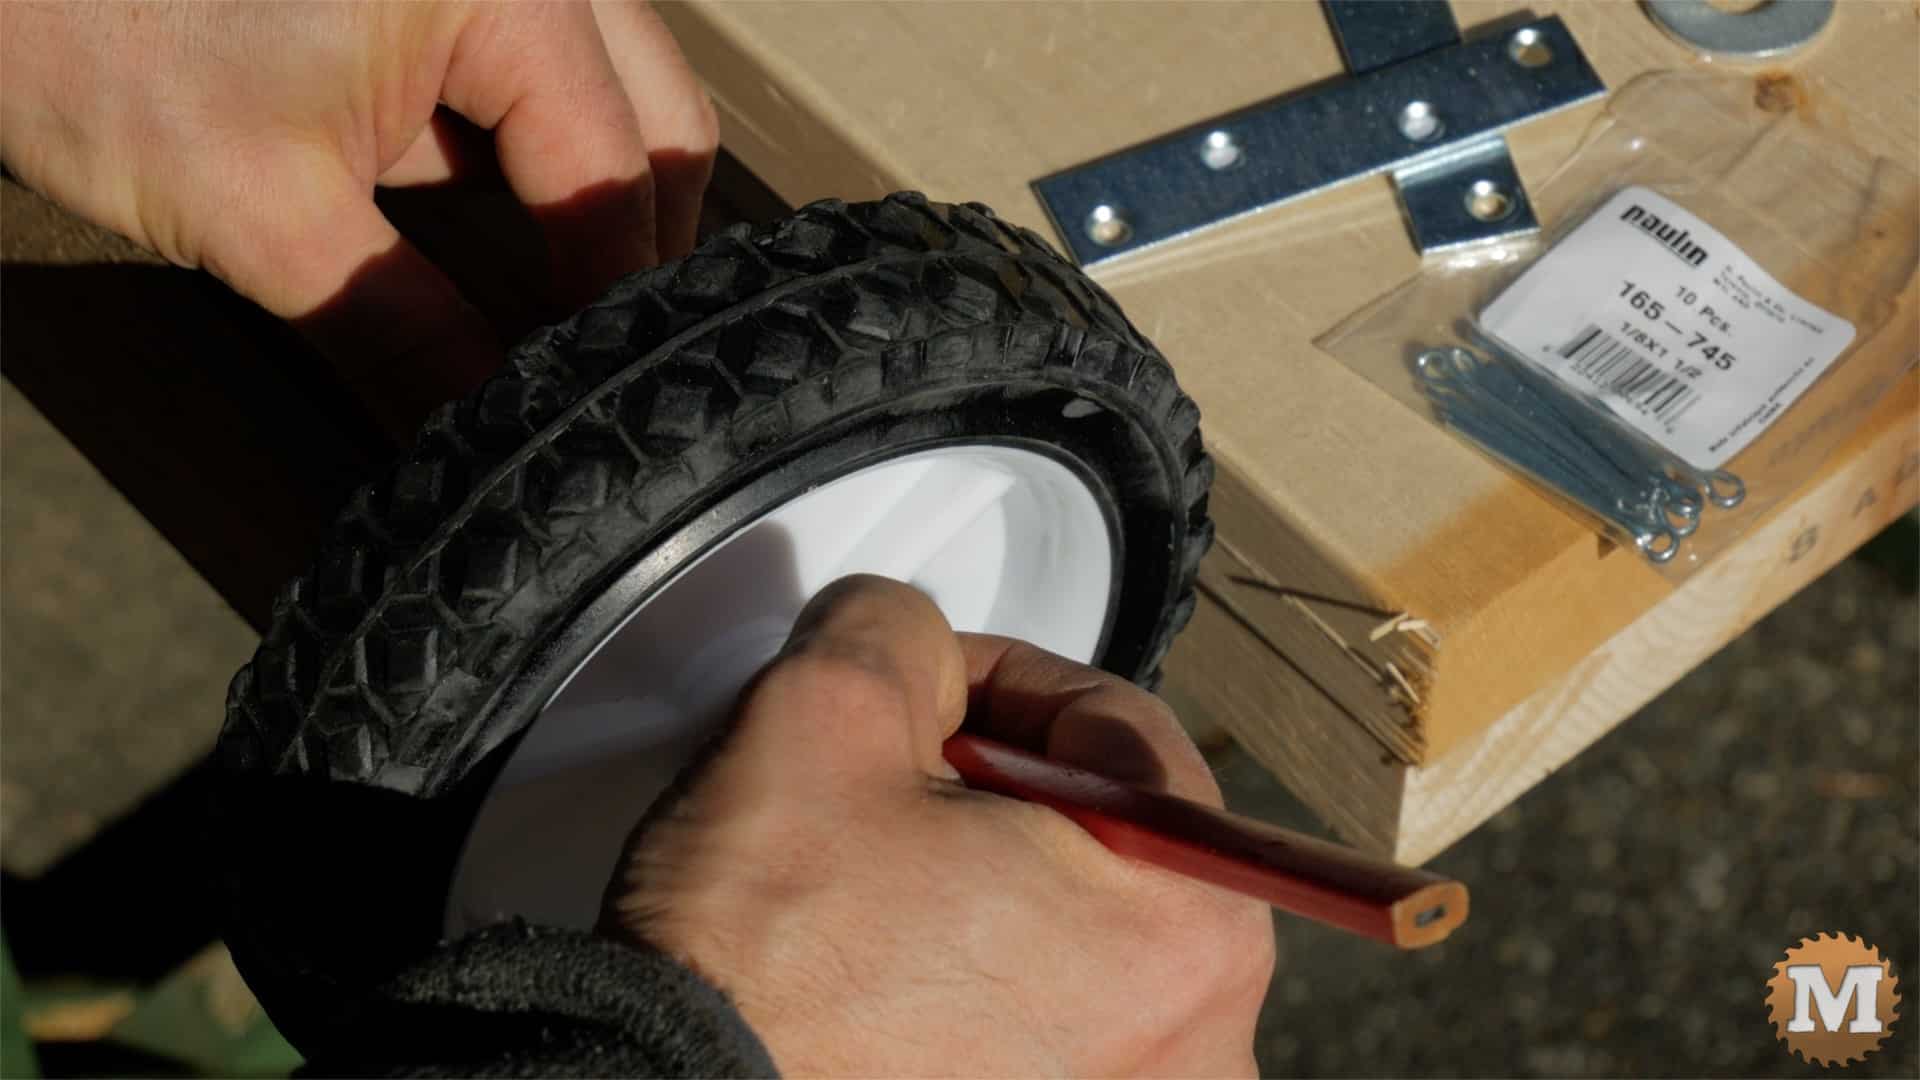
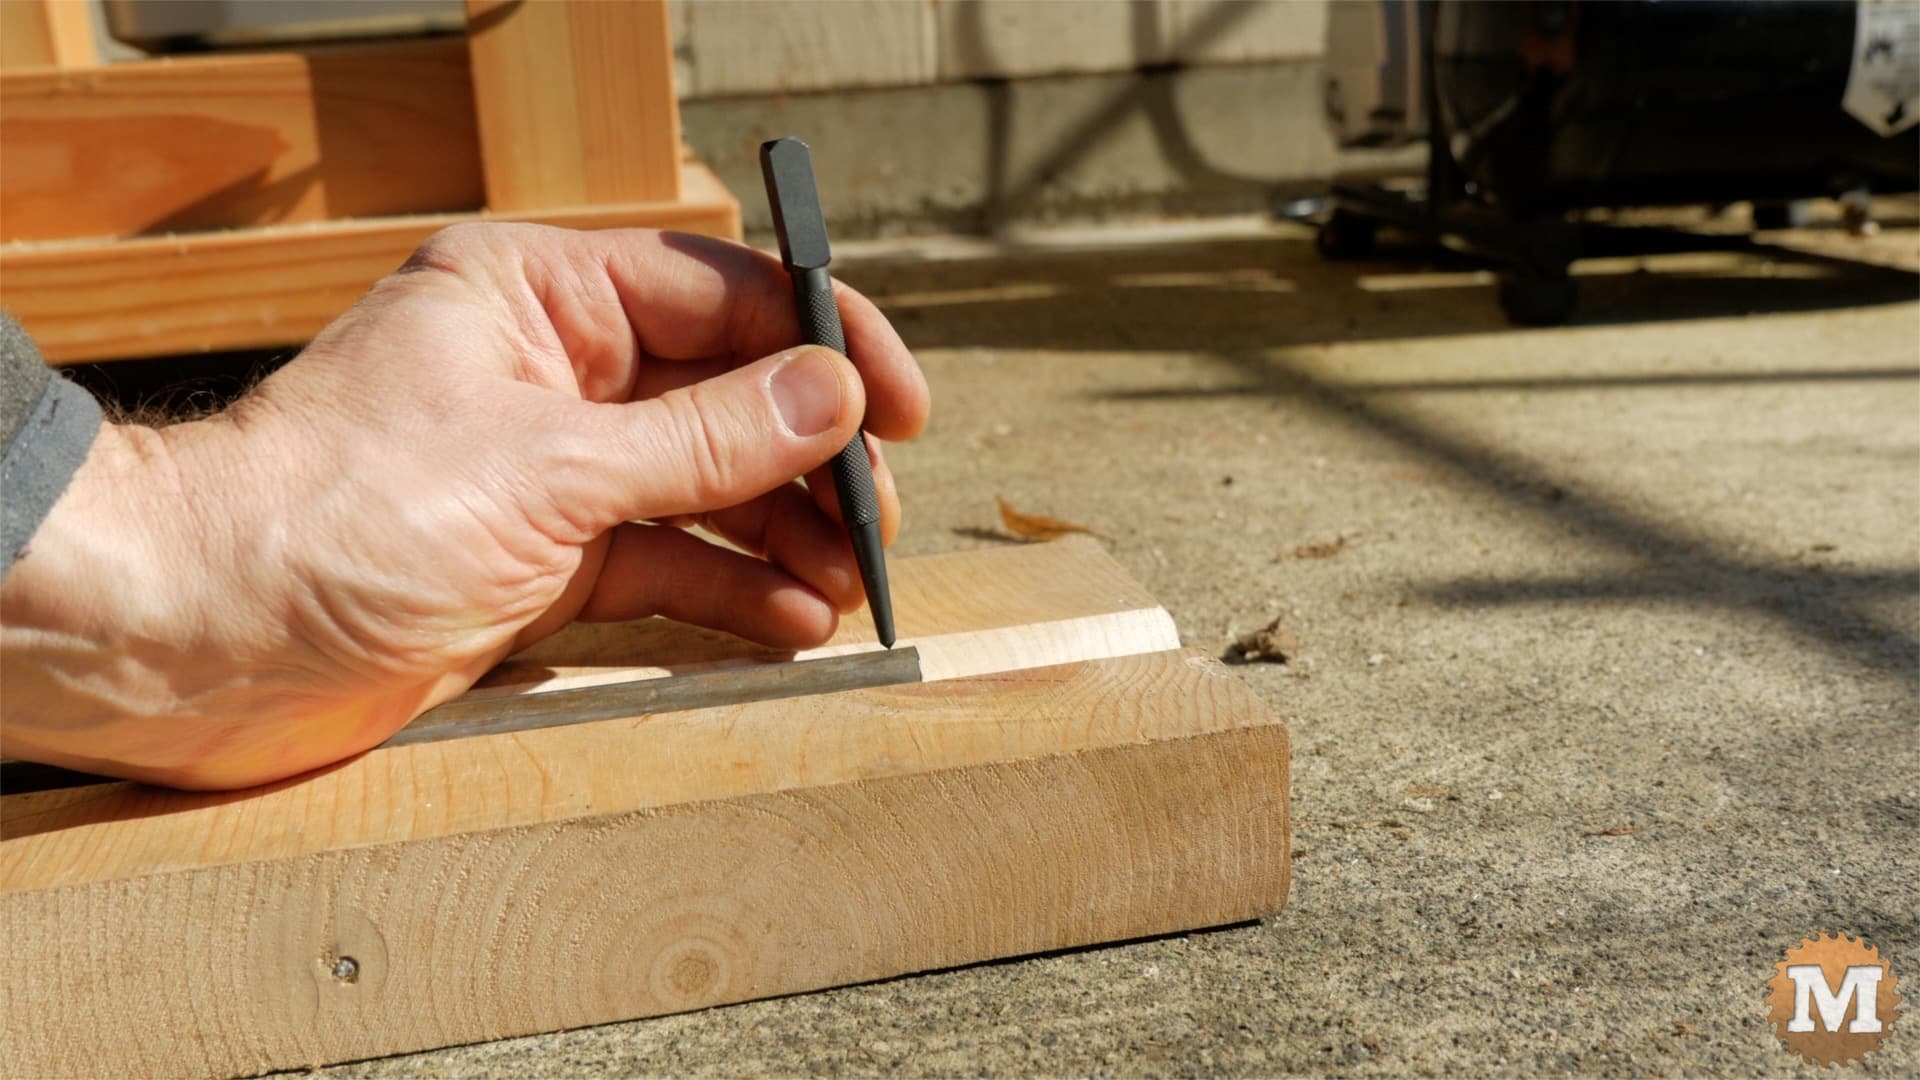
With one wheel on the axle, line up the edge of the tire to the end of the rod. Make a pencil mark for the cotter pin hole. Repeat on the other end.
Cut a V groove into a scrap piece of lumber to hold the round axle rod for the next few operations.
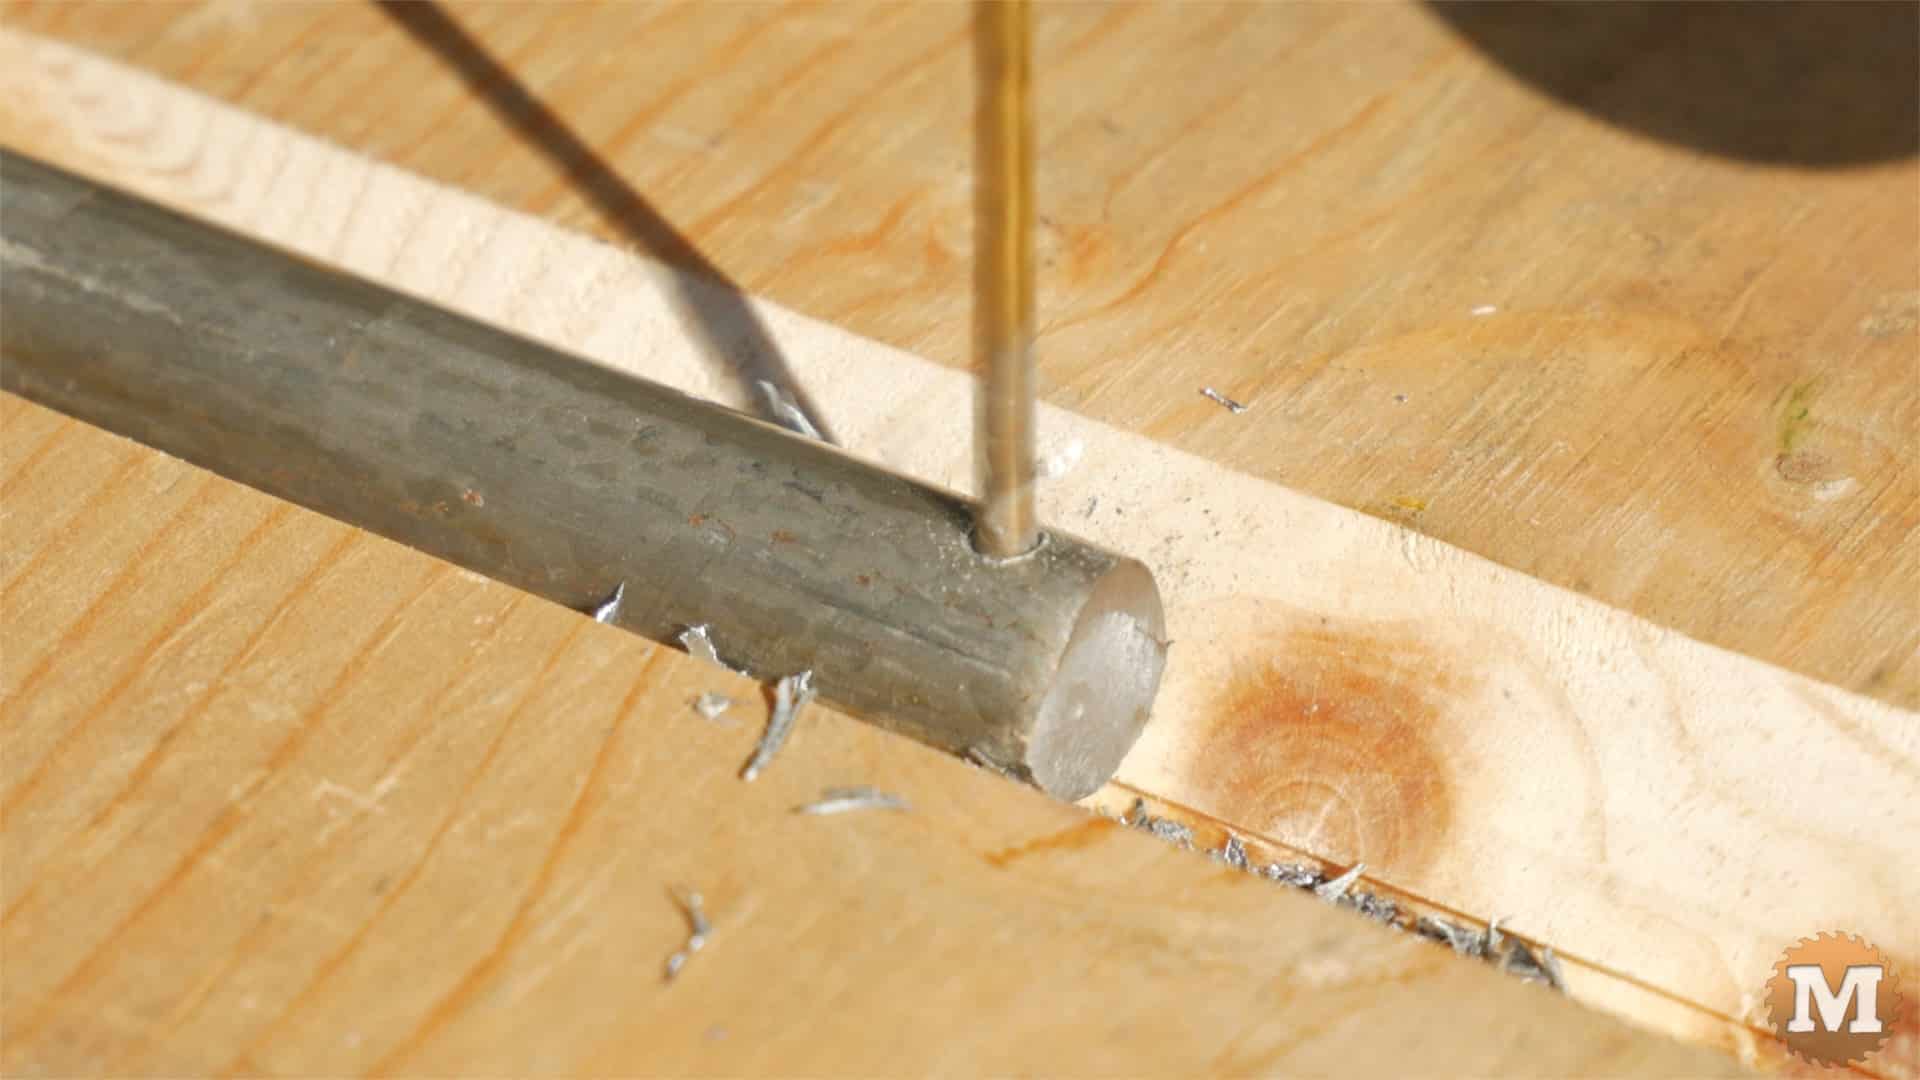
Use a center punch to create a small divot in the steel rod to help guide the drill bit. Use a hardened concrete nail if you don’t have a punch.
(Disclaimer: As an Amazon Associate I earn from qualifying purchases. Thank you for helping to support my content this way. )
Drill a hole in the axle with a 1/8″ metal drill bit. Use a file to smooth down any burrs.
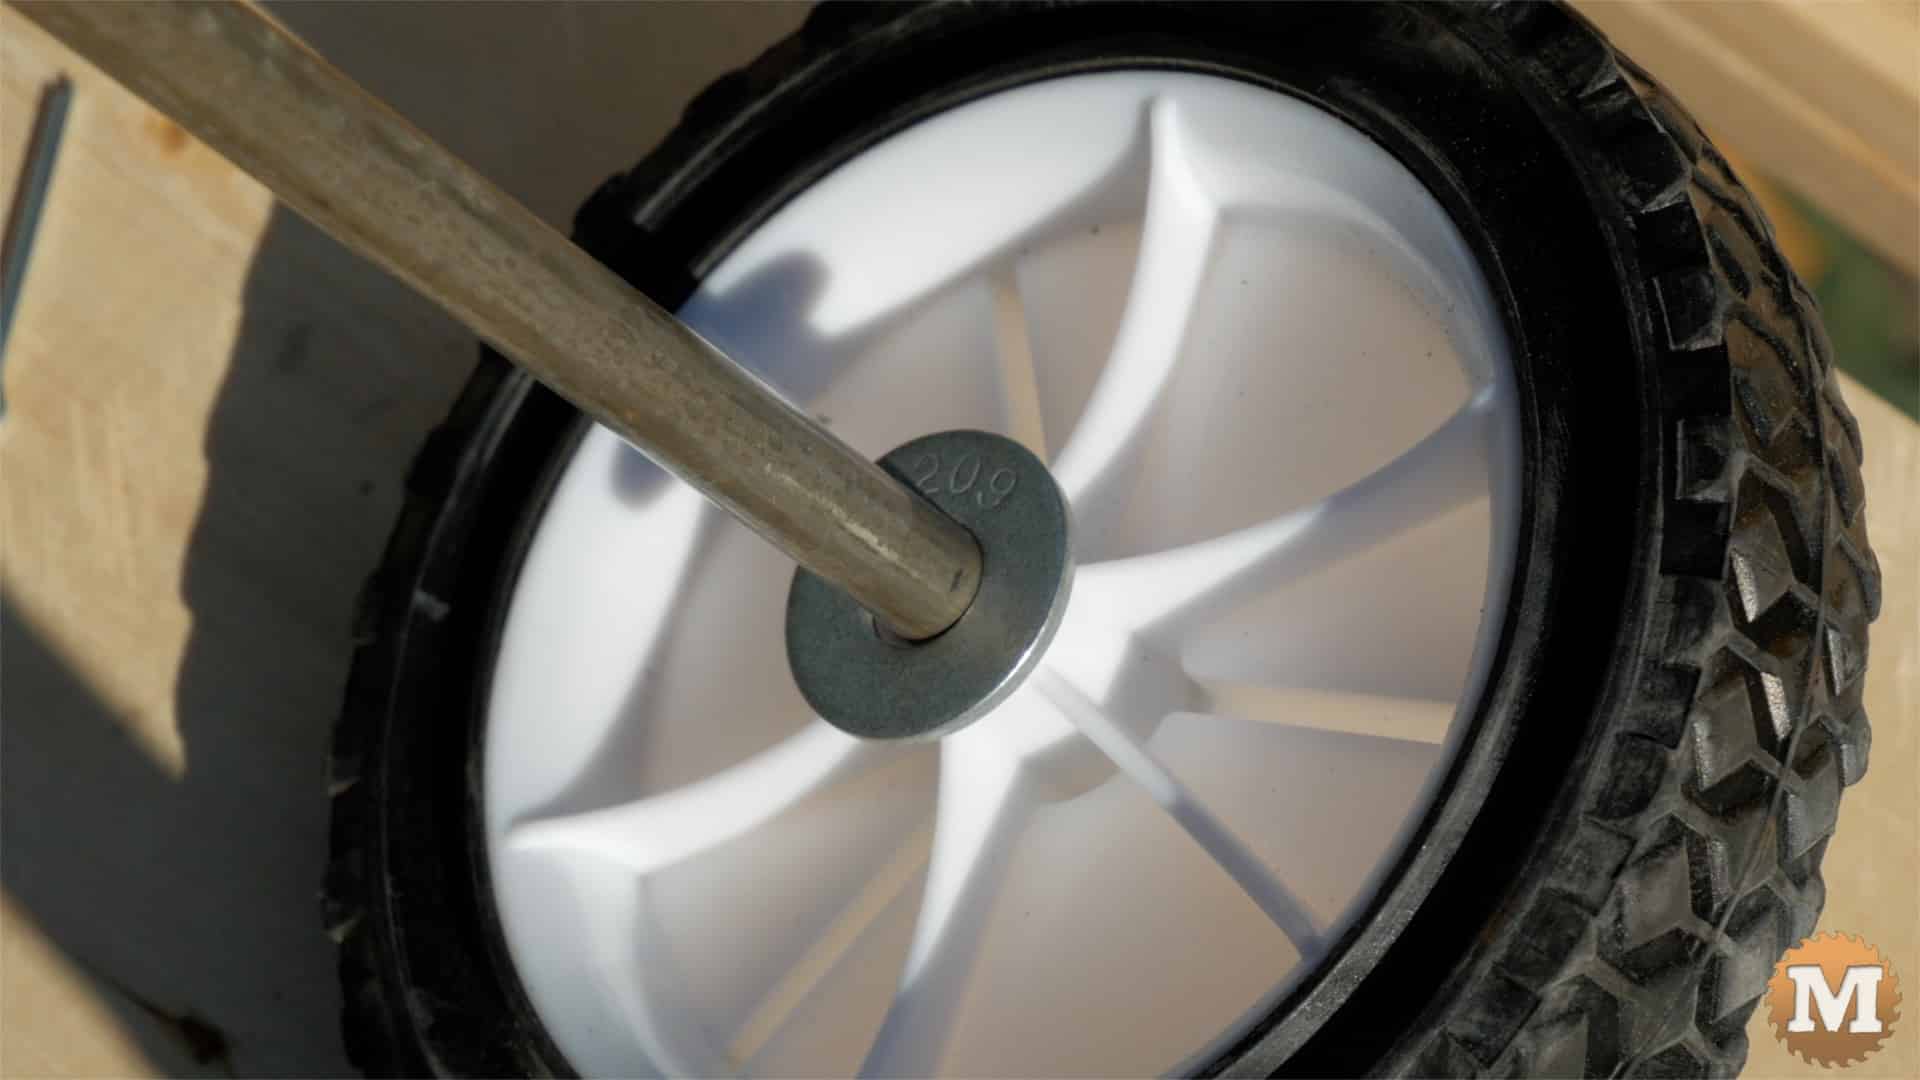
Slide a washer on the axle, the wheel, the opposing washer, and slide a cotter pin into the hole.
Mark the locations for the inner cotter pin holes, then center punch, drill, and file away any burrs.
Assemble the wheels onto the axle but don’t bend over the cotter pins just yet. Measure the distance between the two inner cotter pins, subtract half an inch, then transfer that measurement to a 4×4.
What is the best firewood to burn?
The best firewood to burn is hardwood species such as oak, hickory, maple, or birch. Hardwood burns longer and produces more heat compared to softwood species like pine or fir.
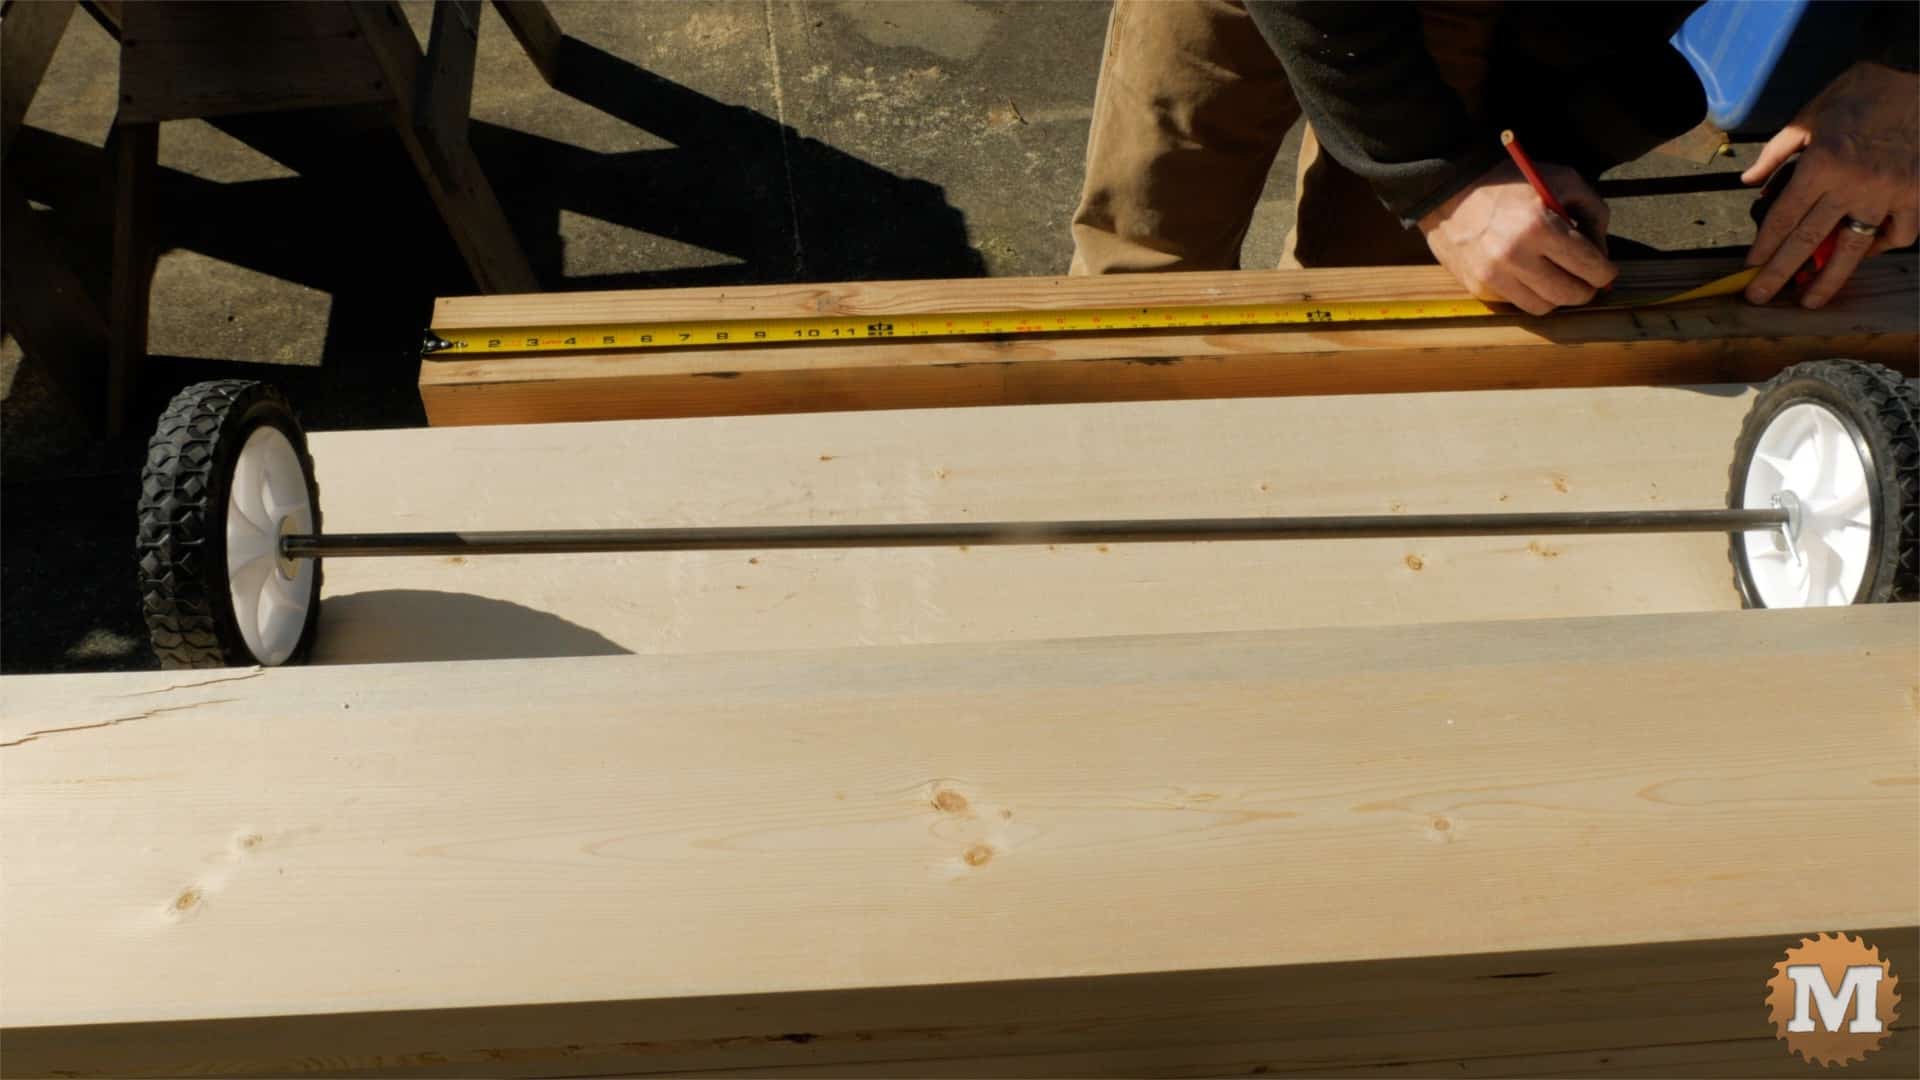
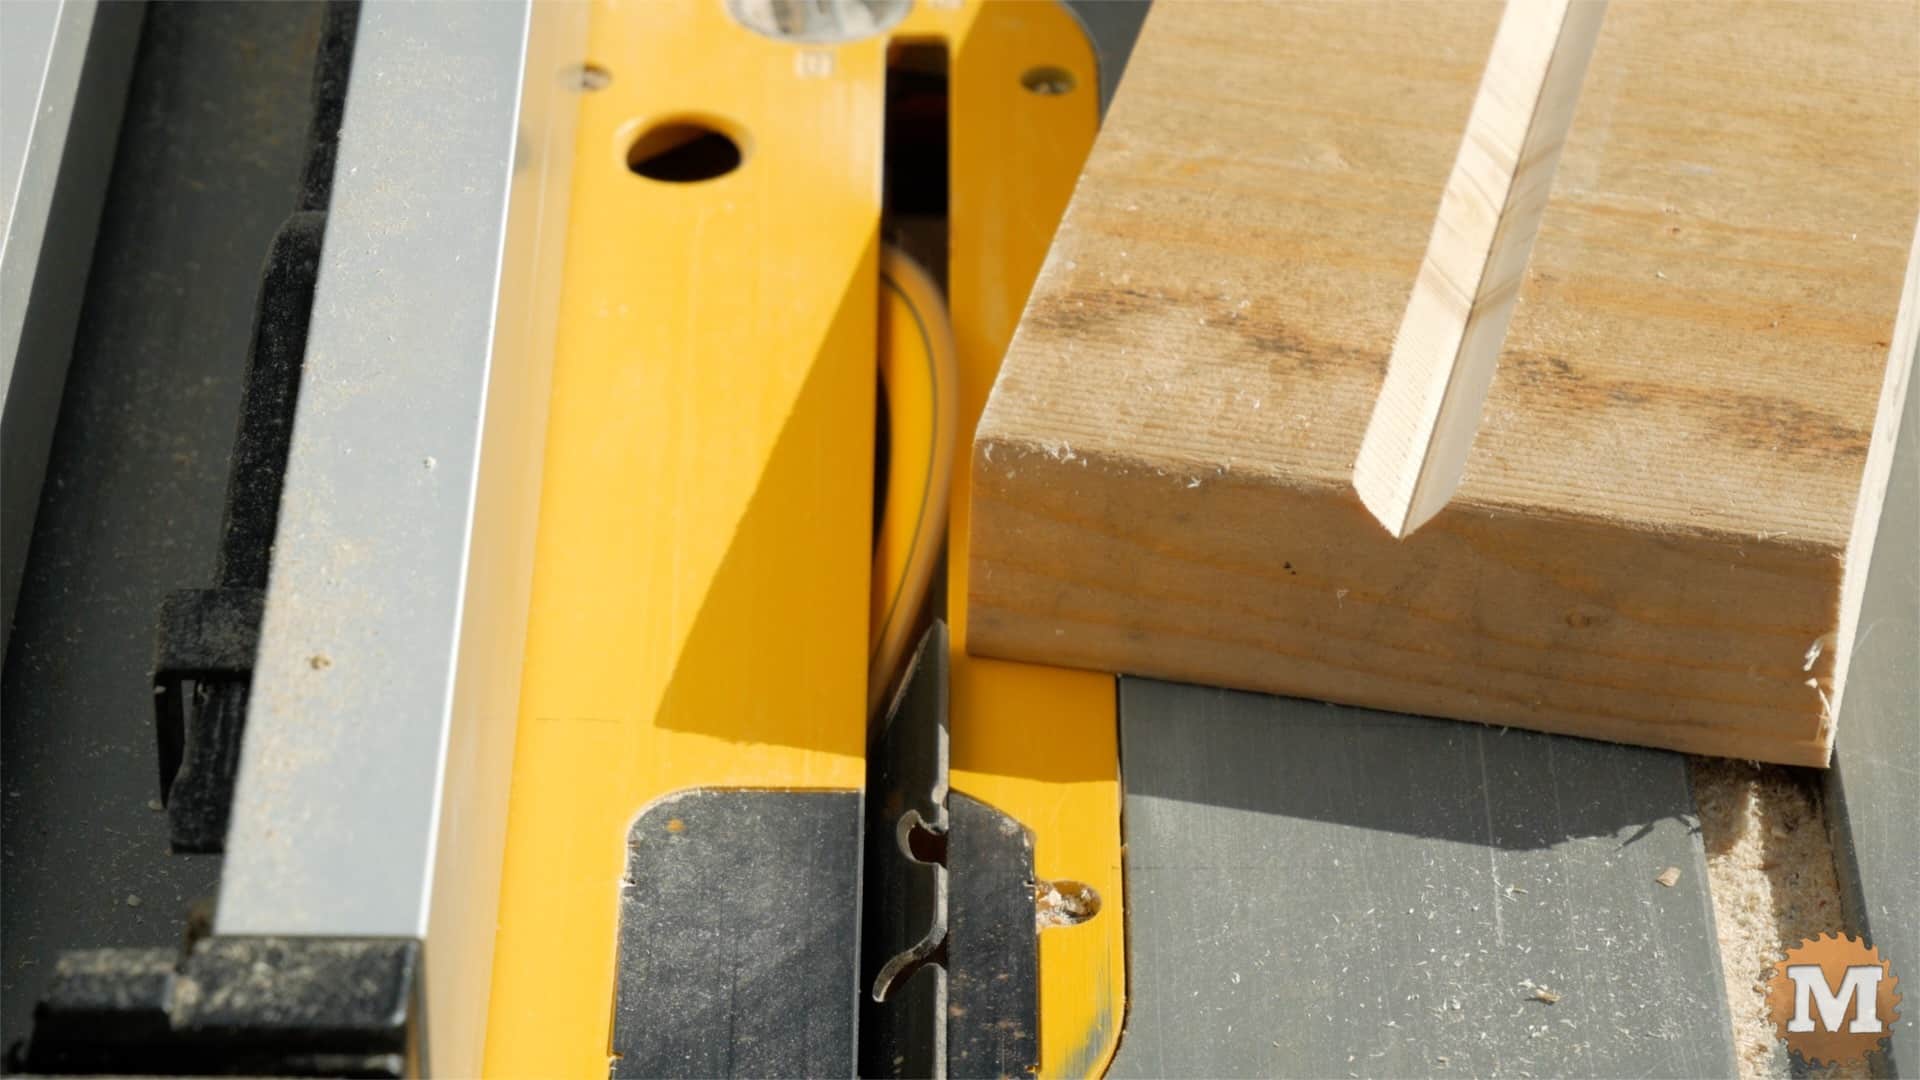
Cut this rear support to that length. Measure the front support according to the plans, and cut that as well.
Rear Support Groove
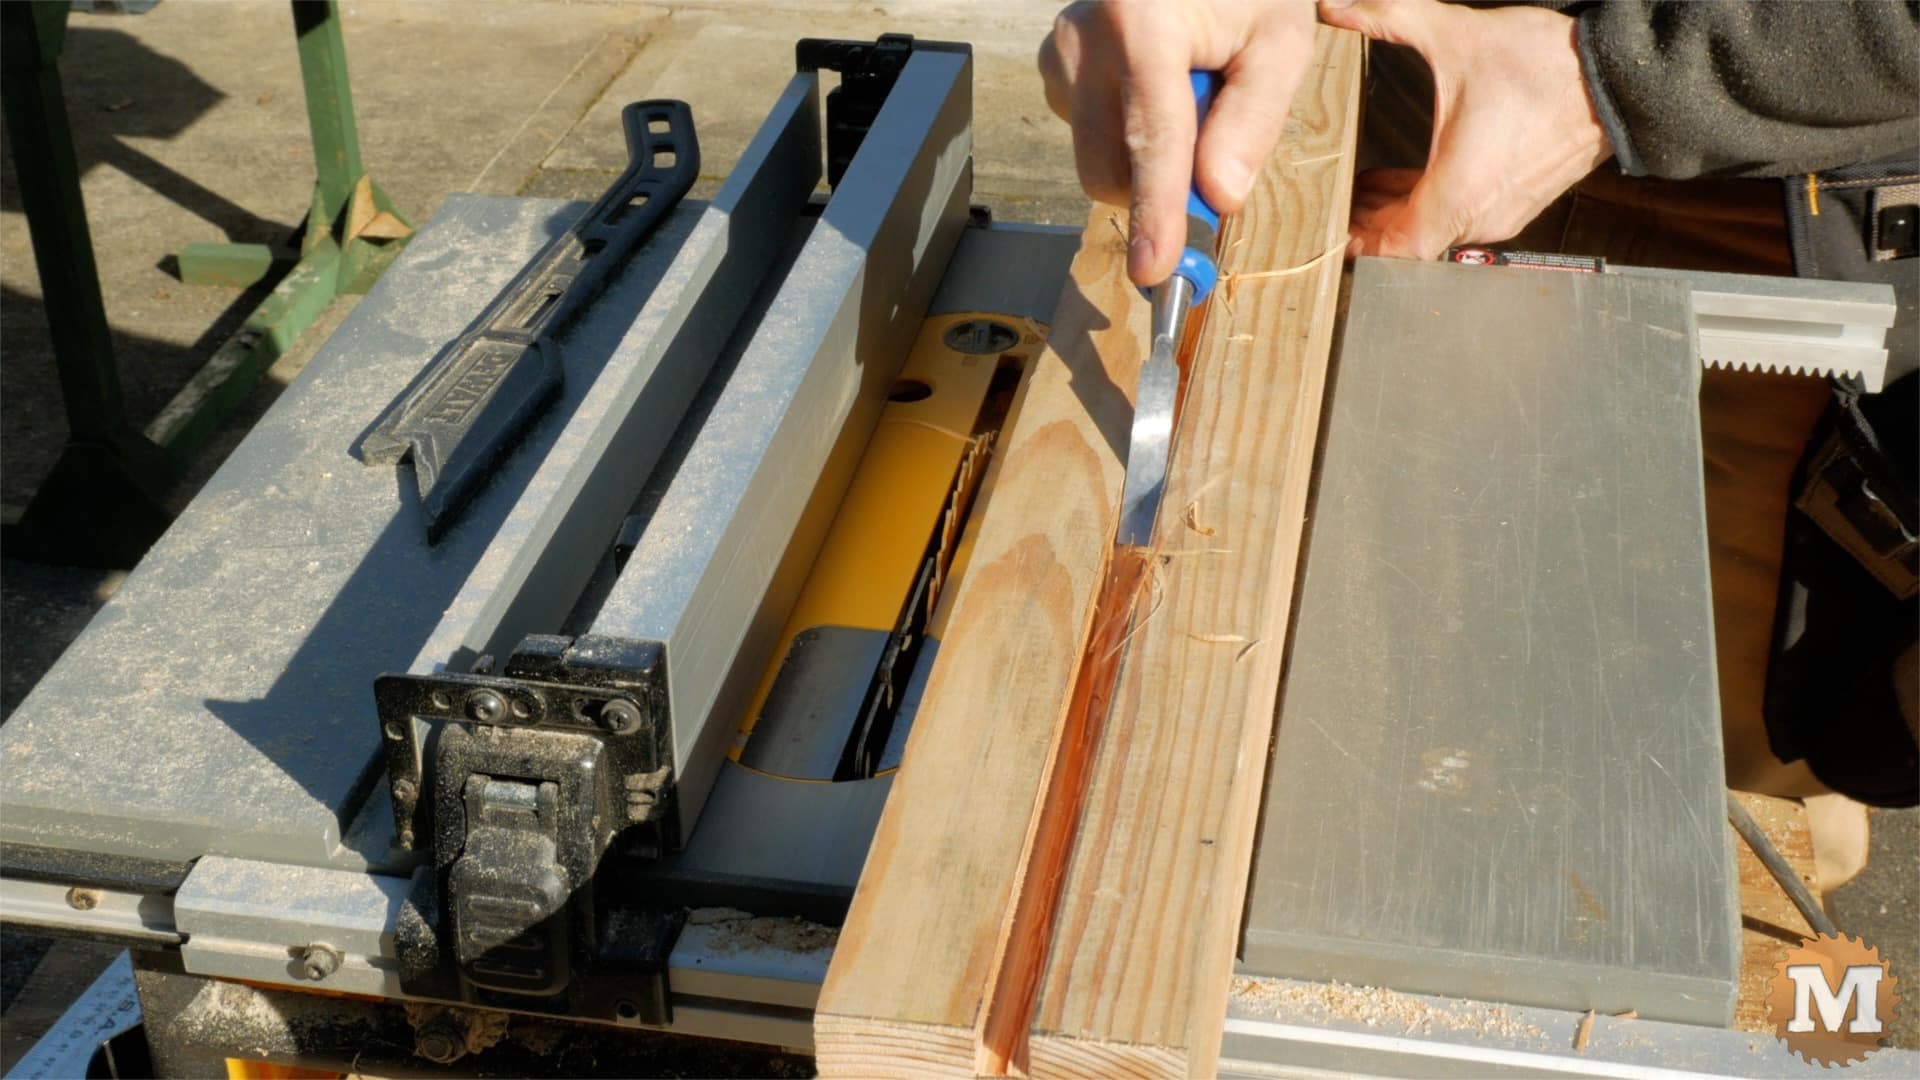
On the rear support measure and layout a groove to accept the axle rod. On the ends I marked the depth of this slot just shy the diameter of the rod. You want the axle to sit slightly high by about a sixteenth of an inch.

Set the table saw fence and run the rear support through the saw a few times. Adjusting the fence a blade width or so each time until the slot is cut.
I removed the excess wood with a half inch chisel. And test fitted the axle.
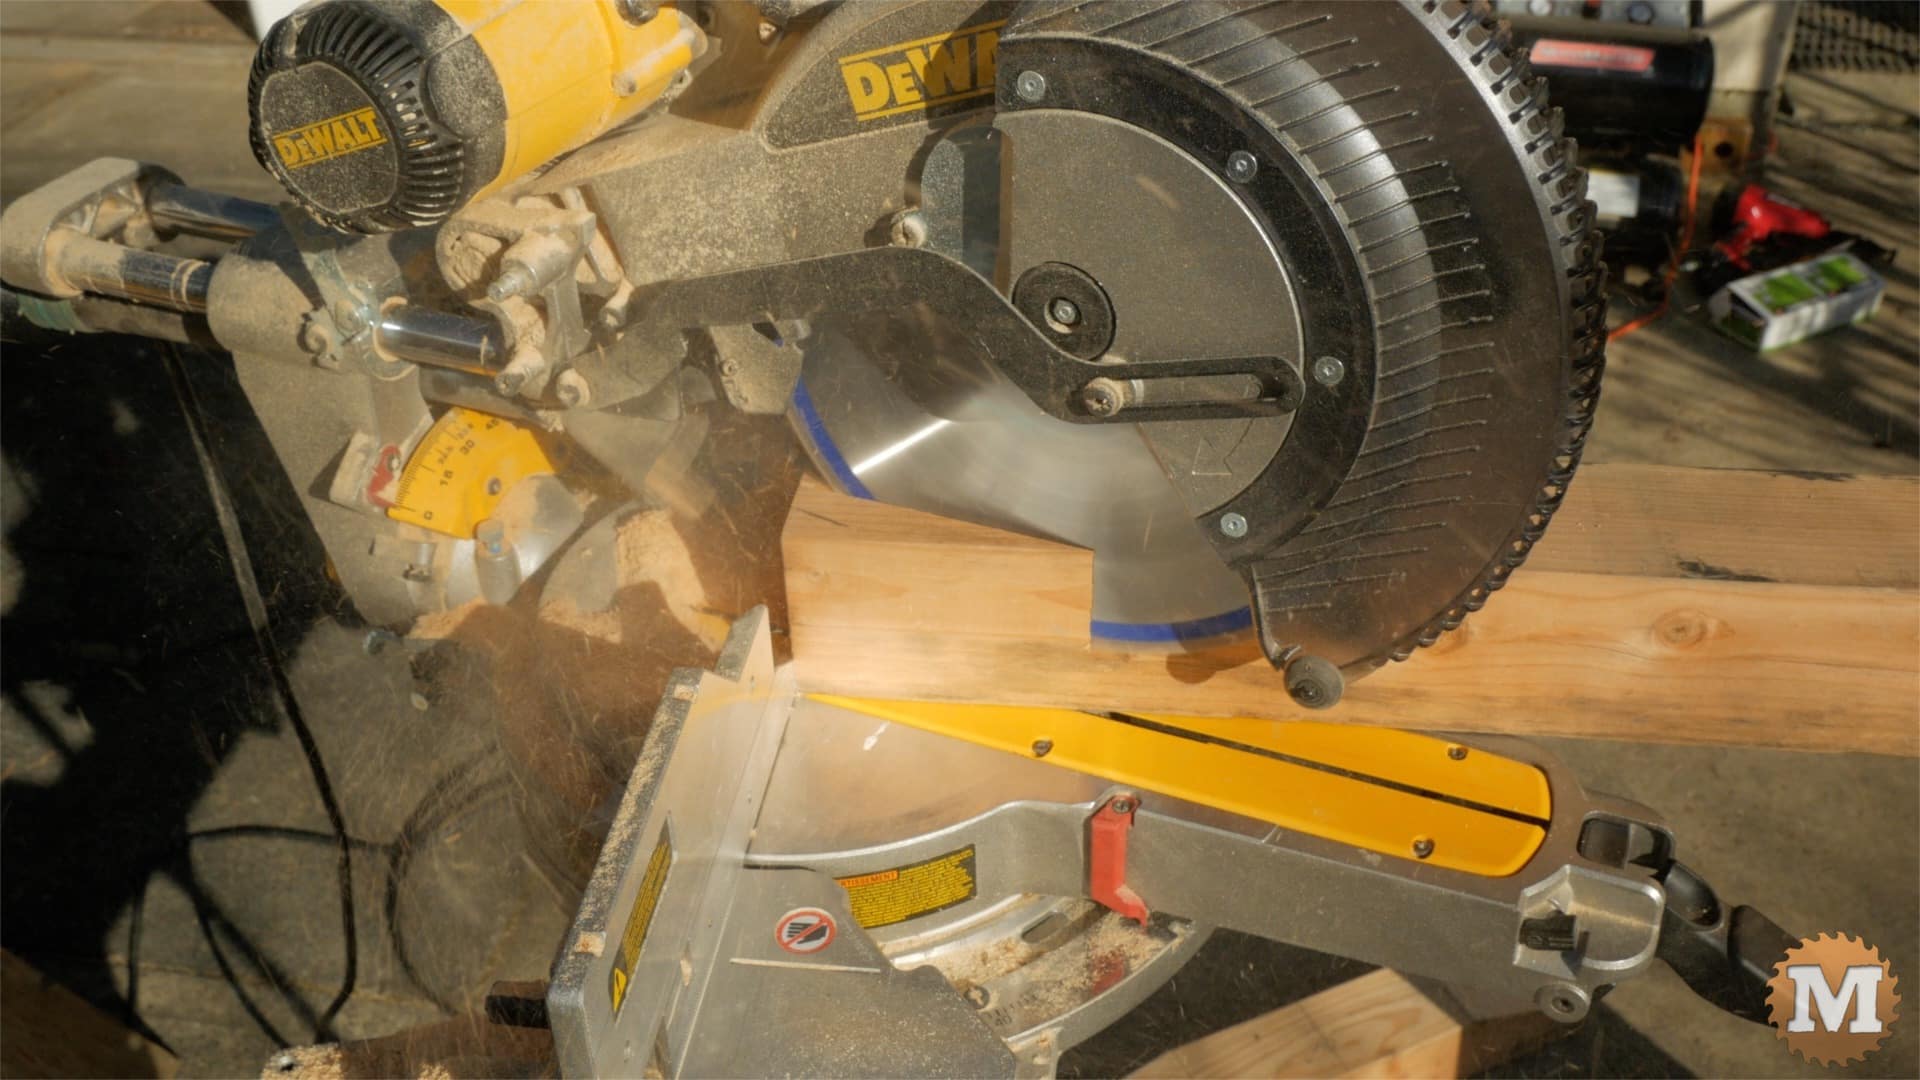
On the front support I laid out the beveled end and set the angle of my sliding miter saw to match. It’s a shallow angle so I cut it lengthwise with a small support block helping to hold it in place. You could opt to cut this it a 45 degree angle instead if that works better for you.
Once set, I cut the 4 ends of the supports.
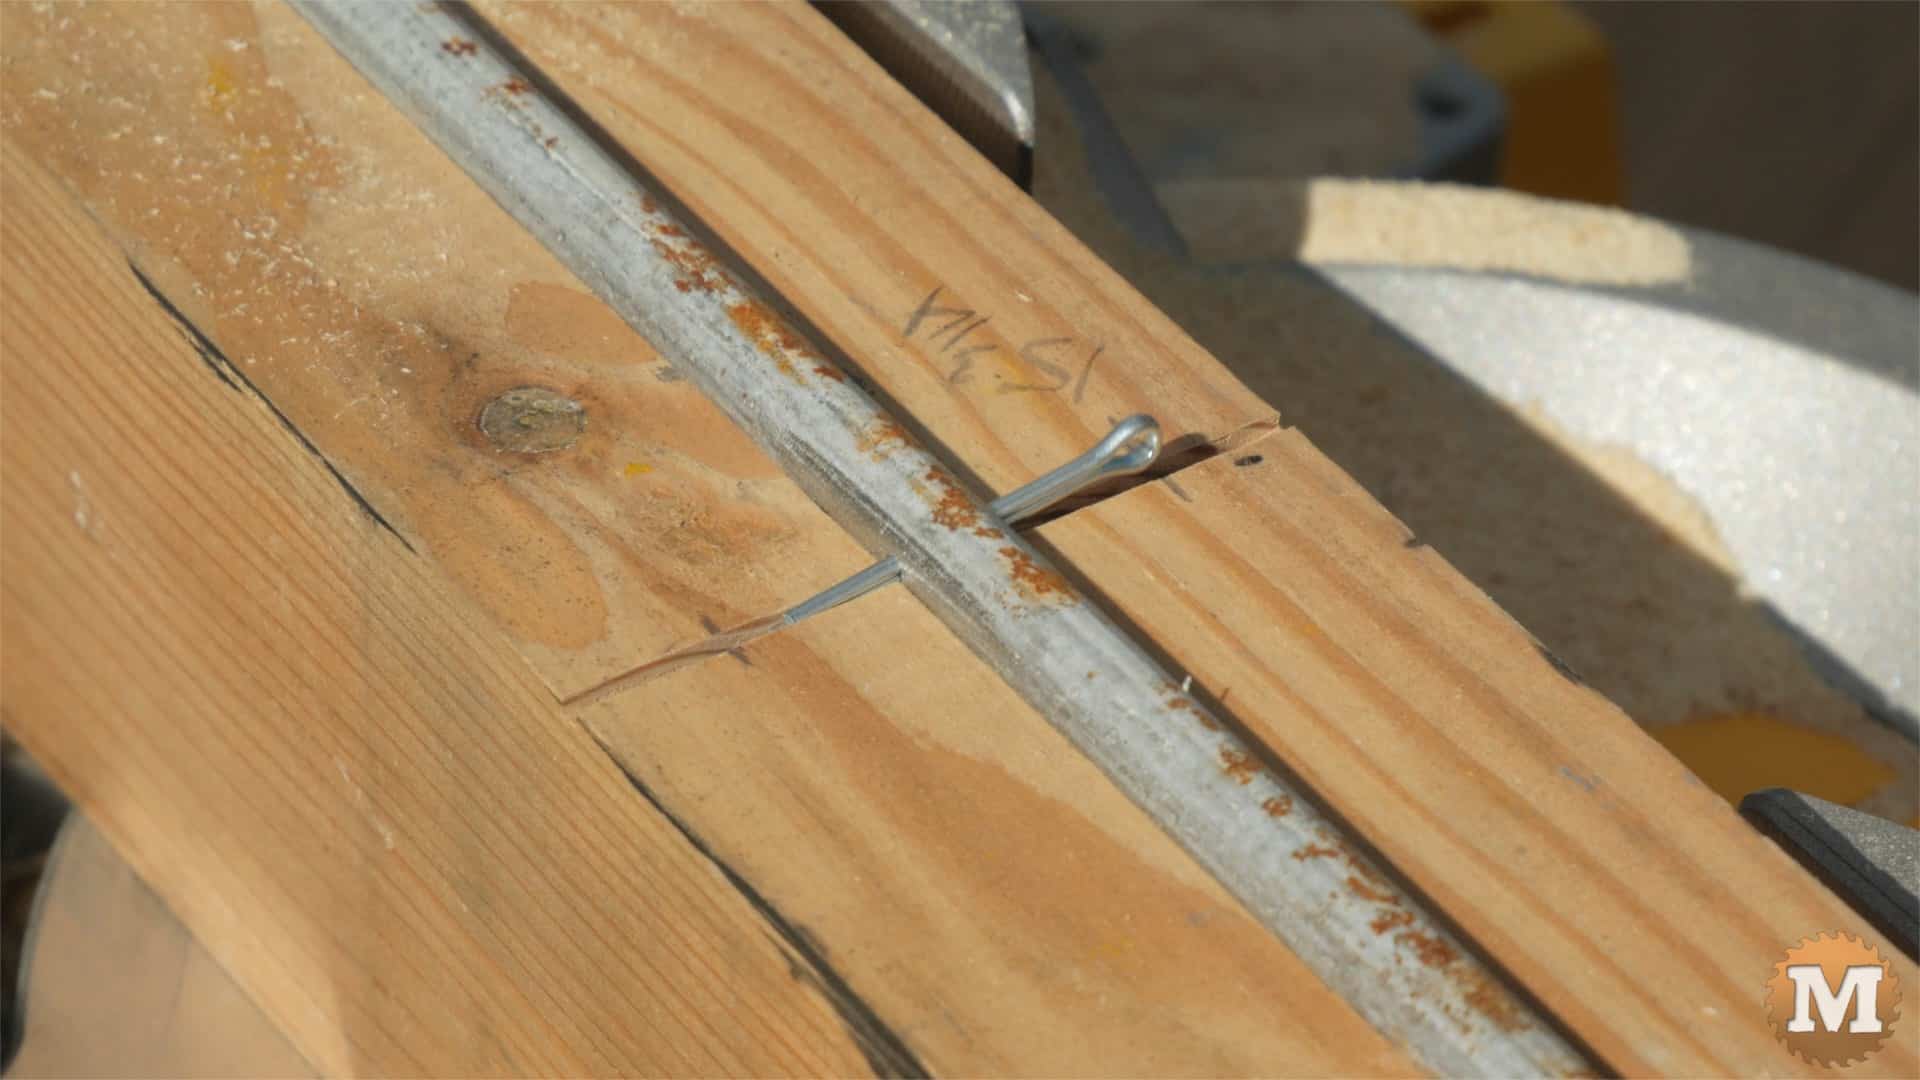
Drill a hole in the center of the axle to accept another cotter pin. Cut a groove with the miter saw at that location. This will prevent the axle from sliding or rotating in the groove.
Secure the Axel
I used 6 inch long, 3/8″ galvanized carriage bolts to secure the supports to the base. I’ll use a one and a quarter inch forstner bit to allow the bolt’s washer and nut to recess into each support. You could use longer bolts and not have to do this step.
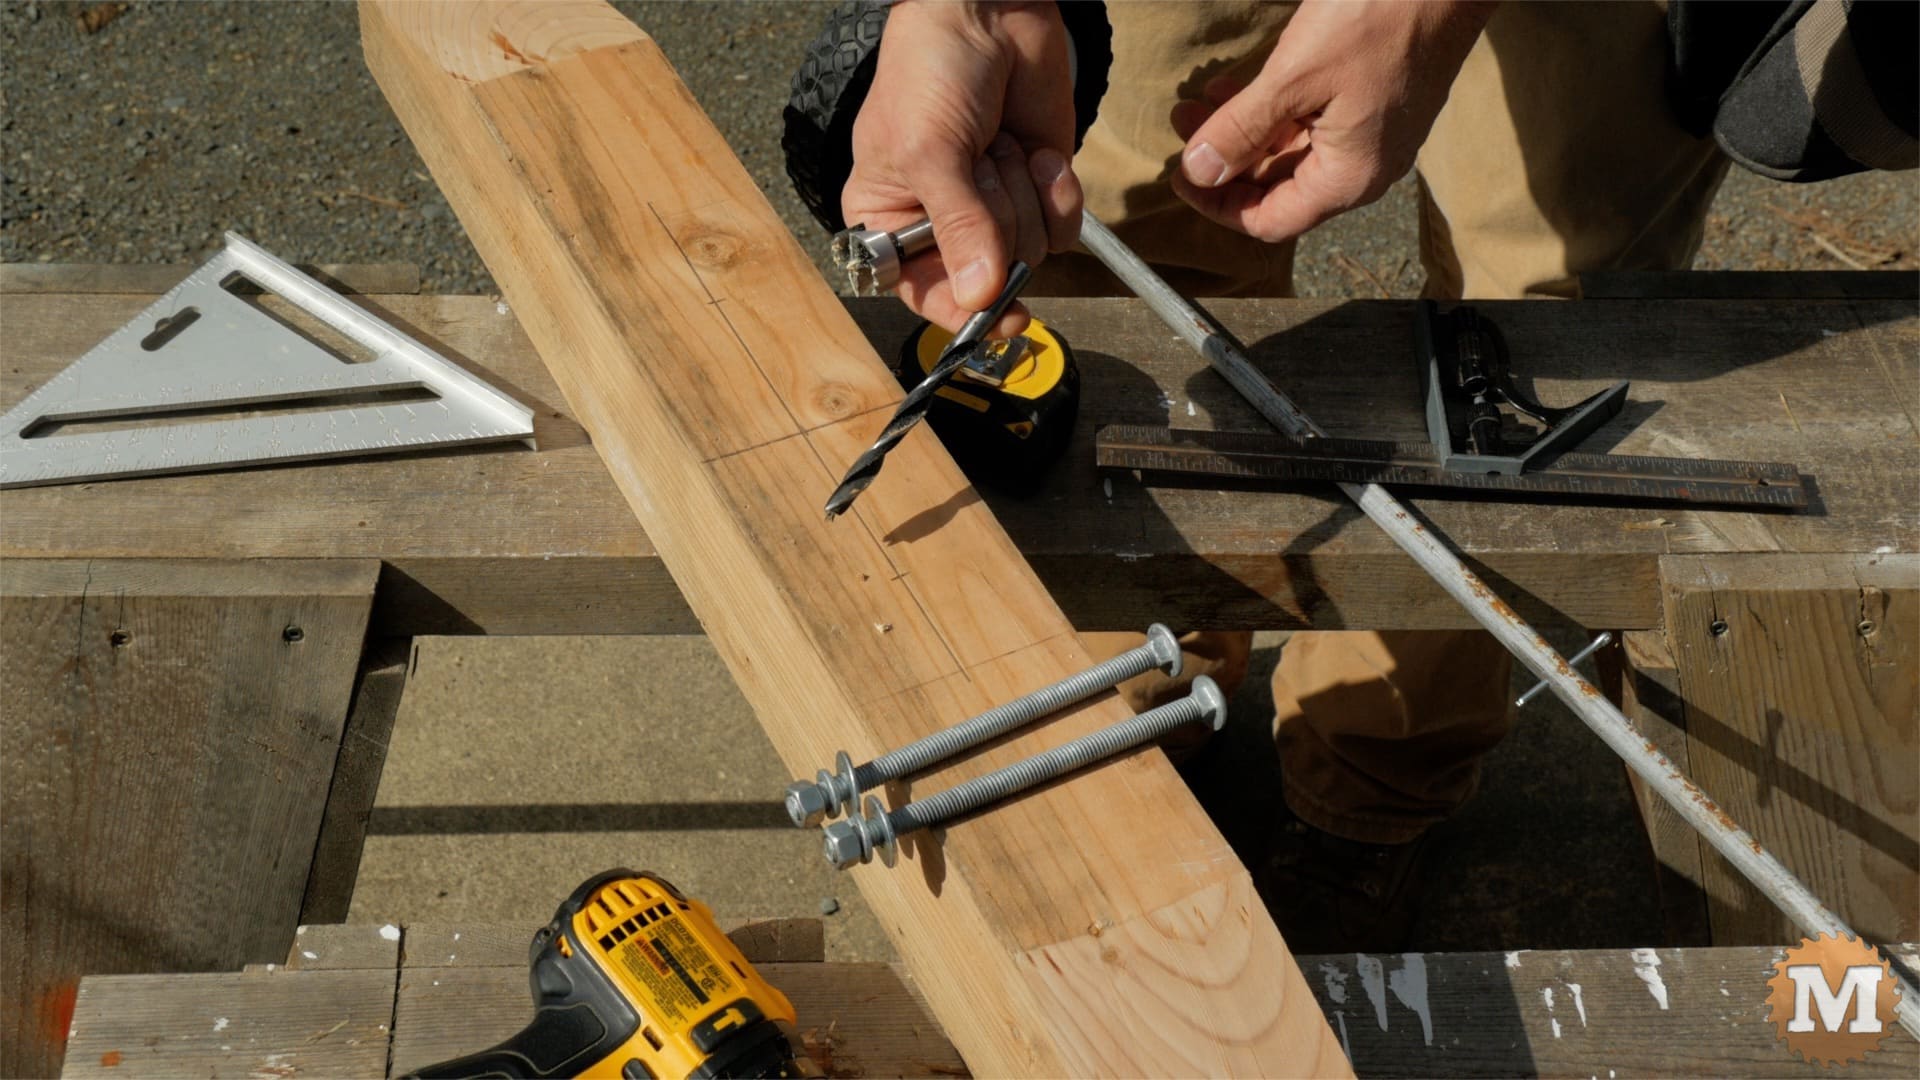
Layout the front base with the two holes marked on the center line.
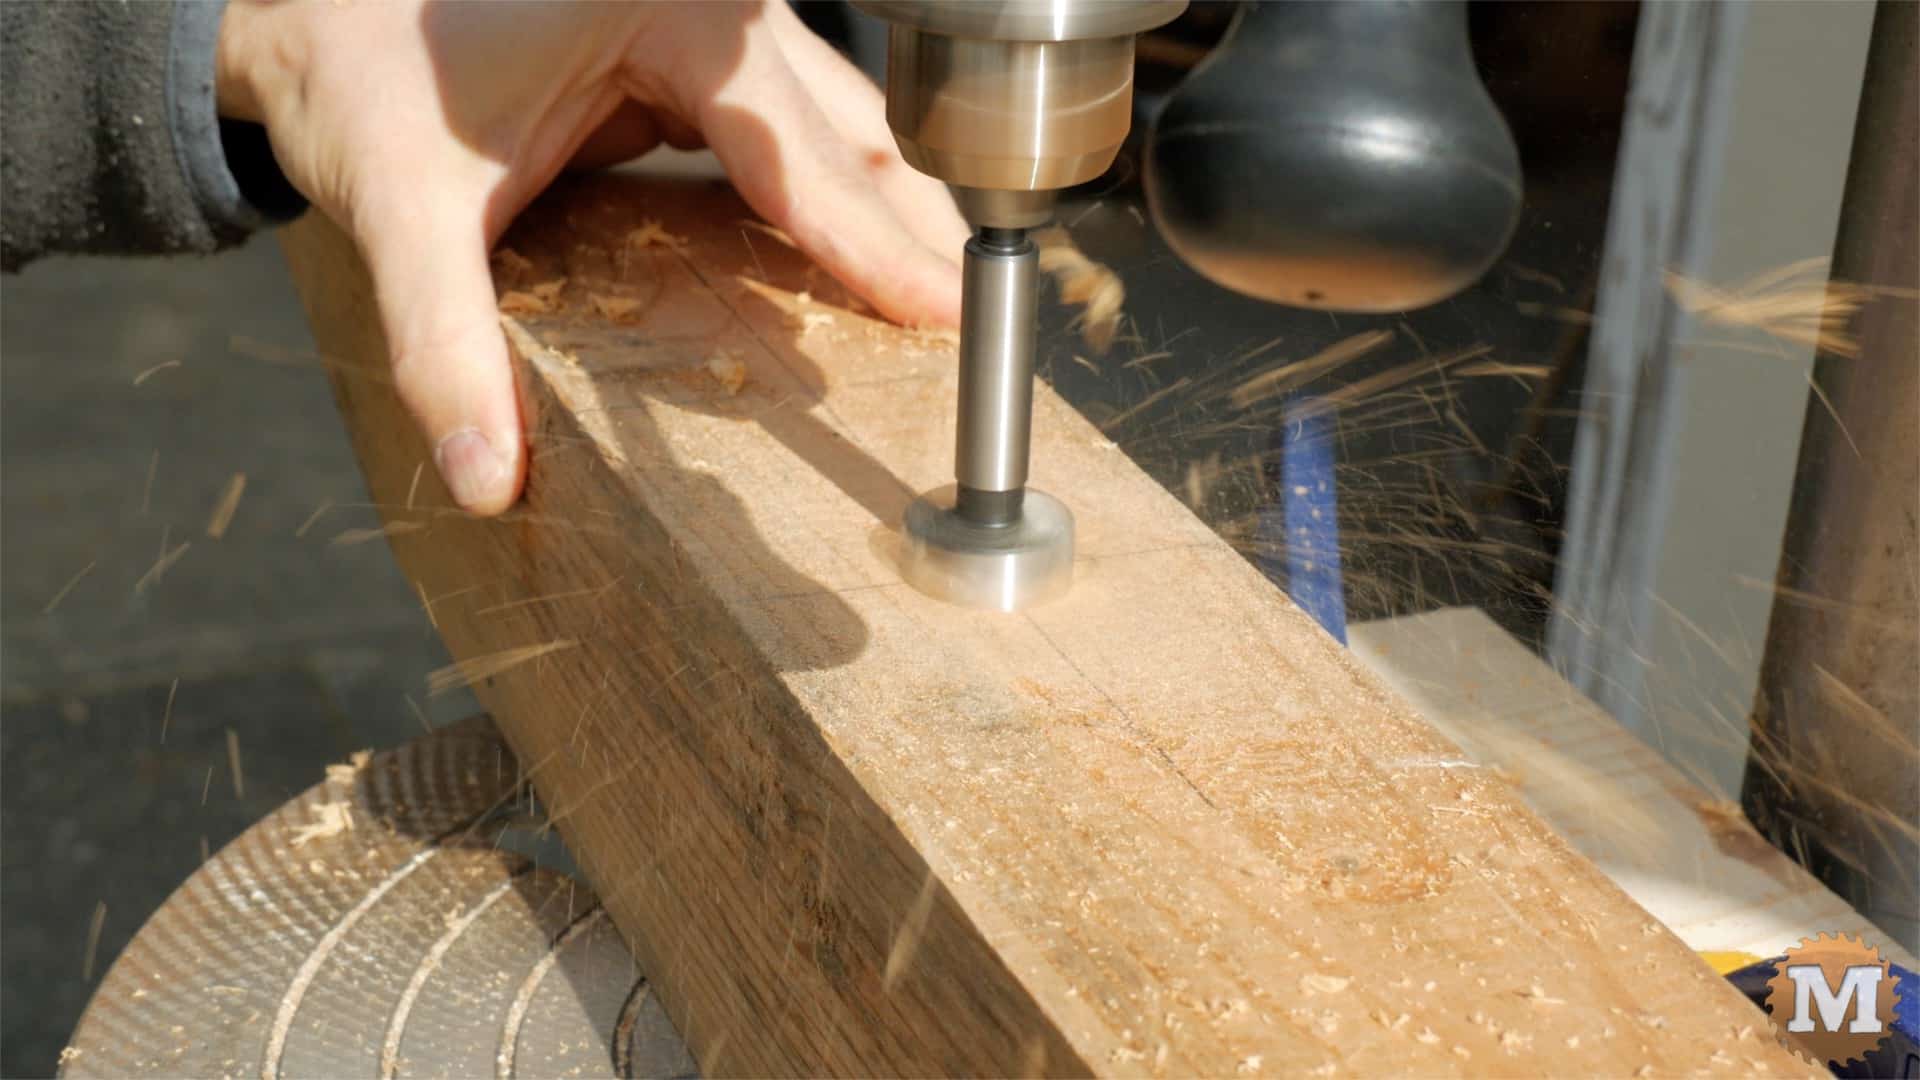
Then drill with the forstner bit one and a quarter inch deep.
Carriage Bolts
The same with the rear support but offset the holes on either side of the axle channel. Use the washer as a guide to layout the hole location.

Chuck the 3/8″s bit in the press and drill each hole.
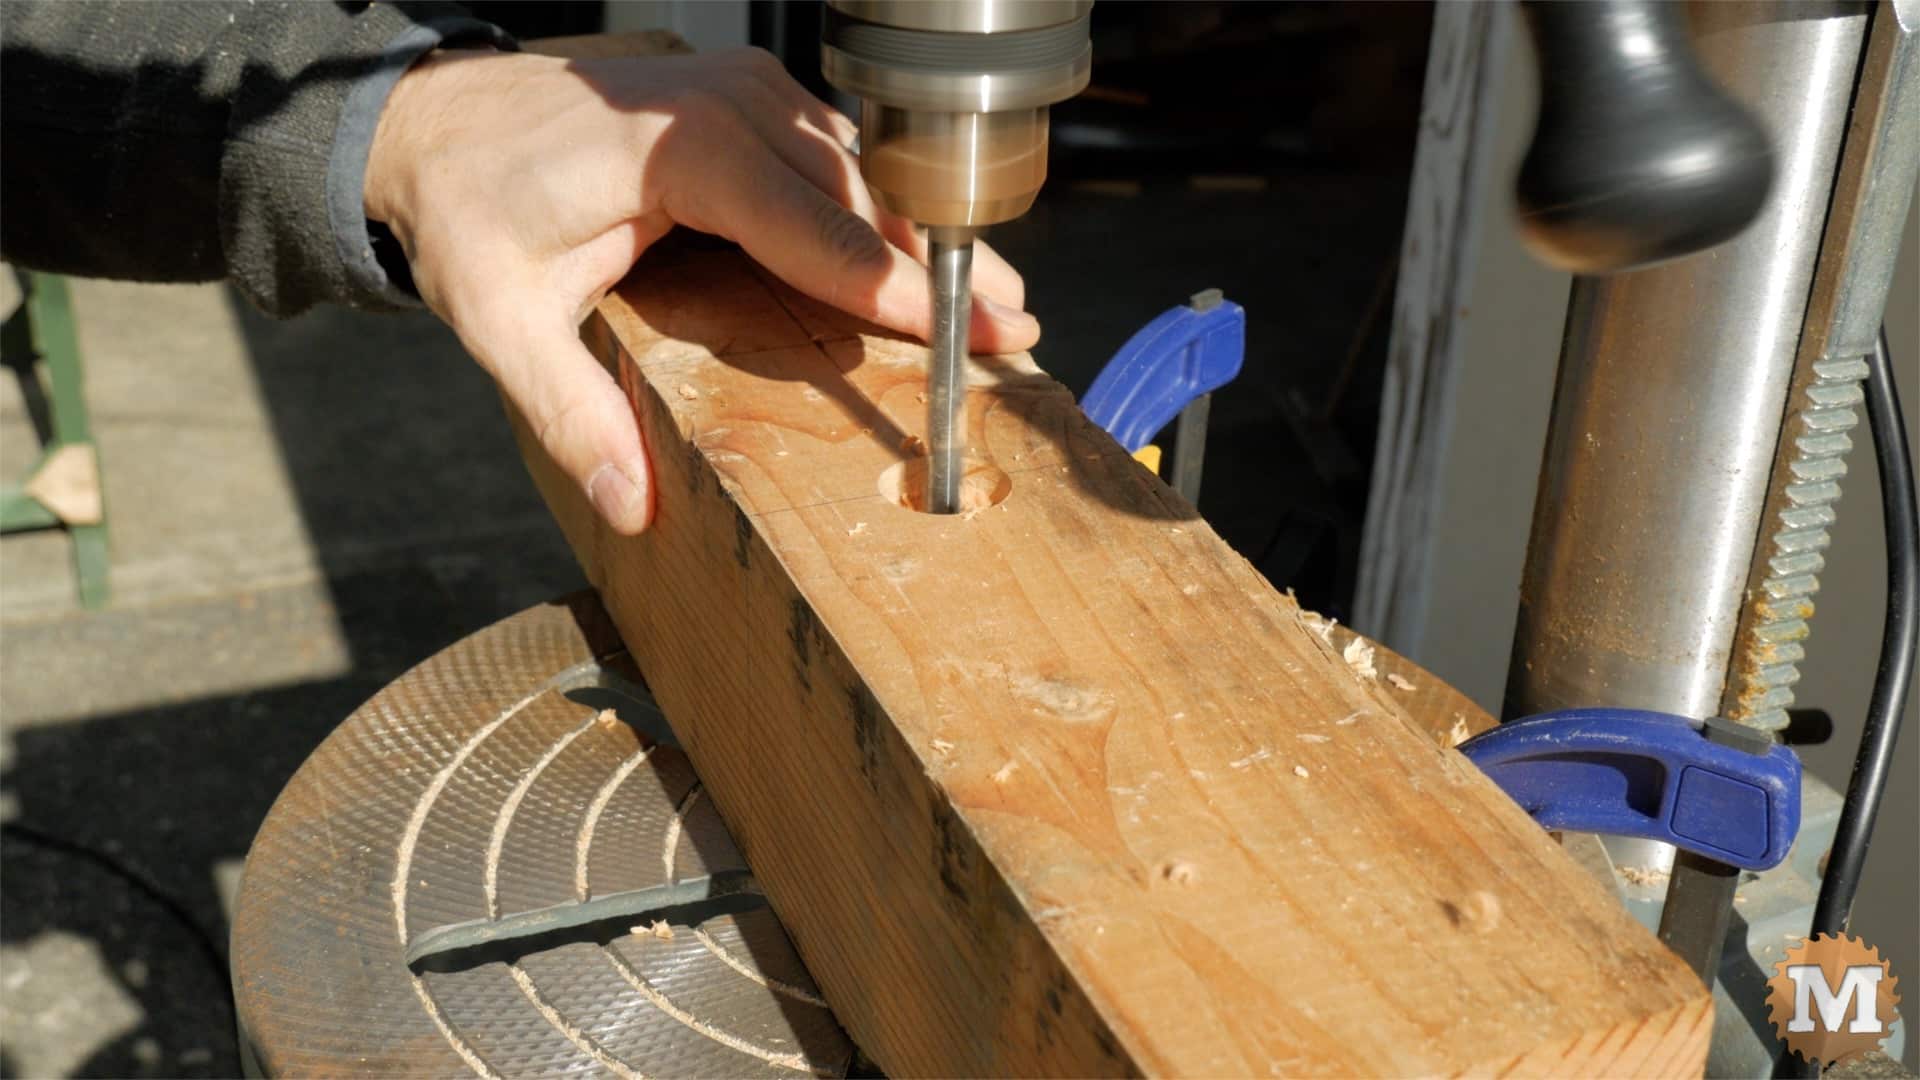
This bit was not quite long enough in the press so I used a portable drill to finish.

