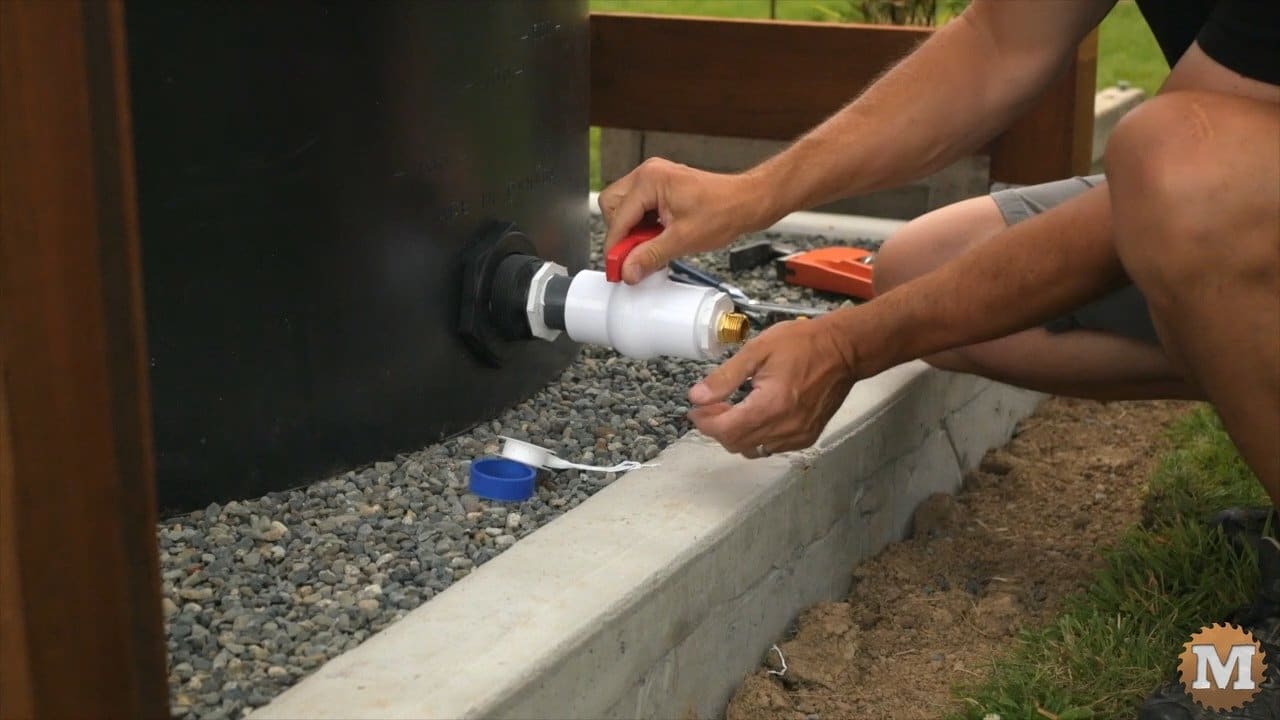
This tank came with a 2 inch bulkhead fitting already installed. It’s for connecting more tanks together and for draining the tank quickly. Or, we can use it for drawing off water.
I’ll be adding a float and screen to this tank so I can draw off the cleanest water that’s just below the surface and away from any sediment in the bottom.
Jump to:
Off-Grid Rain Tank Part 1 – Pour the Tank Foundation
Off-Grid Rain Tank Part 2 – Build the Tank Surround
Off-Grid Rain Tank Part 3 – Tank Plumbing and Fittings
Off-Grid Rain Tank Part 4 – Install a Solar Powered Pump

See the Youtube Video Part 1 or Part 2 or Part 3 or Part 4
Off Grid Rainwater Harvesting System – PART 3: plumbing and tank fittings
(this is a transcript from the video)
I’ll add a ball valve to this existing bulkhead fitting. I first add a reducer down to one and a half inches. I didn’t have channel lock pliers big enough for these so I used the biggest wrench I had. Then I’ll add this short nipple, and then the ball valve.
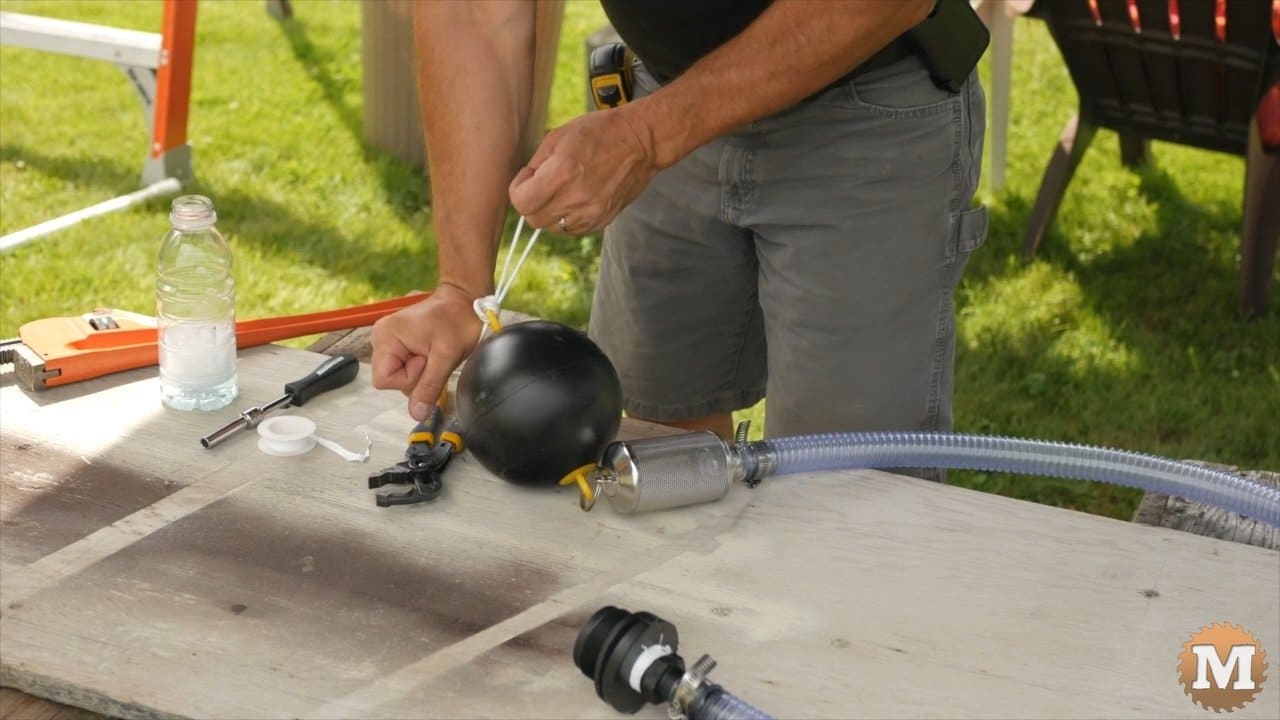
Before I can add the float and screen I need to assemble the parts first. I BOUGHT some of the tank parts and decided to MAKE some of them from existing fittings.
Float Hose Assembly
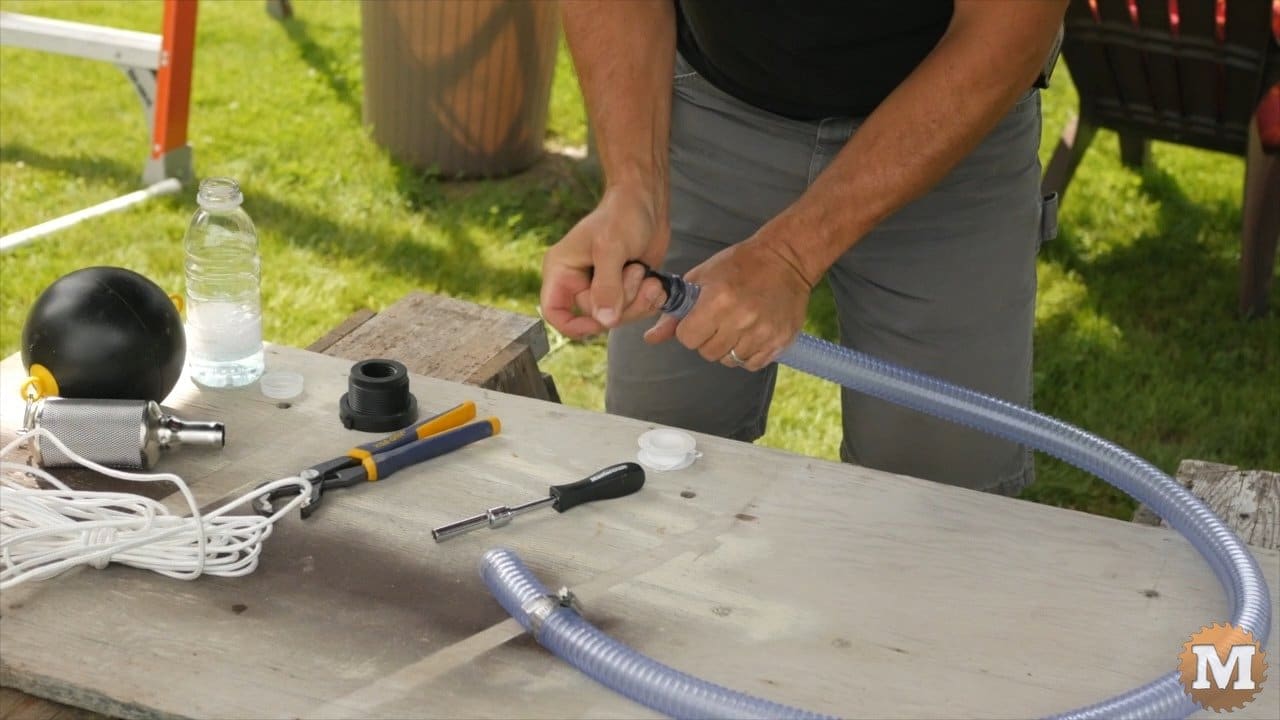
I cut the float hose down to a length I though appropriate for the height of this tank. About 2 feet taller than the tank I thought would be good. There’s a barbed fitting that goes into the inside part of the bulkhead fitting first. Then the clear flexible hose goes onto that. It was a tight fit and tough to get this on, even with some soapy water as a lubricant. And a stainless steel hose clamps secures it.

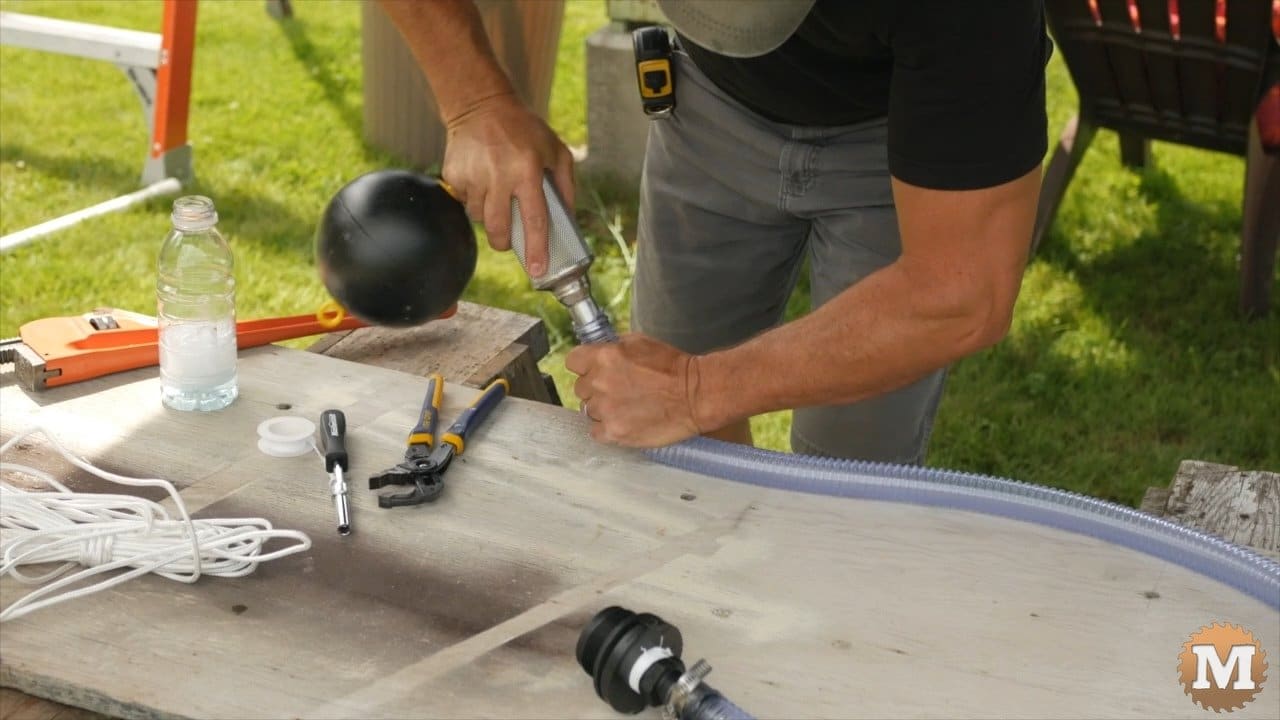
Then the screen and float goes on the other end. And a lanyard is tied to the float. This will keep the screen up off the bottom of the tank when the water level gets low.
(Disclaimer: As an Amazon Associate I earn from qualifying purchases. Thank you for helping to support my content this way. )
I’ll need to drill a hole in the tank for a bulkhead fitting for the hose that’s connected to this float. It will be around the back at the southeast corner. I’ll use a hole saw for this and drill this hole 4 about inches off the bottom.
Drill into Tank with Hole Saw

Getting the bulkhead fitting through this hole can be tricky. I first screwed in a barbed fitting into the bulkhead fitting. Then I tied a string to the barbed end. And taped it too.
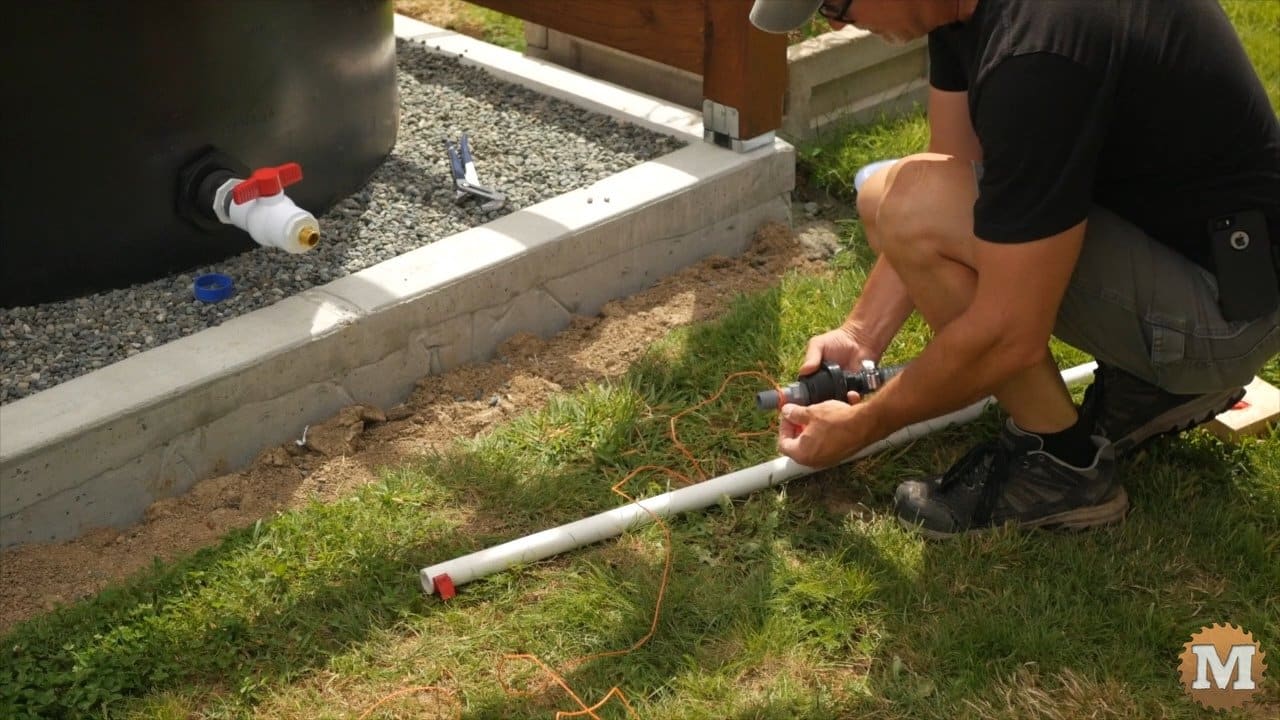
The other end of this string is taped to the end of a pipe.

Then this pipe is set in the tank with the string end resting on the hole I drilled. I then carefully remove the tape and pull the string through the hole.
Feed String through Hole

I remove the pipe from the tank and lay in the hose and float assembly. Being sure that the end of the lanyard on the float is still outside.
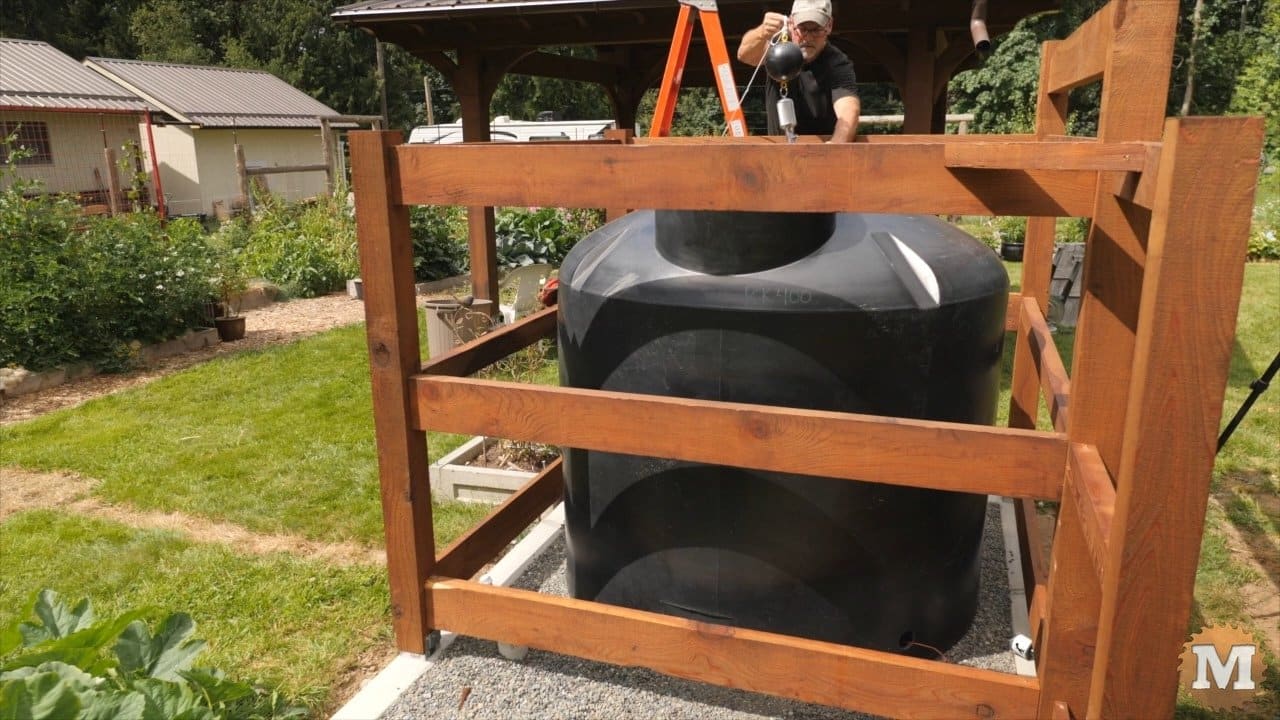
I now pull the string to bring the bulkhead fitting through the hole and attach the nut. I snug this up with a wrench.

I’ll be connecting this fitting to the mini pump house later. But for now I’ll add a ball valve so I can make the tank water tight. I detailed the construction of the pump house box in Part 2.

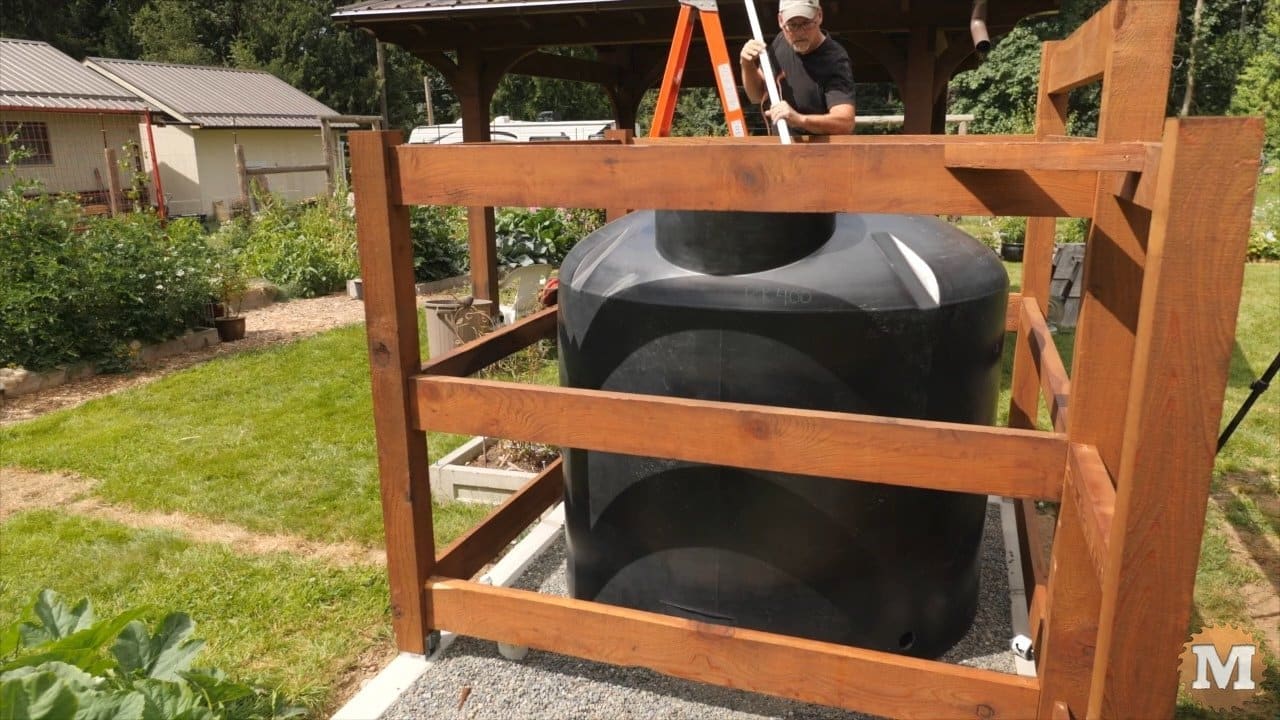
To find the best spot for the tank inlet I sighted down a large speed square. I lined up one edge to the curb and marked the point where the 45 degree edge contacted the tank.
Layout Tank Inlet Hole Location

Then I can mark my center point for the inlet hole.
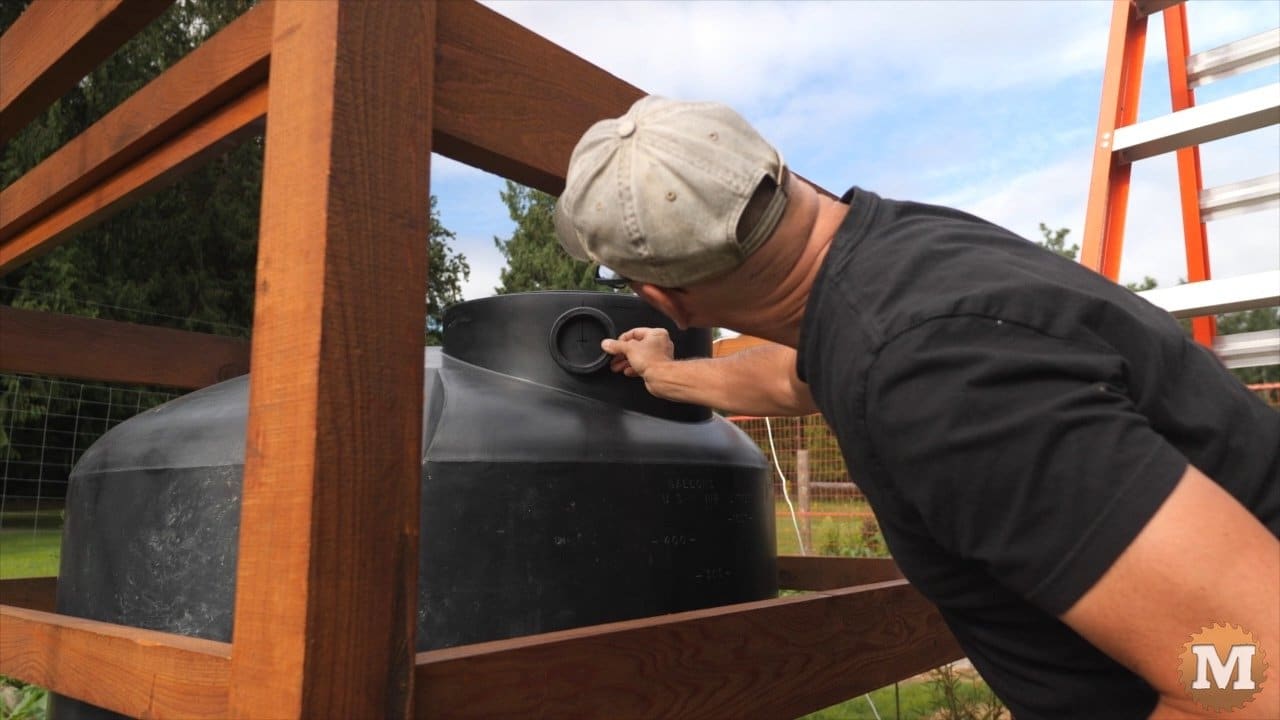
I marked this location this way so I could use standard 45 degree elbows to connect the pipe to the surround wall. I tried to position this hole as high up on the tank as possible. Not so high that it would not run into the thread lip where the lid screws on.
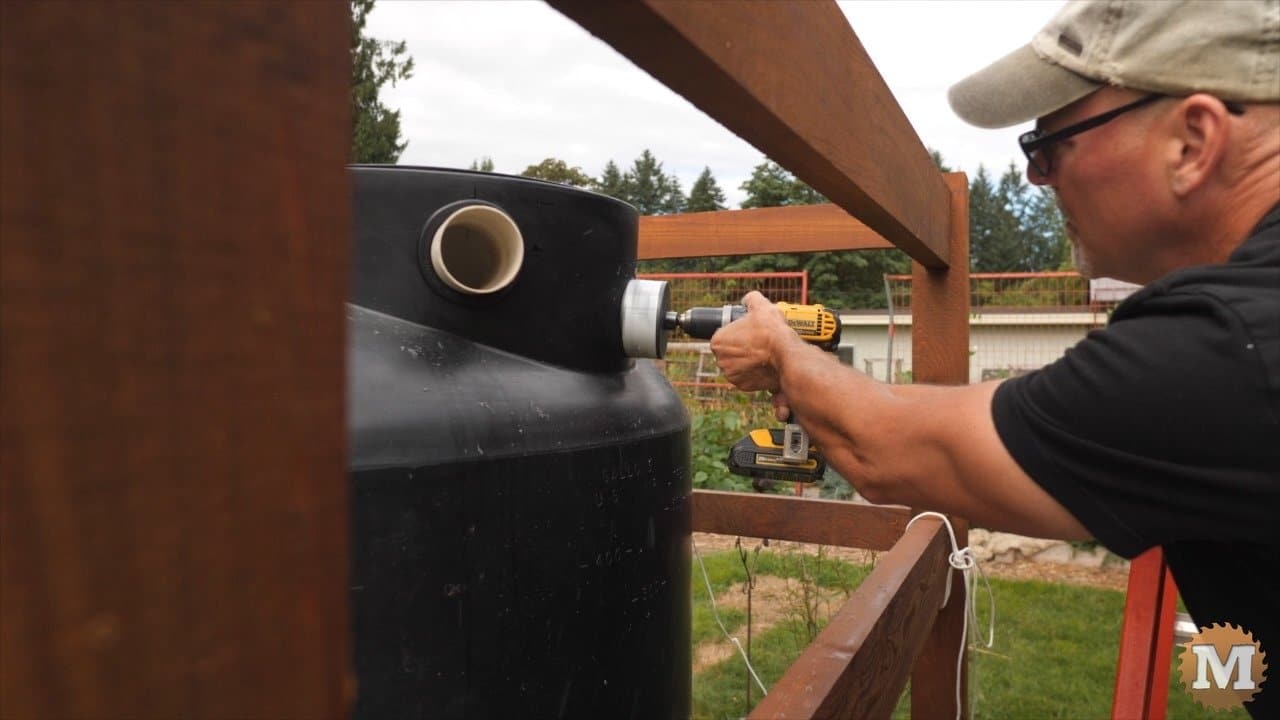
Drill Tank Inlet with Hole Saw
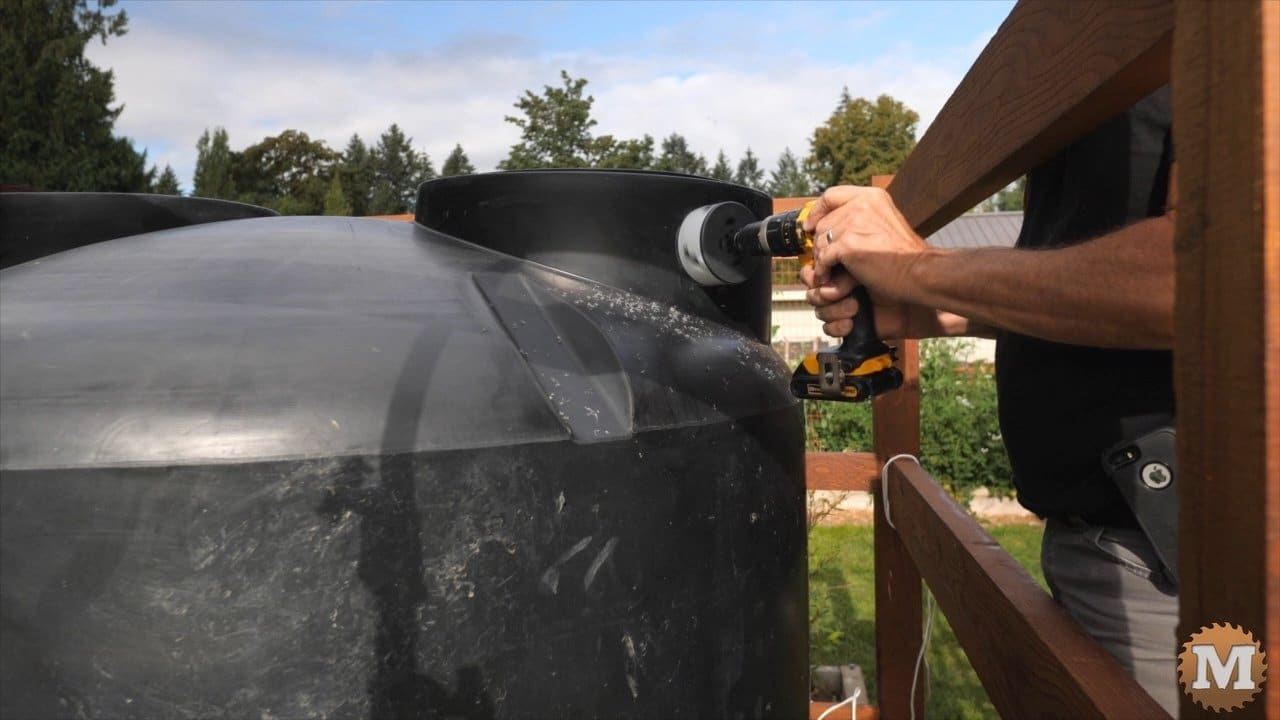
You don’t get a lot of second chances drilling holes in a big tank. So I took my time planning and thinking this through.

I used a large hole saw for the inlet and overflow pipes. On the slow setting, I drilled until the pilot bit pierced the tank, then clicked the drill in reverse to cut the big hole. This keeps the hole saw from grabbing. And this worked really well.
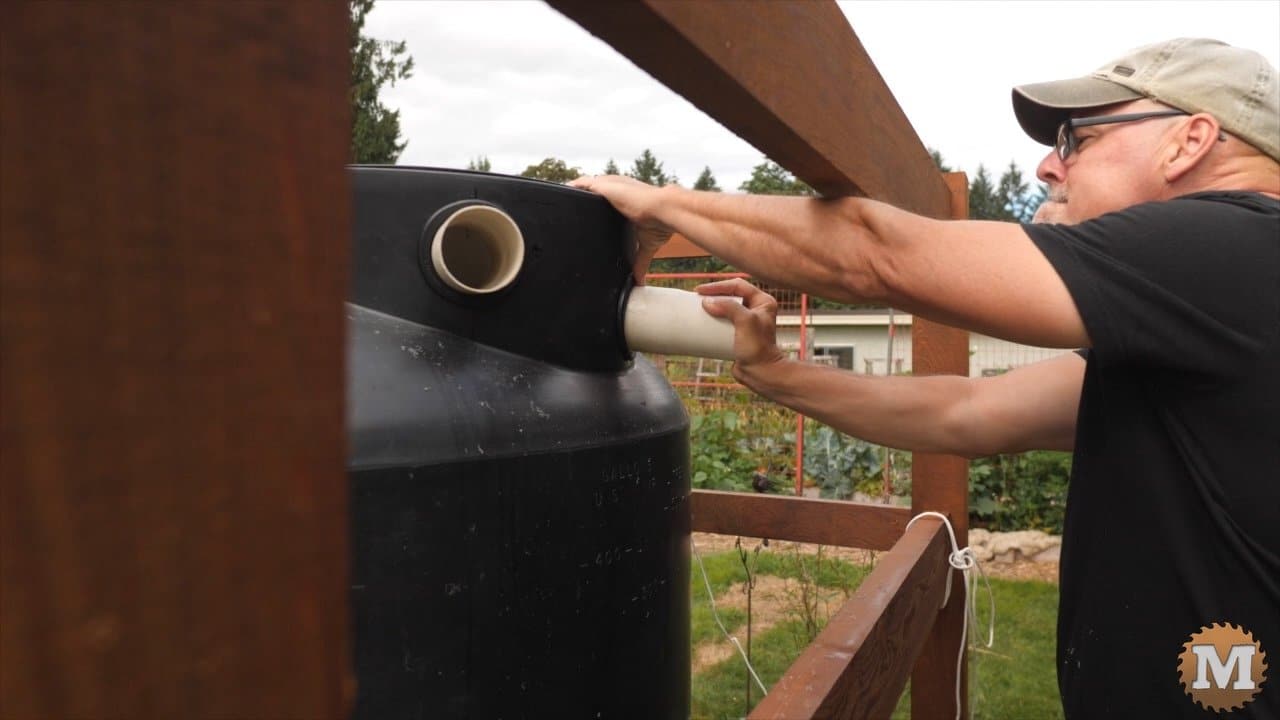
A rubber grommet fits in the hole and the pipe expands the rubber to make the seal against the plastic watertight. Then I push in a short piece of pipe. It’s tight and a bit of soapy water helps.
Make a Calming Inlet Pipe
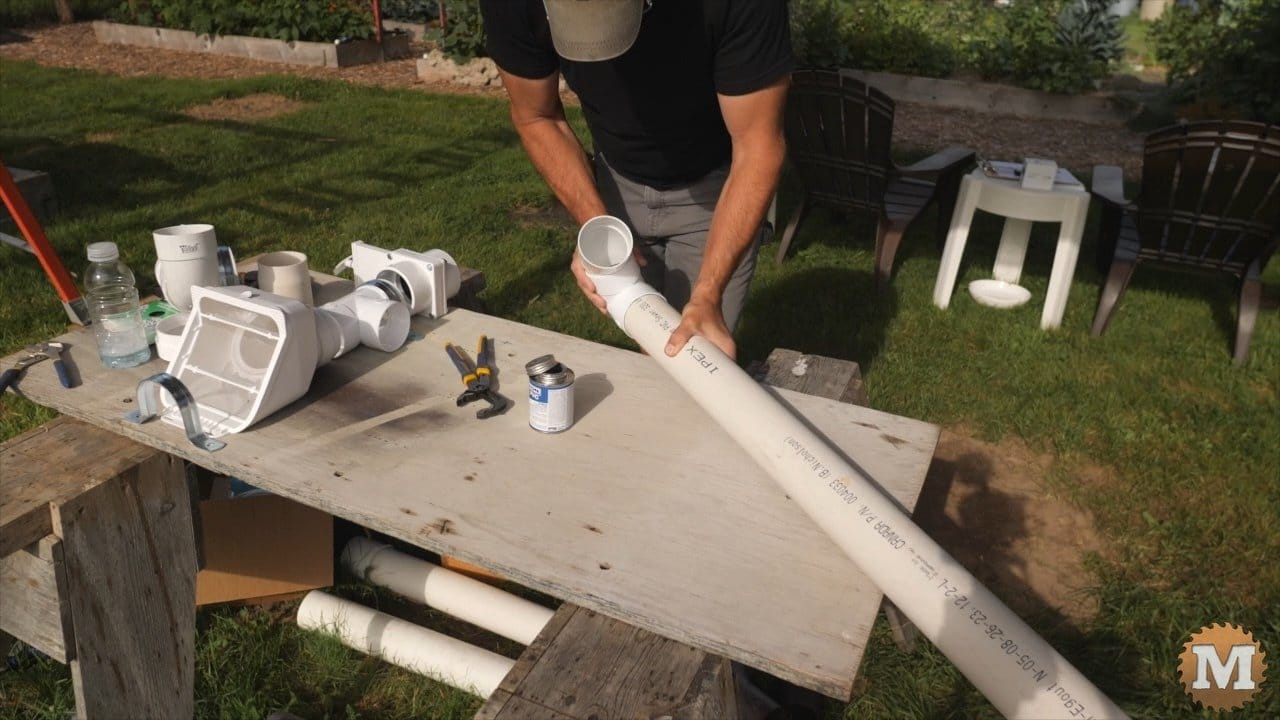
So that water entering the tank does not stir up sediment, I’ll run a pipe to the bottom with two elbows to create a calming inlet.
This will keep the water from splashing as the tank fills. I glue up a 90 and 45 fitting and attach it to one end.

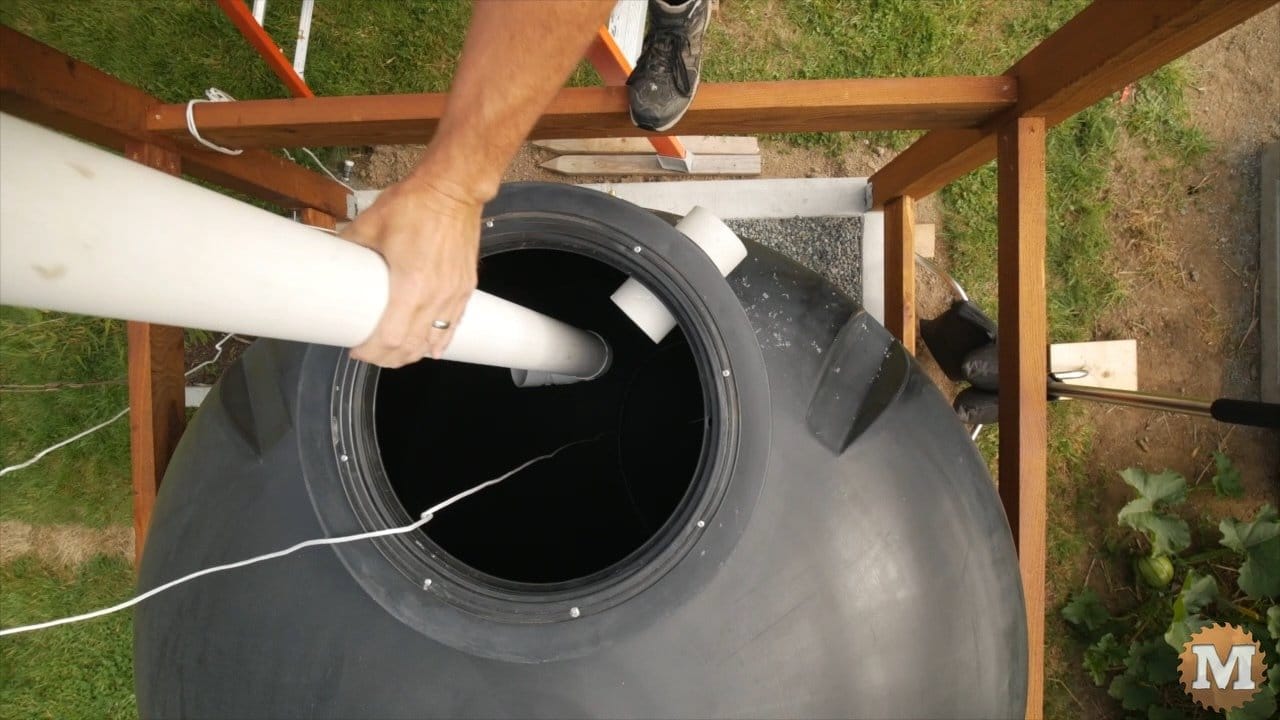
Then add a 90 to the other end.
Then set this in the tank and attach it with a stainless steel screw. In case I need to remove it at any time later.
Now, I can drill the hole for the overflow siphon.
Drill the Tank Overflow Hole
It’s just slightly lower than the inlet hole. And I needed it to rotated around this access hatch wall so it didn’t run into the inlet pipe.
Then a short piece of pipe is convinced strenuously that this is it’s new home.