I install a 1200 gallon (4550 litre) rainwater harvesting tank to collect water for our garden when our irrigation well runs low in the summer. This is four part mini-series.
Jump to:
Part 1 – Pour a Rainwater Tank Foundation
Part 2 – Rainwater Tank Plumbing and Fittings
Part 3 – Rainwater Tank Pump and Irrigation
Part 4 – First Run of Tank Drip Irrigation System
Even after we had 5 feet of mud removed from our shallow irrigation well, it still runs dry in the middle of summer. It’s definitely better than it was, but to expand our garden we need more water.

Install a Rainwater Harvesting Tank – PART 1: the Base
(this is a transcript from the video)
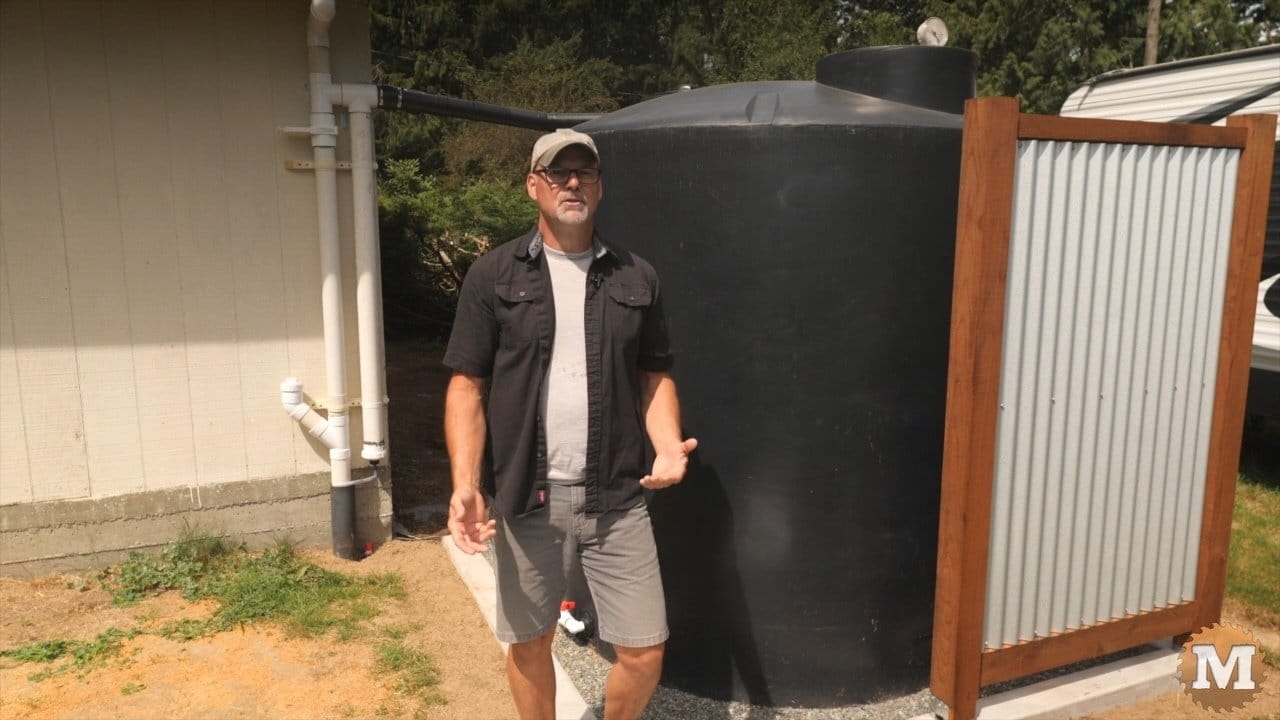
Last year we bought two rainwater harvesting tanks, a 1200 gallon, and a 500 gallon. In this series I’ll go through all the steps I took to install and connect this first tank to the gutters of these two workshops.
In the following series I’ll look at the smaller 500 gallon rainwater harvesting tank that we installed off-grid in the garden and powered the pump with solar. So that’s coming up a bit later.
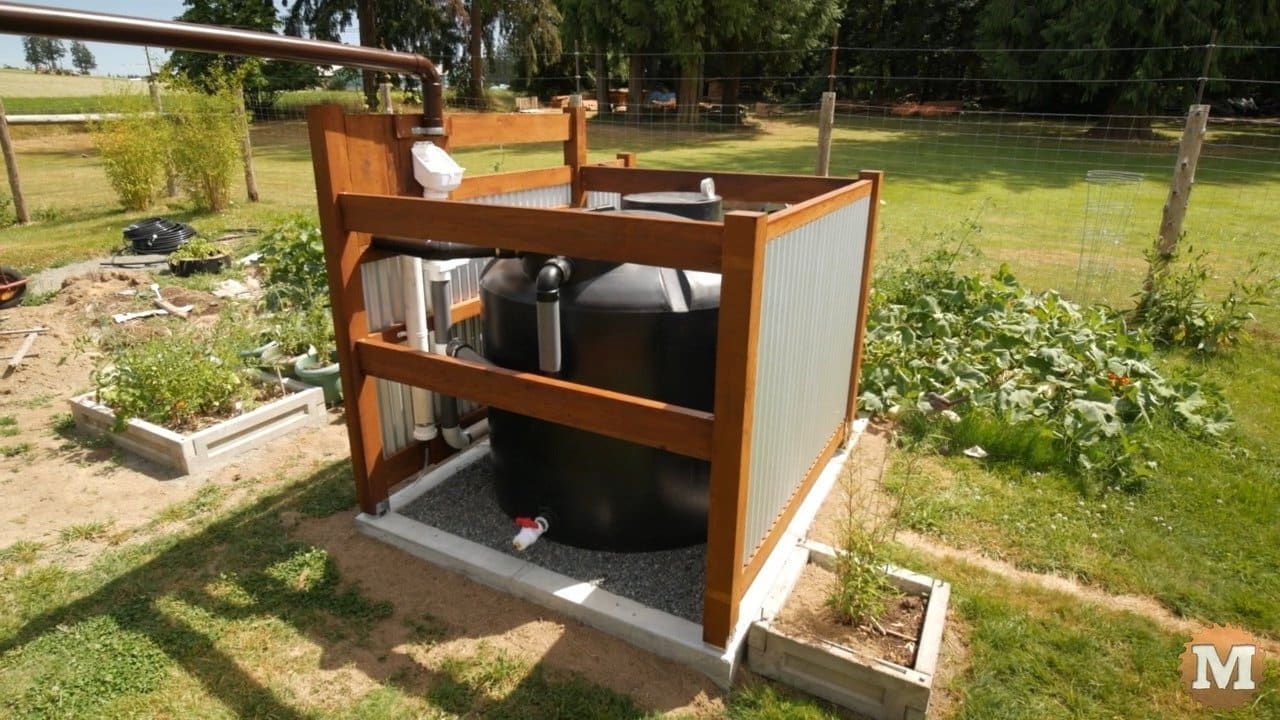
So, in this first episode I’ll go thru building a solid foundation to support the weight of all that water. In part 2 I’ll connect the tank to the roof gutters. And in Part 3 I’ll detail how I build the fence that surrounds part of the tank AND cover connecting the rainwater harvesting tank to a pump to feed our garden system.
Our property is on Vancouver Island and we get a lot of rain in the winter but the summers seem to be getting drier and drier. We need enough extra water on hand to make it through July and August mainly. So, we estimated that this 1200 gallon and the other 500 gallon tank would be just big enough to cover that dry spell. Drawing from these tanks for part of the time should give the shallow irrigation well some time to recover.
I’ve never installed a rainwater tank beyond a 55 gallon poly drum before so I was learning as I was going along. There’s a lot of great info online for installing tanks. I really like the video Frank Howarth did a few years back on the tank he put in beside his shop. I can now totally relate to his experience and how long it took him, thinking through the process, before drilling his first hole in the rainwater harvesting tank.
(Disclaimer: As an Amazon Associate I earn from qualifying purchases. Thank you for helping to support my content this way. )
Our property has a gradual slope and there’s no truly flat spot for this tank. I wanted to install it on the downslope side of these two workshops and draw water from their combined roofs. And given the height of the tank and the height of the gutters we found the best spot just off the corner here.
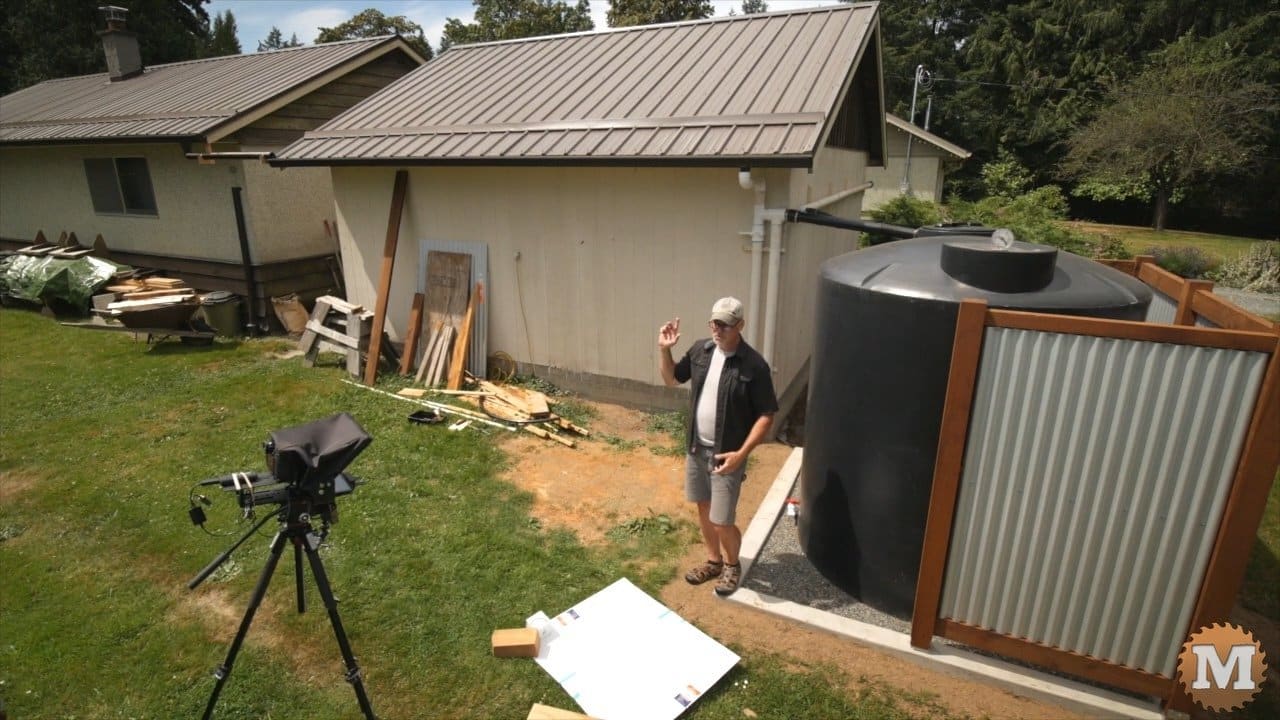
We needed to build a solid, flat base for the tank that also drained well. Water coming off the top of the tank runs down the sides and may erode the base material. So that was a consideration in the design of the tank foundation. I decided to pour a low concrete curb to hold the gravel and also to support the fence later.
I have several other projects on the go this summer that require a low concrete wall so I can reuse the forms. For me, it made sense to invest the extra time and expense to pour concrete for this.
Laying Out the Footing
I set the rainwater harvesting tank where I thought it should go and marked lines on the lawn.
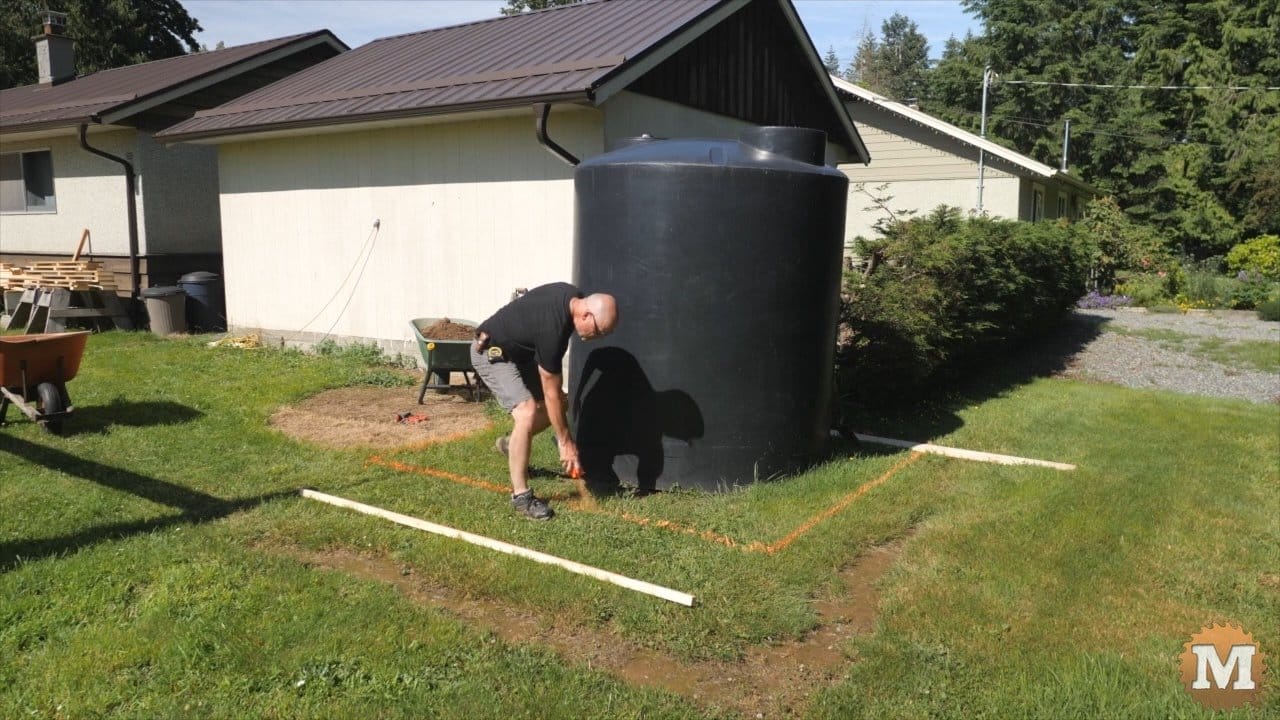
This tank is not heavy but large and awkward. Works best to roll and lift a bit at a time. With a spade I cut the sod into a grid of square sections.
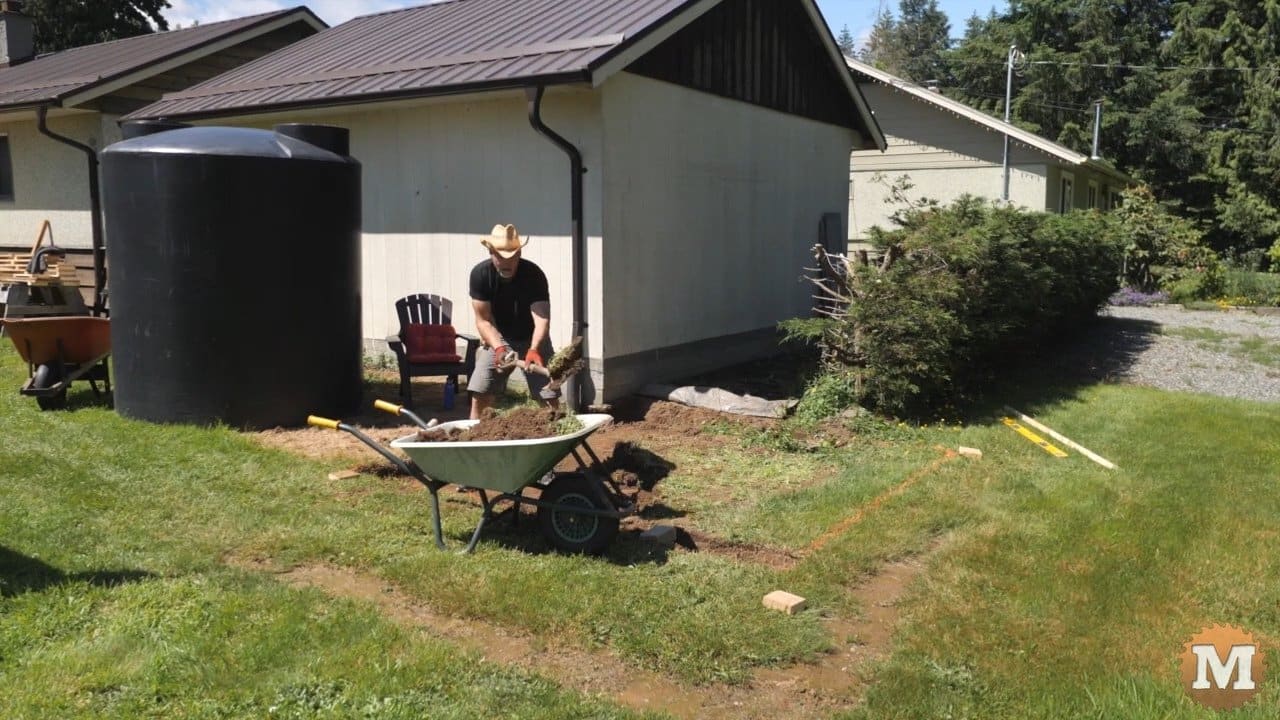
Then removed the sod and topsoil to create this flat, level spot.
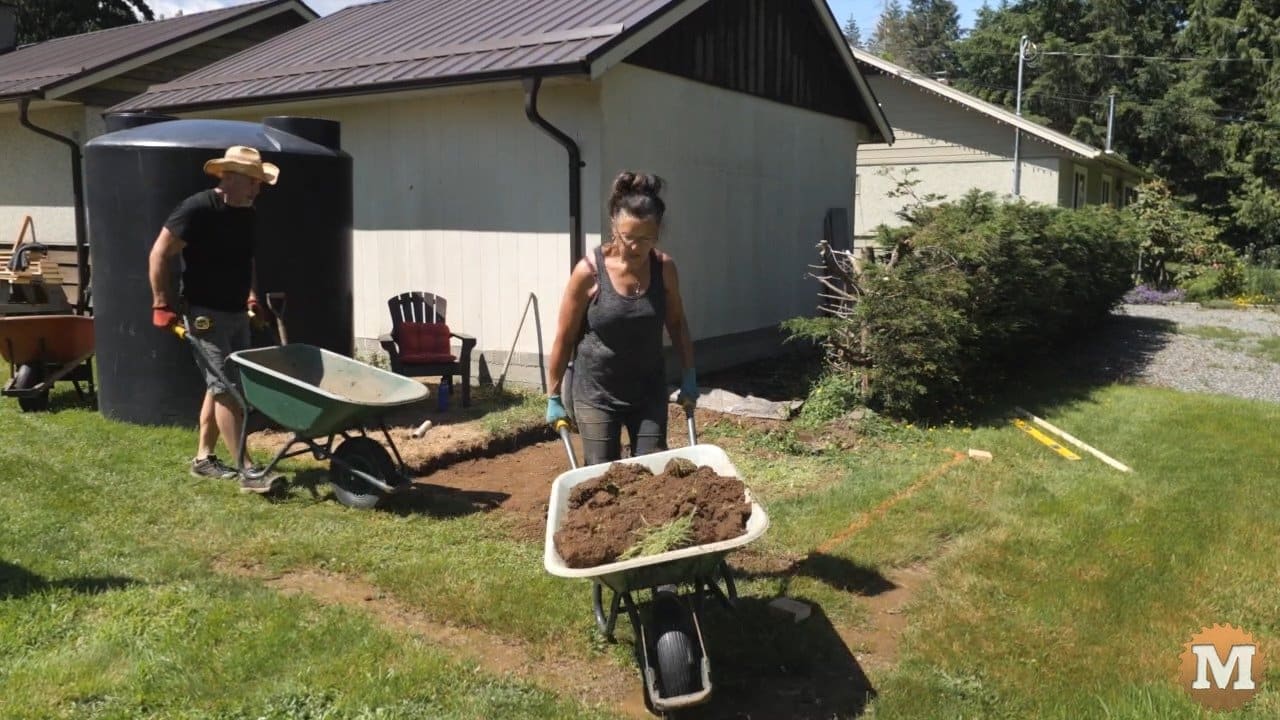
It took a few hours and a lot of wheelbarrow trips for Marilyn, but it was a really good workout.
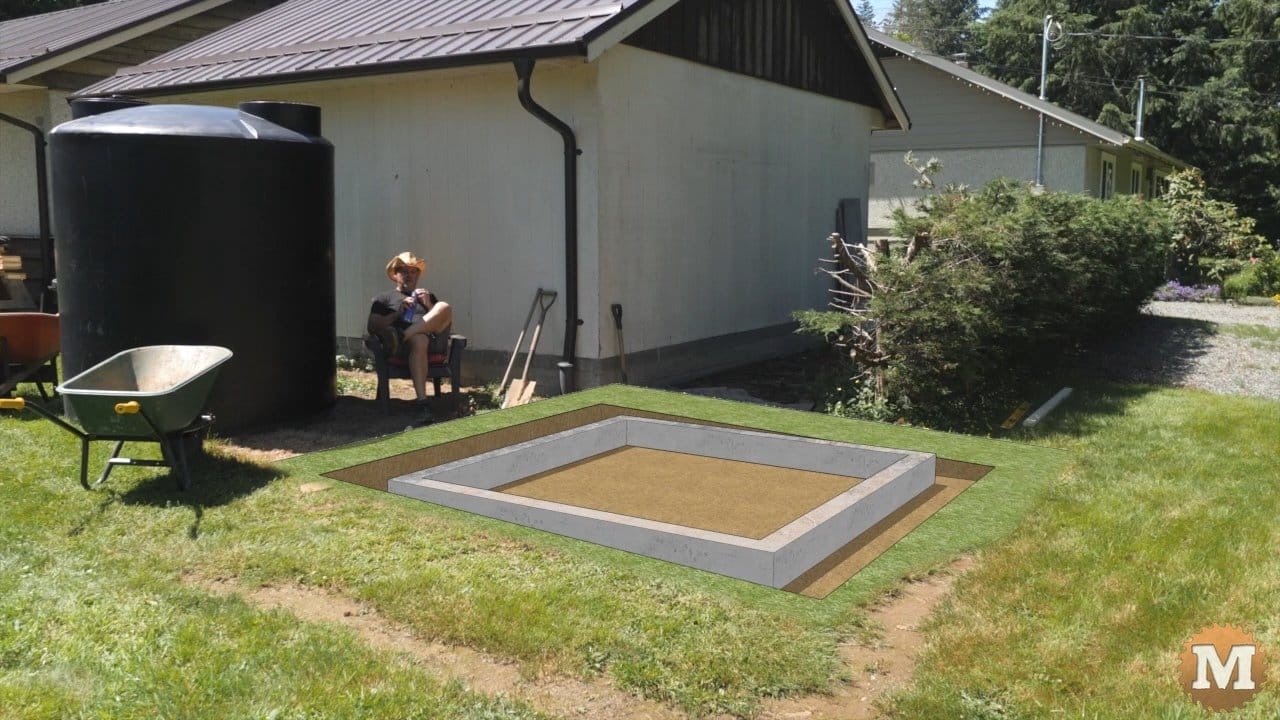
A 5 inch wide by 8 inch high curb will be poured here. Then filled with gravel.
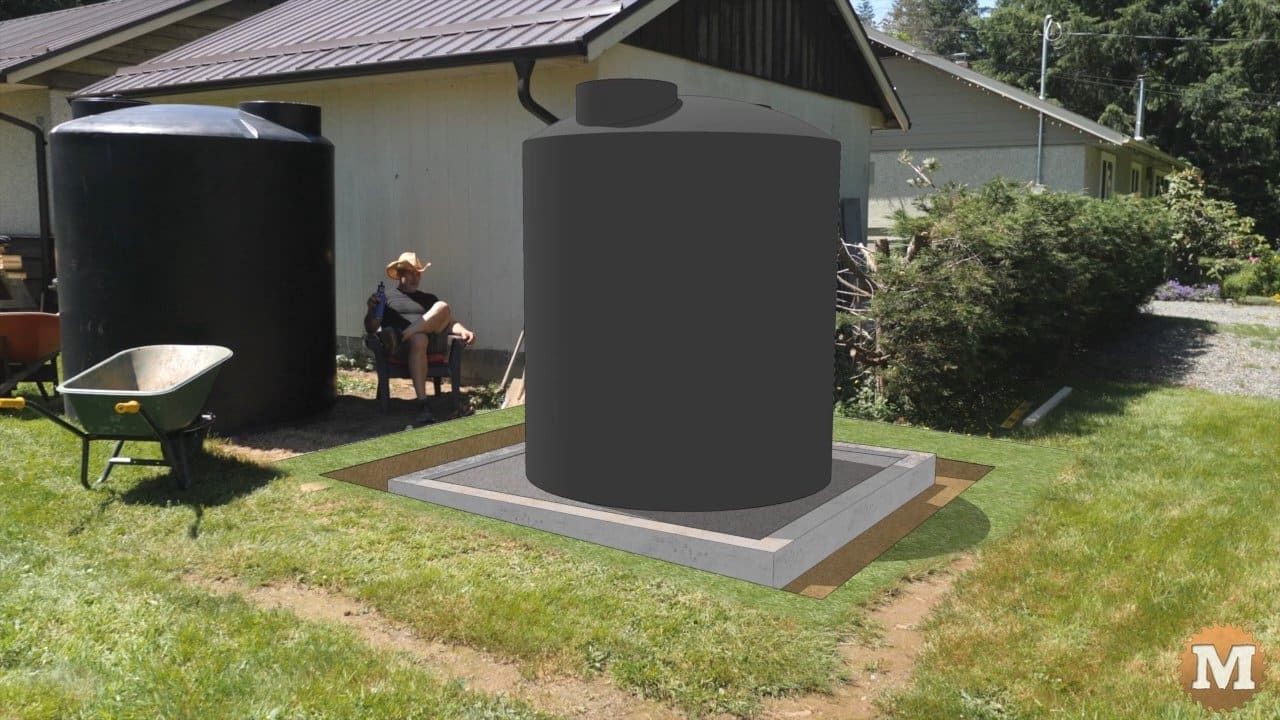
And the rainwater harvesting tank will sit on that.
Drain under the Rainwater Tank
Beside the tank there’s a perforated pipe about a foot underground that’s surrounded by drain rock.

We dug that in a few years ago to help with drainage behind the shed and workshop.

As I’m essentially creating a bathtub with the concrete curb, I’ll need a path for the water to flow away. I wanted to add a short length of pipe to direct the water from under the tank to the drain rock surrounding that existing pipe. I dug a trough and lined it with drain cloth, added some gravel, then the pipe, more rock.

Then topped it with more fabric and rock.
Forms for the Rainwater Tank Concrete Base
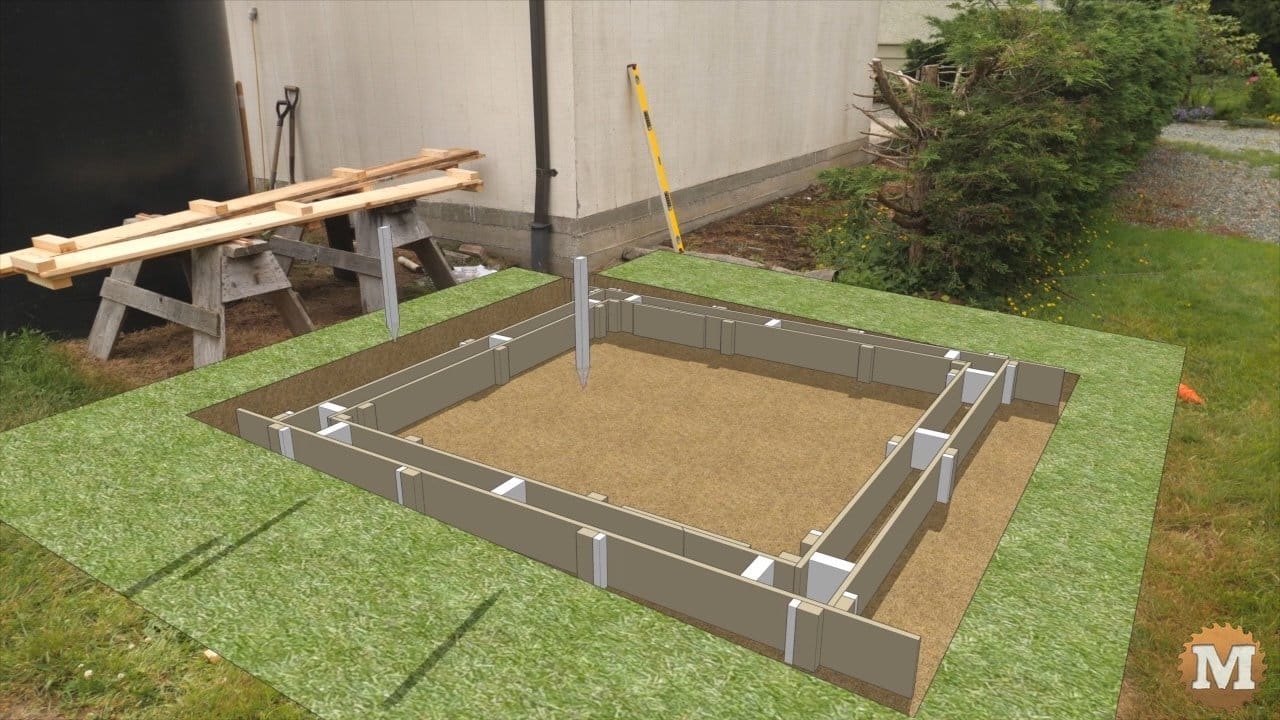
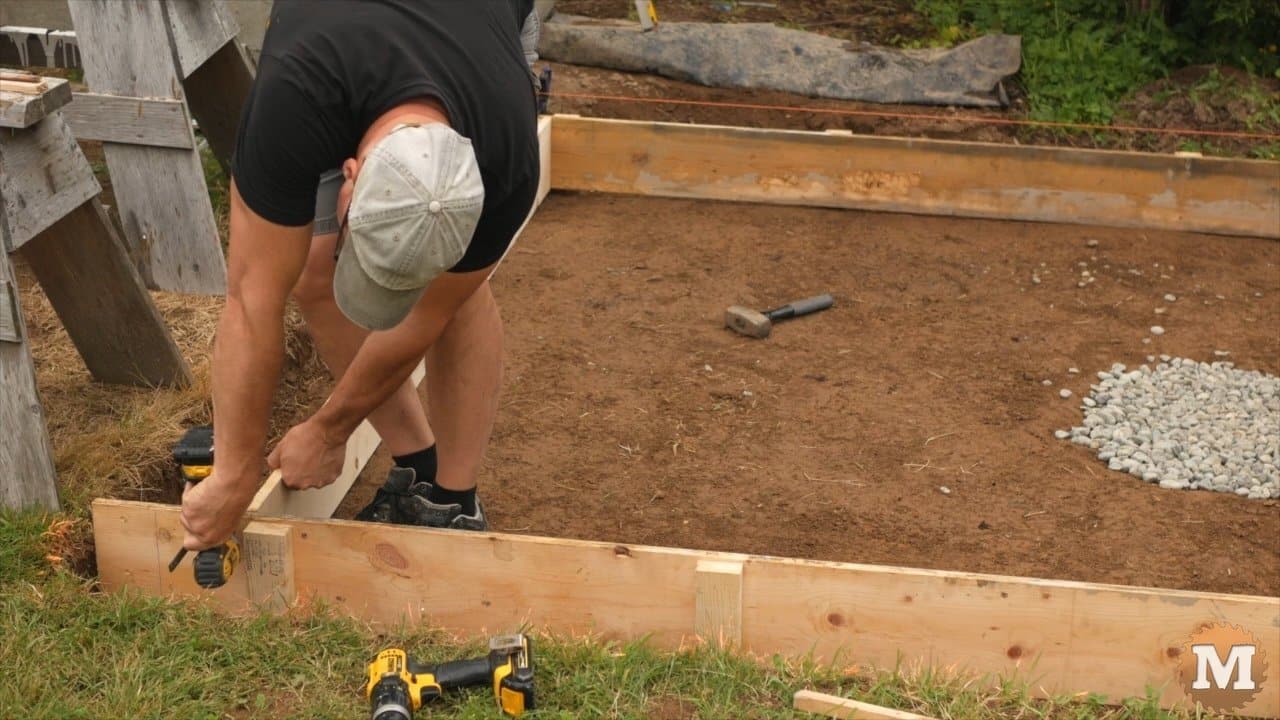
I made the forms from 1×8’s. They will be held in place with 1×2 stakes. Temporary 5 inch blocks help with spacing the inner and outer forms. More stakes are driven in and then the blocks removed.
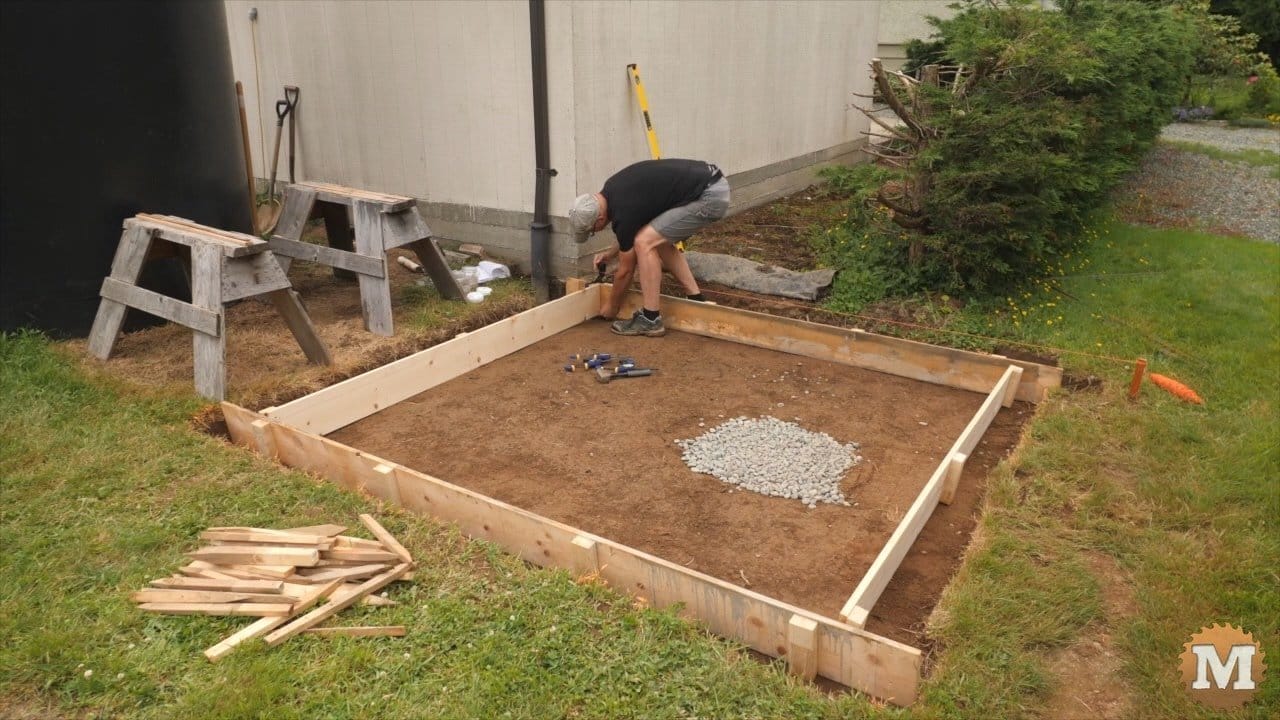
I attached 2×4’s to these boards to screw the stakes to. I’m not a forming contractor and I’m sure there’s a simpler way to do this but, this is what works for me. I roughly position the outer forms and clamp the corners together. Then run in some screws. This worked well to create the basic box. Then I squared and levelled it as I was driving in stakes to hold it in place.
It’s funny what you discover when you film yourself working on a project. I seem to have a furniture or woodworkers approach to what is really rough carpentry. I’m not a carpenter or a builder. I simply have a passion for building things. And, I don’t have an issue at all with constructive criticism or tips from you builders out there. We can all benefit here so I welcome your feedback.
With the outside form boards in place I can make the inner walls that will create the curb. I wasn’t sure how well the forms would come apart on the inside as I was worried that they would bind against each other.

