The Pergola Rafters
Like the beams, the rafters are cut to length. The end profile marked and cut. And the edges chamfered.

The rafters fit over the beams. Two notches on each end of the rafter needs to be cut. I mark the rafter where it sits on the beam.

If the marks line up on the four rafters that surround the posts then I gang them together with clamps. I set the depth required on my circular saw and make a series of close cuts through the first four rafters. With a hammer, I break off and knock out these wafer pieces. Then clean up with a chisel.
Chisel Work

Alternatively these could be cut individually with a jigsaw. Or, if the marks on the beams don’t line up just so.

These rafters are set in place. And they are screwed directly to the posts.

Build a Pergola – The Braces
The corner braces are made from 2×6 stock. They are simple braces with 45 degree angles. First I cut the side braces on the miter saw. Then drill holes for the carriage bolts that will connect it to the beam. Then I’ll mark the hole location where a lag bolt will attach it to a post.

These braces are attached with lag bolts in the same way as the woodshed I built.

The woodshed braces are curved but the lag bolts were done the same way. I drilled into the post, then ran in the bolt with an impact driver.

Drill Press
Now I’ll cut the side braces to length. And pre drill the carriage bolt holes.
(Disclaimer: As an Amazon Associate I earn from qualifying purchases. Thank you for helping to support my content this way. )
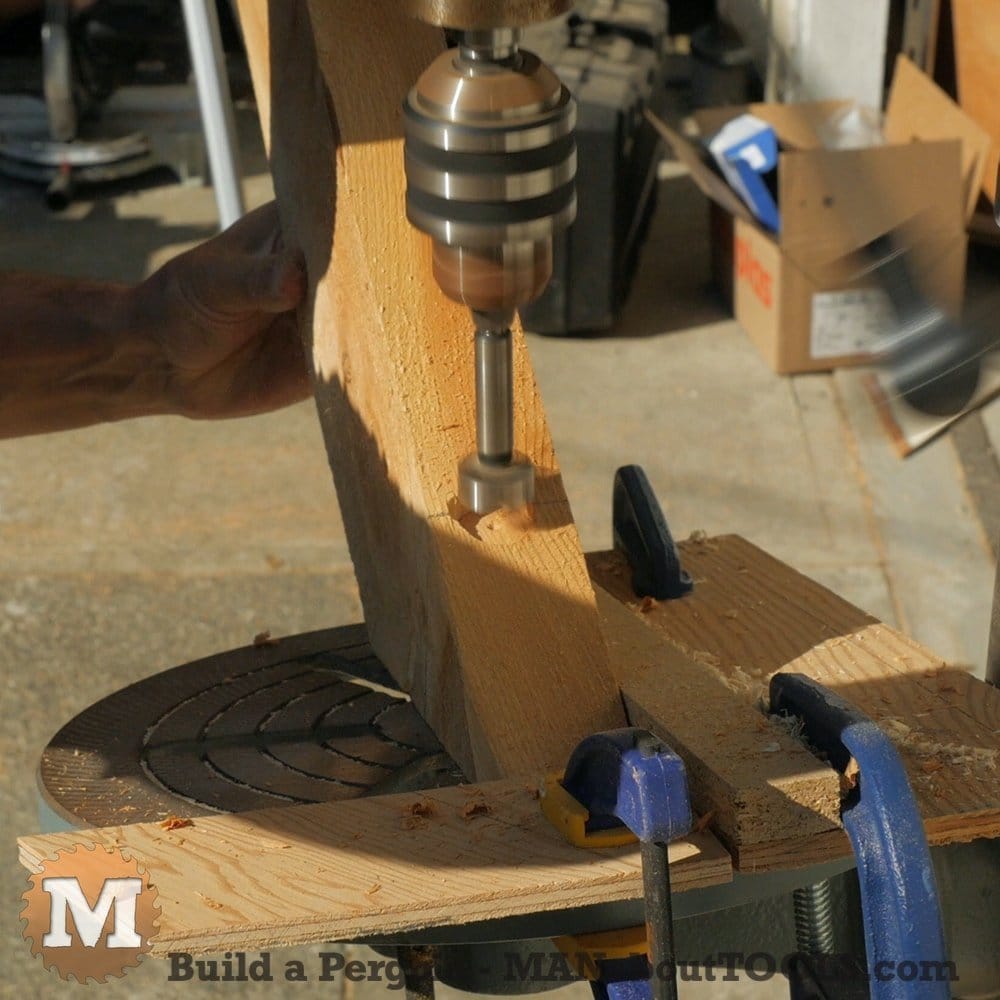
The lag bolt holes are drilled at approximately 20 degrees so the lag bolts will pull them into the corner. I tilt the table of my drill press to 20 degrees. A forstner bit can be used first to countersink a larger diameter for the washer of the lag bolt. Then I drill through for the shank of the bolt.

It’s possible to freehand all of this during construction if you don’t have a drill press.

The braces are now chamfered and stained.

A little construction adhesive would help during assembly to add a bit more rigidity to the pergola. The braces are clamped in place and holes drilled for the carriage bolts at the tops. And holes are also drilled in the posts for the lag bolts as shown previously. The top of the brace is bolted to a rafter or a beam.
Adding the rest of the Rafters

Now the temporary bracing can be removed. And the rest of the fill-in rafters are toe screwed to the beams.
Build a Pergola – the Louvers
Next the 2×4 louvers are made. They’re made in the same way as the beams and rafters. They are marked, ganged together with clamps, and notched with a circular saw. They are set in place and screwed to the rafters.

If you want more shade you can add more louvers to the pergola. If you’ve always wanted to build a pergola, then this simple pergola design might be the one for you.
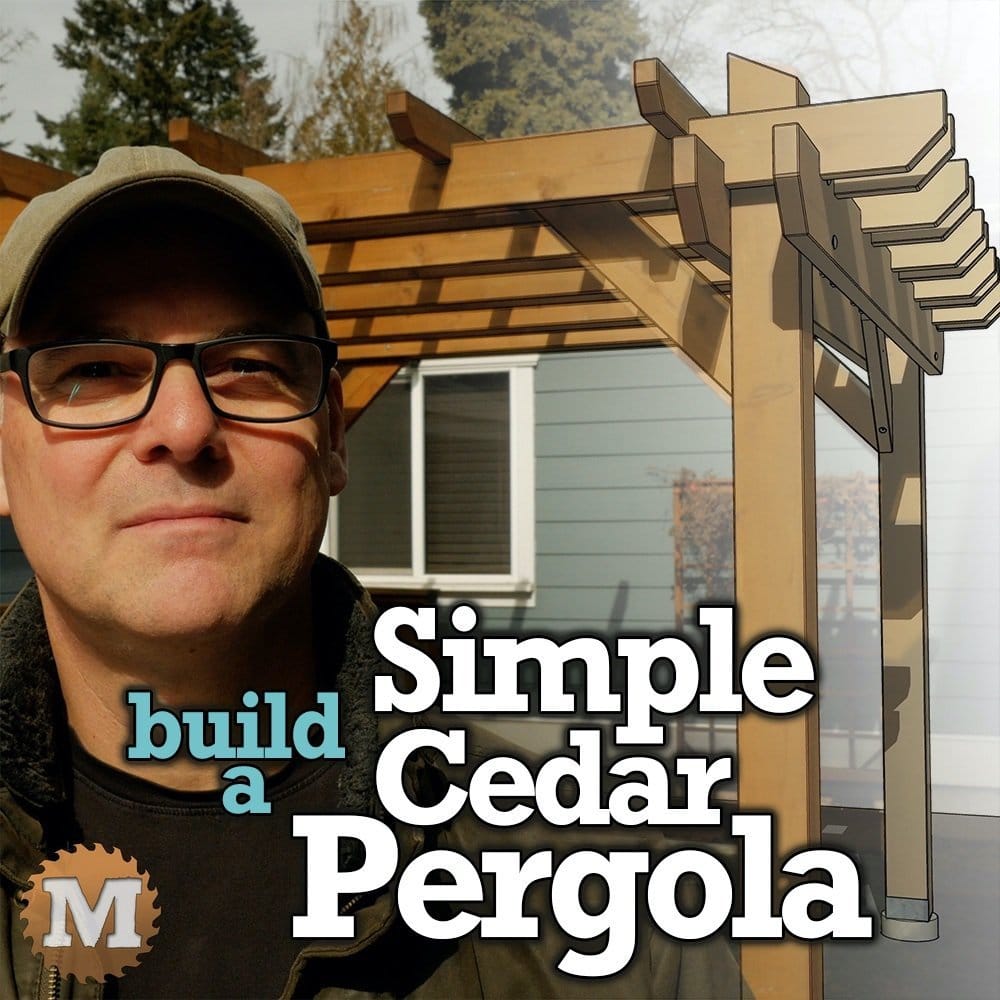
And this simple pergola is done.
What I like about this pergola is it’s simplicity and how the rafters are notched into the beams, and the louvers into the rafters. I think taking the extra time to do that is well worth it. I also like the chamfered edges – I think that’s also worth the extra effort.
I finished the pergola with a semi-transparent stain. I stained each part prior to assembly. Not always required but it can make things easier to roll on finish with boards laying over a sawhorse instead of overhead.
And thanks to everyone who has supported our channel through Patreon. It’s very much appreciated.
I have a full set of plans available for download.
If you have any questions, please leave them in the comments below. Thanks for reading

