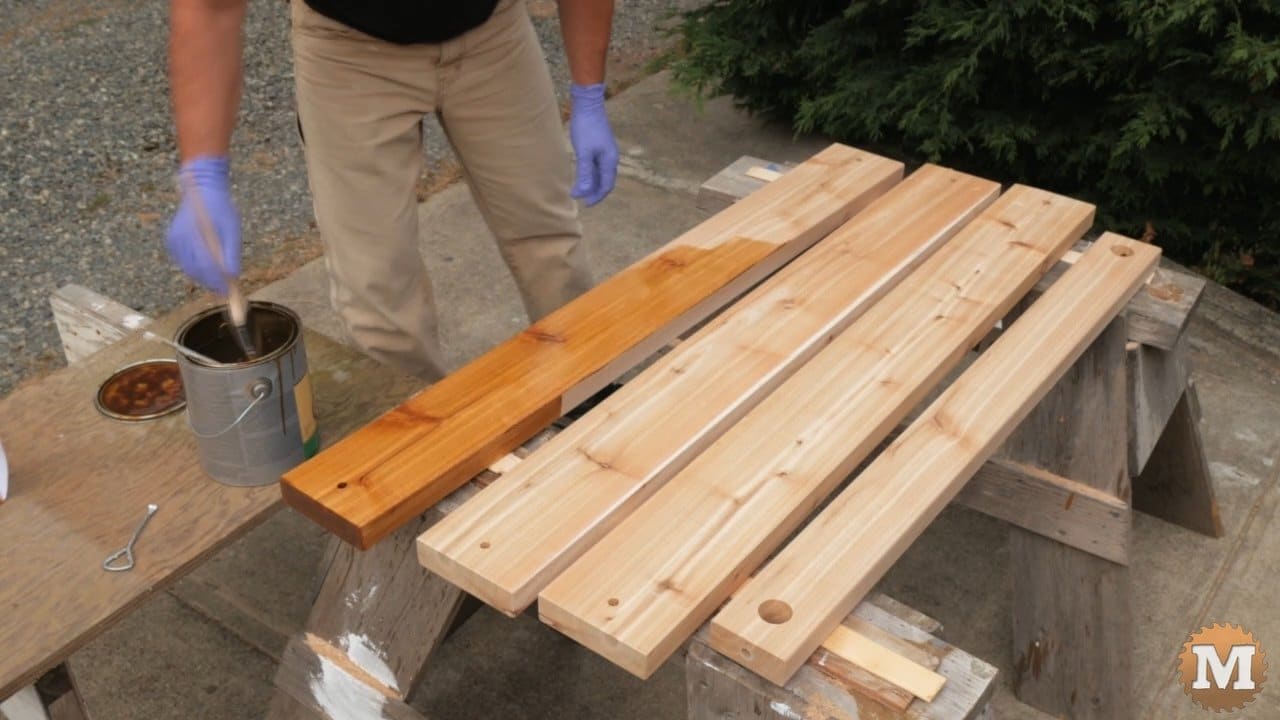
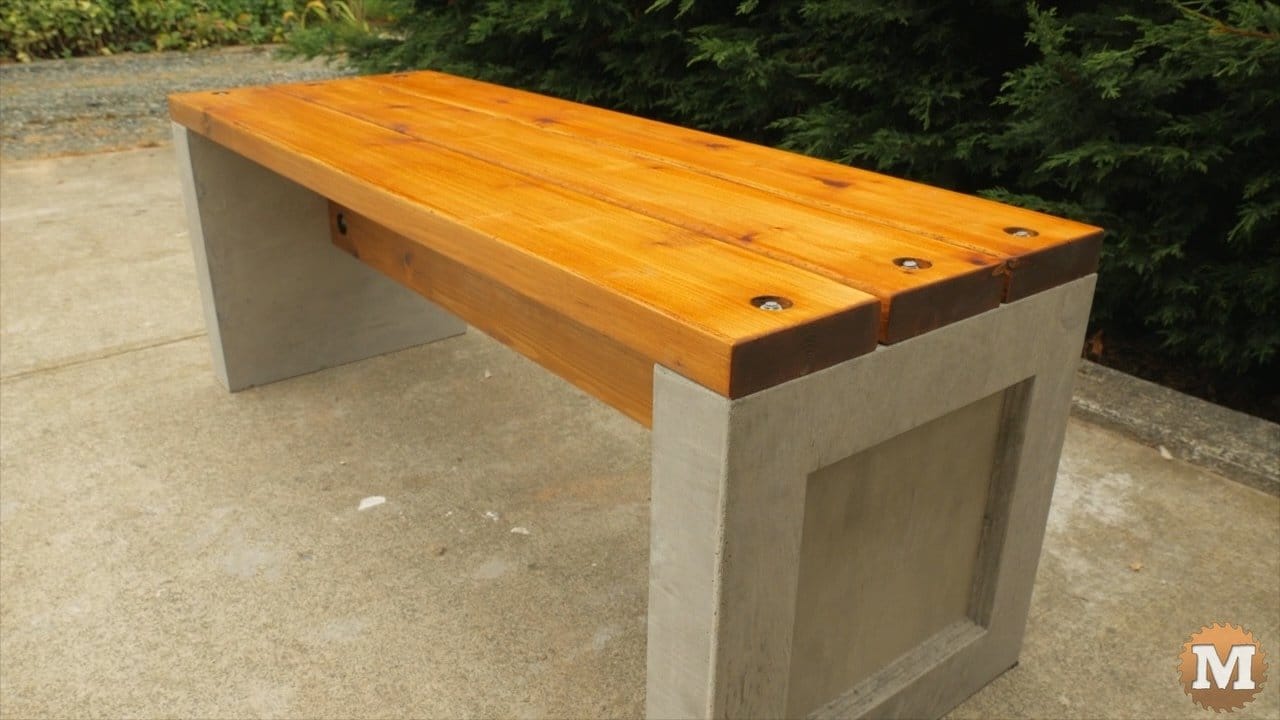
Stain the Western Red Cedar bench
Then apply two coats of oil-based stain and leave everything to dry overnight.
Assemble the Concrete Garden Bench
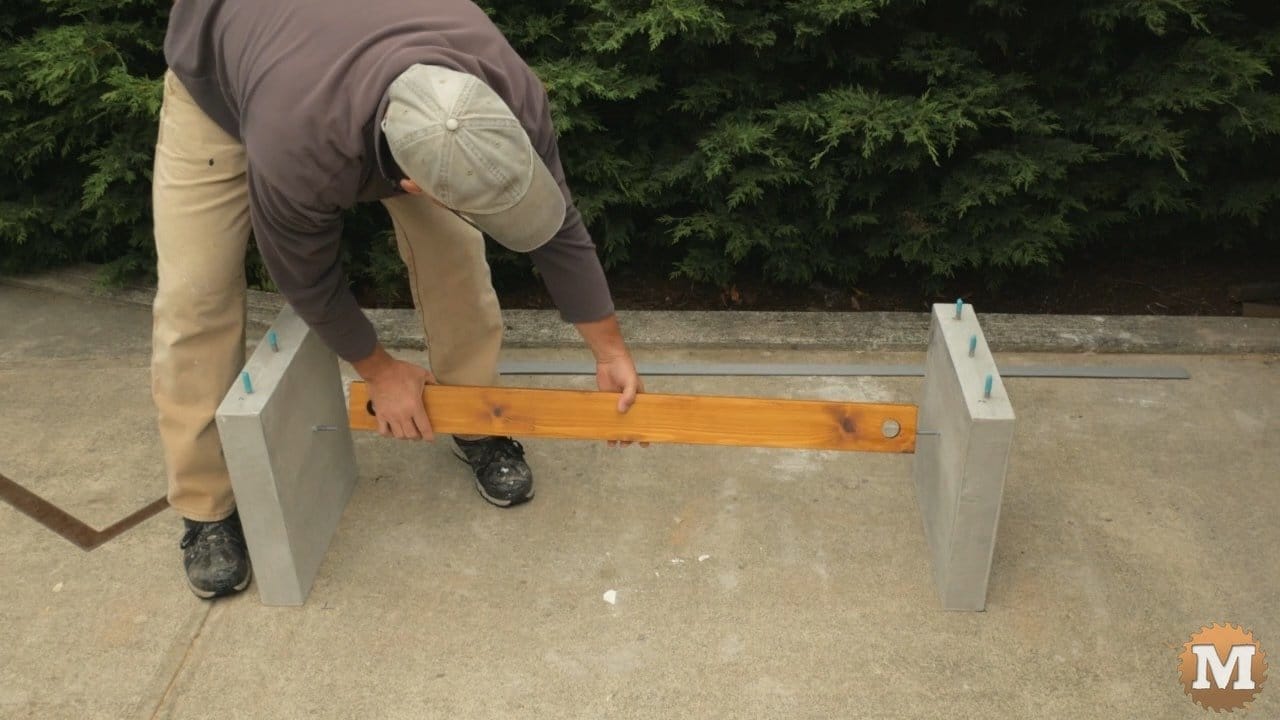
To help with assembling the bench I mark the corner locations of the legs on a flat surface.

I use a long straight edge and framing square for this. I set the legs in place while I slide the stretcher onto the bolts. Then add the seat planks and check everything for square. I add washers and nuts to the seat bolts just finger tight for now.
I slide the flat washer and lock washer on the stretcher bolts.
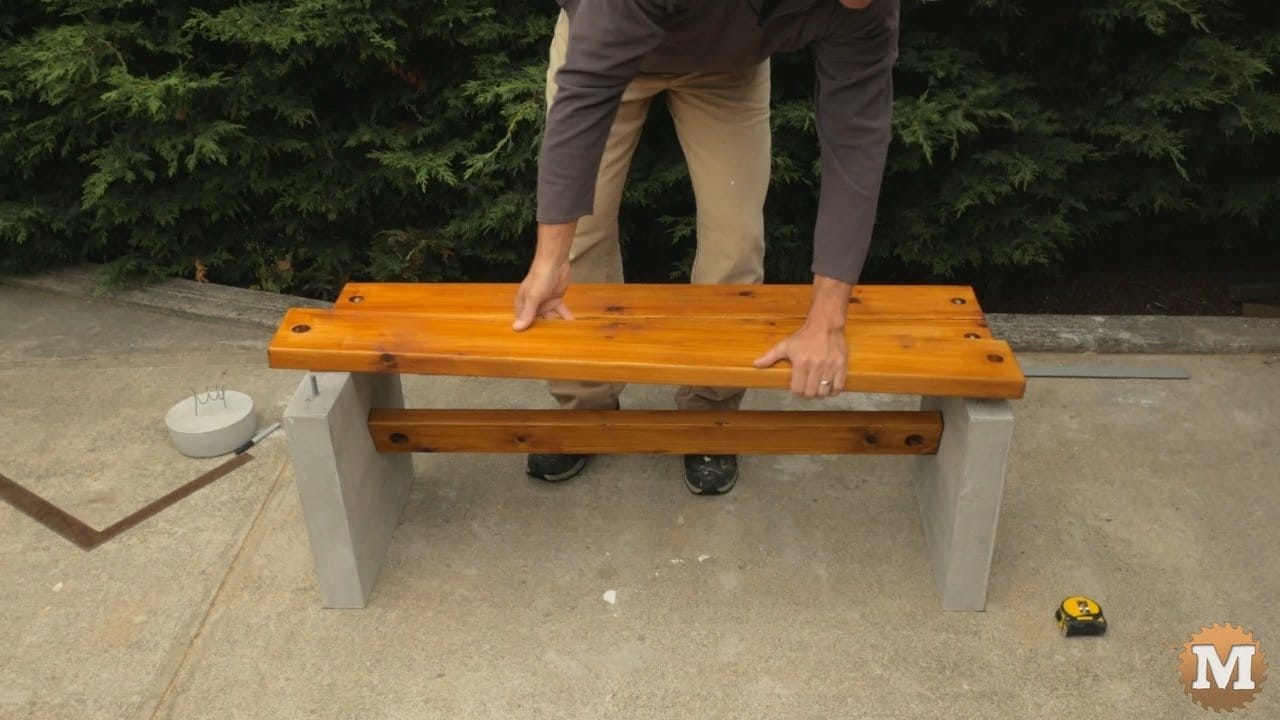
Then thread the nut on the bolt and tighten with a wrench. Not too tight, just enough to pull the end of the stretcher against the concrete leg. And I do the same on the other end. I can now tighten the nuts on the seat planks with a socket wrench .

The ties are screwed to the seat planks from underneath. I use a scrap strip of wood and clamps to hold it in place while I run in screws. With the seat planks having only two attachment points, the ties are required to counter any twisting forces.
I realized that my center two pilot holes should have been offset as the driver was blocked by the stretcher. So I just drilled two more holes.
Rubber Gaskets
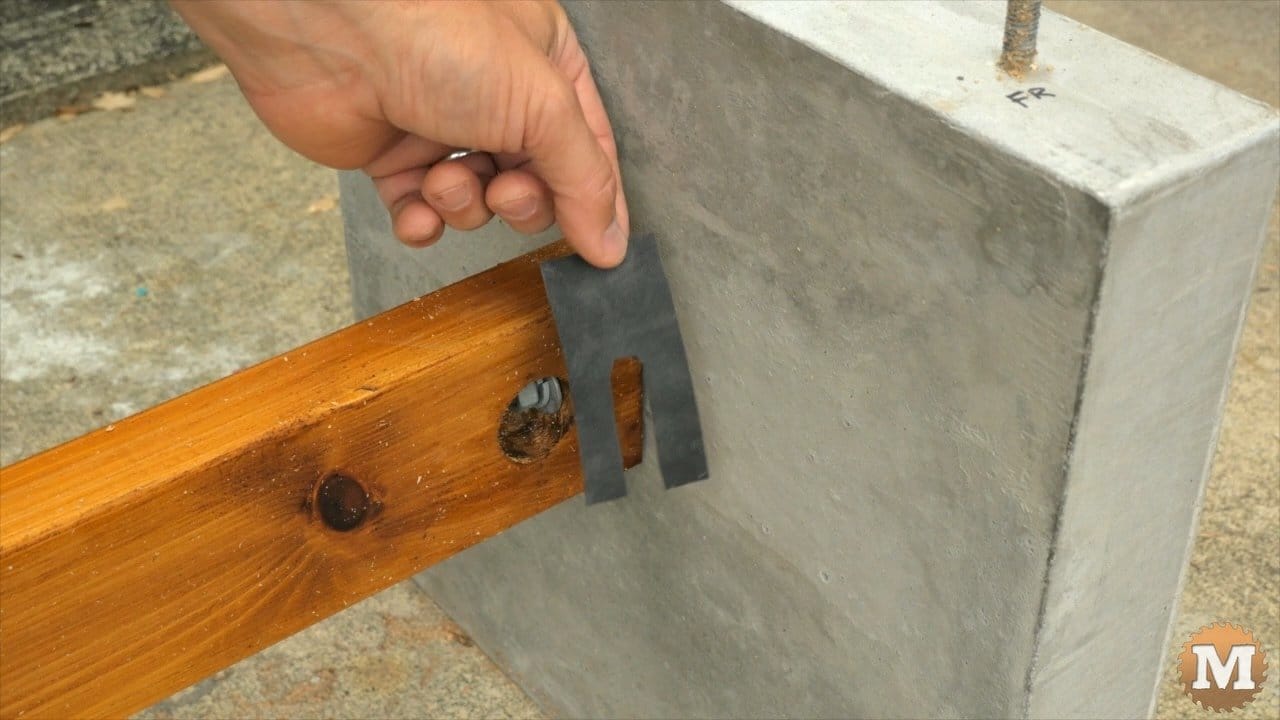
I forgot to add rubber gaskets to keep any wood from contact with concrete. Wood will wick moisture from concrete and cause rot. So a rubber gasket will help prevent this. I used an old tire inner tube and cut the gaskets with scissors.
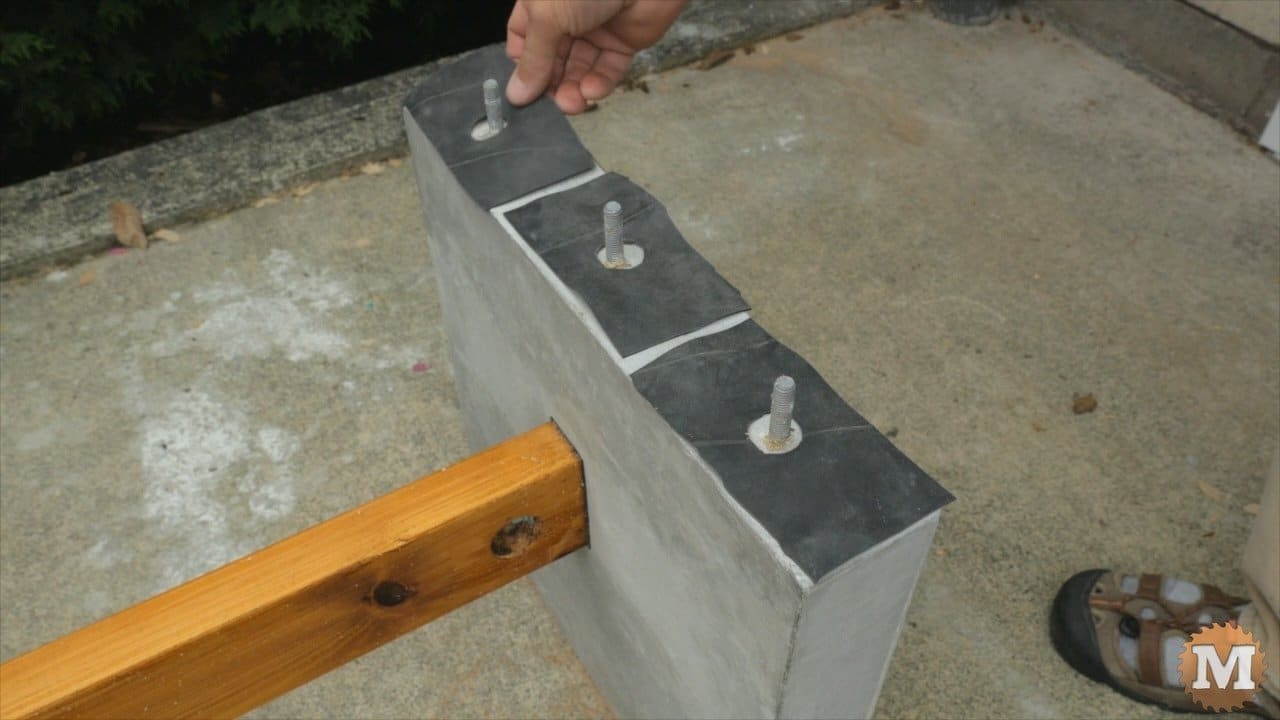
When I move this bench out to the garden I’ll add the rubber gaskets then.
Please leave a comment with your thoughts or suggestions. I am amazed by the wealth of knowledge out there and I so appreciate everyone who has shared it.
Red Cedar and Concrete Bench
So I hope you have enjoyed this post, and thank you so much for reading. If I make any further improvements or changes I’ll post them here.
And, while you are here, please hit the Support Link to help us make more projects and videos like this. We really appreciate anything you can do to help us out!
(Disclaimer: As an Amazon Associate I earn from qualifying purchases. Thank you for helping to support my content this way. )

