Build your own Timber Frame Garden Pavilion. Plans available for download in PDF Format.
See the How to Video.
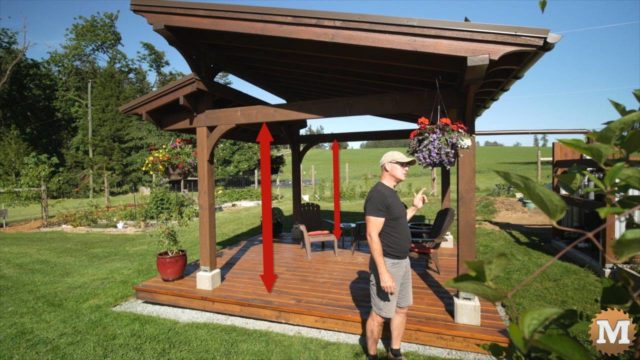
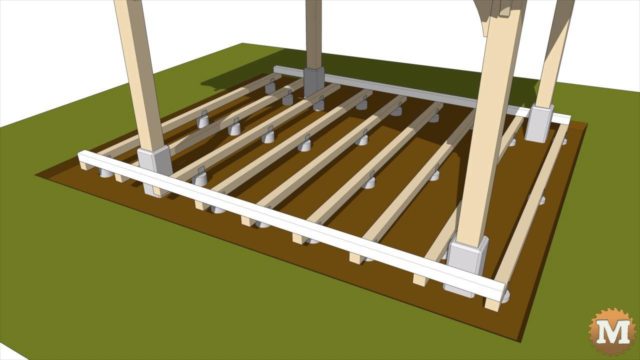
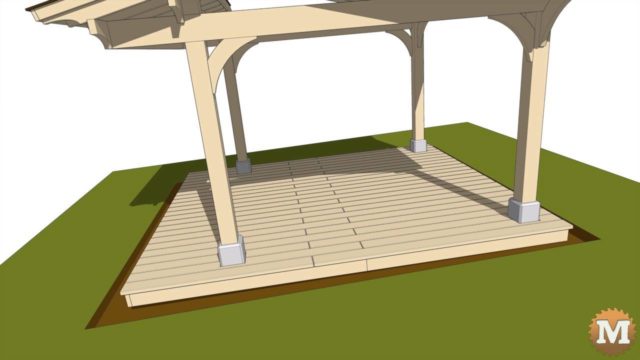
We built a floating deck under our garden pavilion. This low-profile floating deck is stand alone and hovers only a few inches above the grass in our garden. This stained deck is build under a timber frame style pavilion. The full length video details the entire construction of this floating deck from design through to straightening crooked boards, sanding, and staining. The deck is supported with 4×4 pressure treated joists that have poured concrete footings. Over the joists are rough sawn fir deck boards with a rustic chamfer and milling imperfections.
Build a Low Profile Floating Deck

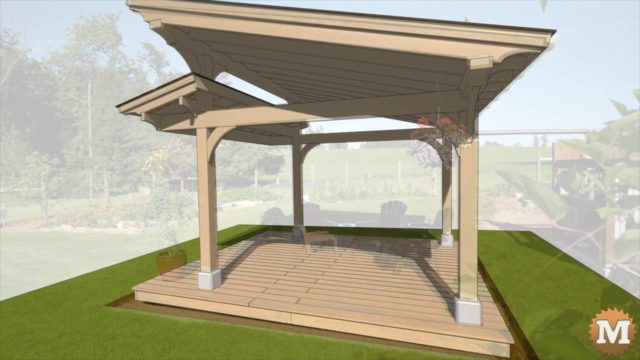
Timber Frame Style Design
(this blog post is based on the transcript of the video)
On this episode I’m building a low profile floating deck under this garden pavilion.
Deck Design Considerations
When I designed and built this pavilion I wasn’t sure what kind of deck I’d build under it. Or even if it would have one at all. So I wasn’t thinking about head clearance that much. When we decided to have a wooden deck then the height of these two side beams became more important.
With any deck I built I wanted at least standard doorway head clearance under these beams. And that meant to get that six foot nine clearance the deck would need to be low profile. And that would mean I couldn’t just have two footing supported beams with two by six or two by eight joists and standard deck boards over that.
So here’s what I did.
Deck Sketchup Model & Animation
To keep the profile very low but with just enough ground clearance for ventilation I chose 4×4’s for the joists and to forgo any beams.
(Disclaimer: As an Amazon Associate I earn from qualifying purchases. Thank you for helping to support my content this way. )
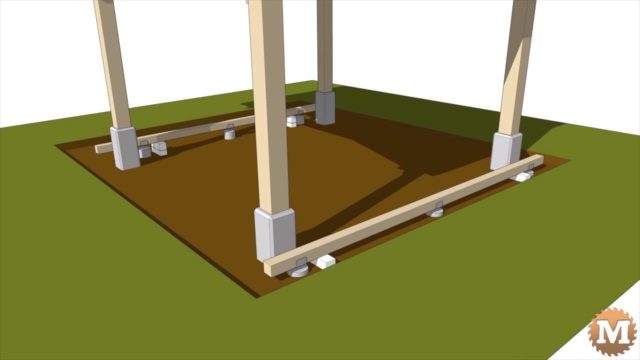
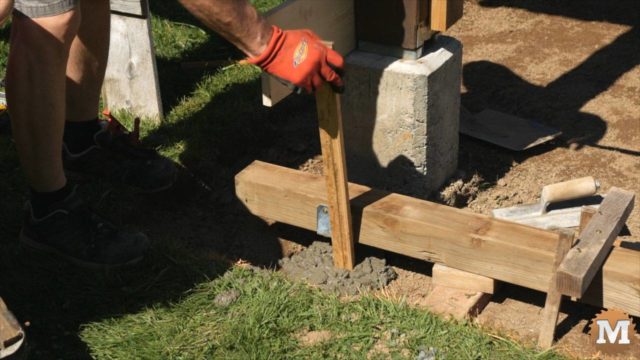
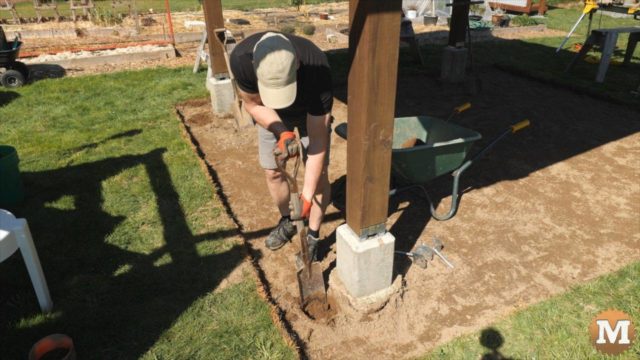
And for each joist I’d attach the galvanized joist hanger first then pour three small concrete footings to support it. The first two joists would be levelled and laid on blocks while the concrete set up. Starting with the southern most joist, then to the north on the other side of the pavilion pier.

When these first two could support weight I hung the middle joist over them. Then three more joists were hung and their footings poured. Then the final three.
And this was done over several days allowing the concrete to harden. And this method seemed the most manageable for me.
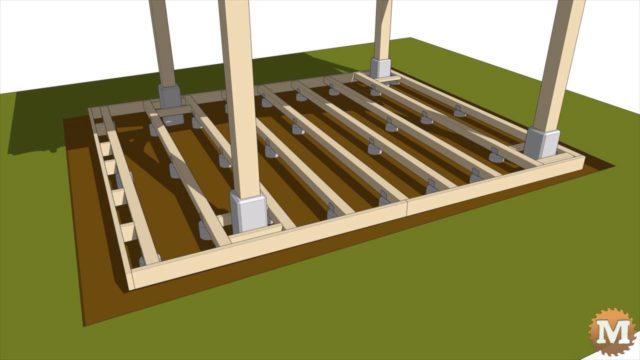
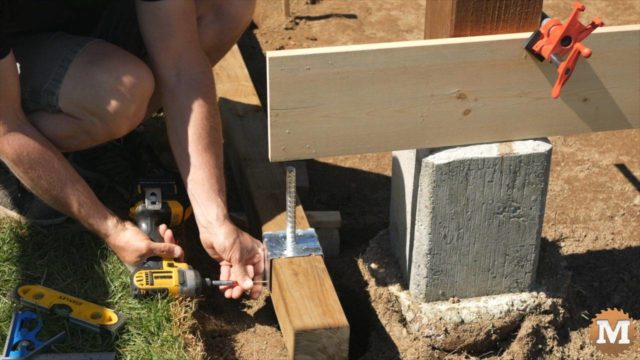
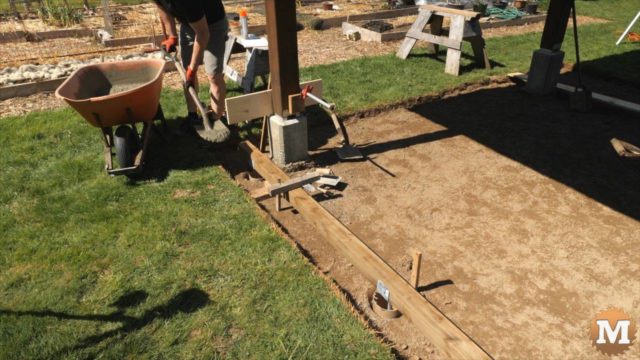
With all the concrete done I removed all the temporary 4×4 supports and added the 2×6 rim joists. The north side rim joist is cantilevered so some blocking was needed there. Finally a few 2×4’s around each pavilion pier complete the framing. And fir 2×6 deck boards over that.
This deck is roughly 12′ x 14′ in size.
Remove the Sod
So once I had the design down it was time to remove the sod under the pavilion.
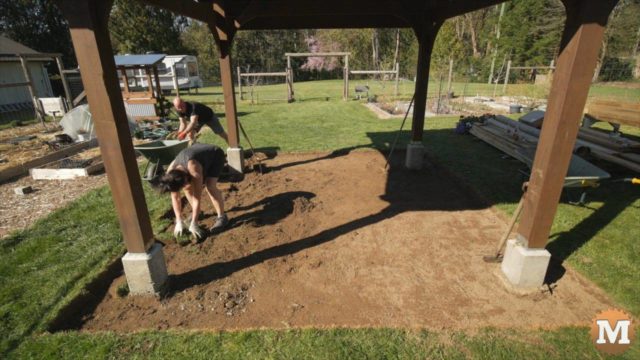
We had an unexpected good run of weather for April so we just had to go for it. I marked the lawn then cut into the sod with an edger. Then continued with the edger in a grid to chop up the sod into small blocks. Then with a flat shovel we broke these away and into wheelbarrows.
The sod was piled up and covered with a black tarp to kill off the grass so we could then break it up, and later add compost for topping up garden beds.
Deck Footing Holes
I really needed to work off some excess stay-at-home Covid weight so what better idea than to remove sod by hand. It was a long tough afternoon but in the end we got it done.
I originally thought I’d mark and dig all the footing holes, assemble, level, and suspend the entire deck frame, then pour all the footings at once. And for a very small deck this would be possible. But, the weight of mine would be more than I wanted to handle solo so I decided to start with one joist at a time.
Prepping the Floating Deck Joists
I know the tops of the pavilion piers are all on the same level plane so I used them as reference for the height of the first two joists.
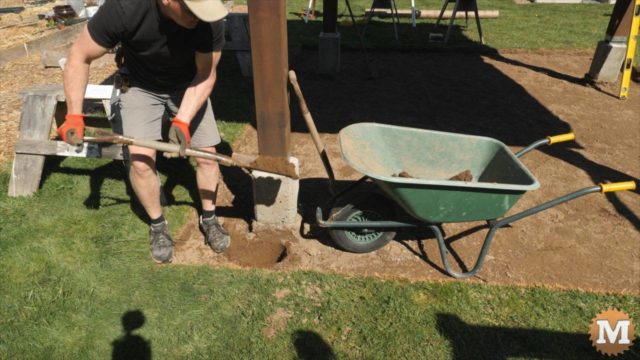
With the concrete piers of the pavilion to work around I’d be using a shovel to dig the footings. Instead of a post hole auger. Theres just no room to pivot the handle. But this was okay as our soil has basically no rocks and is soft this time of the year. Plus I was only going down a foot and using 6 inch tubes. But I know there’s 27 of these so who am I kidding that this too would not be part of the spring deck weight-loss project.
I marked the first three footing hole locations and dug those. Then I set the first 4×4 joist on blocks to level it. I attached the post brackets to the joist and dropped a tube in each hole. A few stakes will hold the joist in place as I shovel concrete around and into the tubes. When the tube is almost full I can settle the concrete and top it off.