Overall Size and Placement of Lean-To
I built this pavilion with a 12 foot by 9 foot size for a few reasons. I wanted it wide enough to allow for full access to the roll up door. I also wanted the taller posts to be set back from the shop wall by 3 feet for a walkway. And I wanted the posts on the low end to be well back from the driveway.
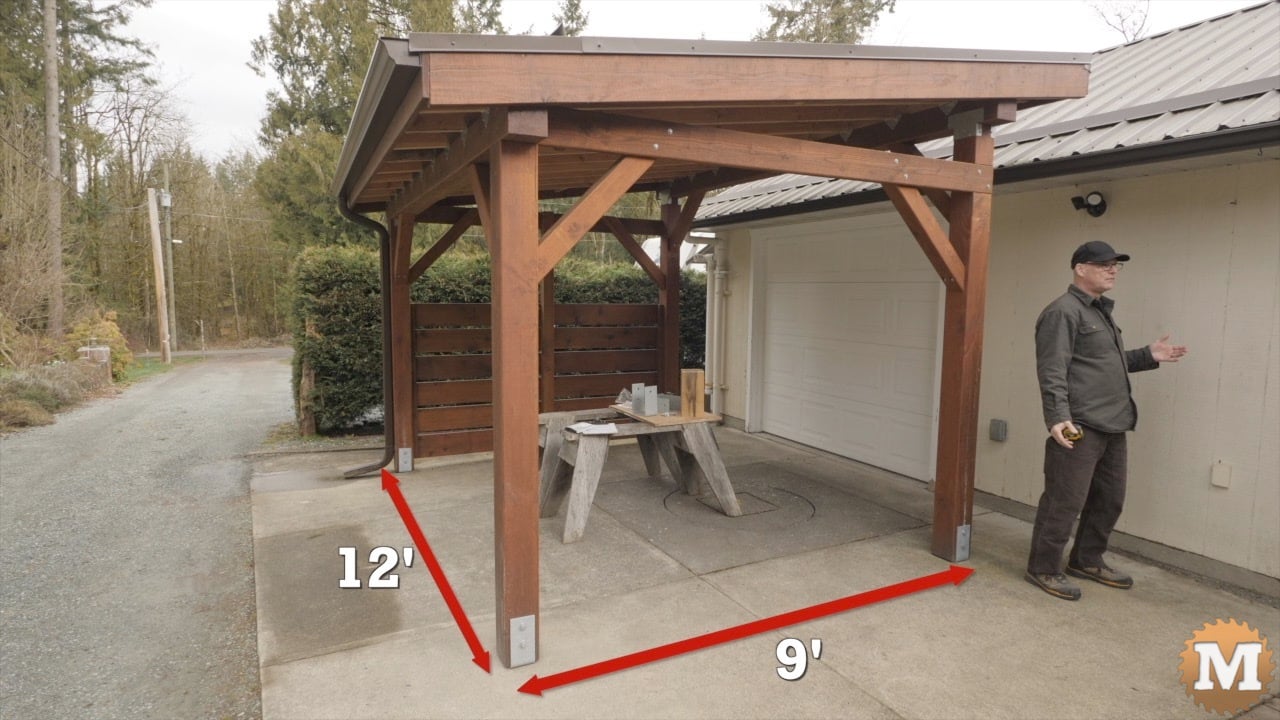
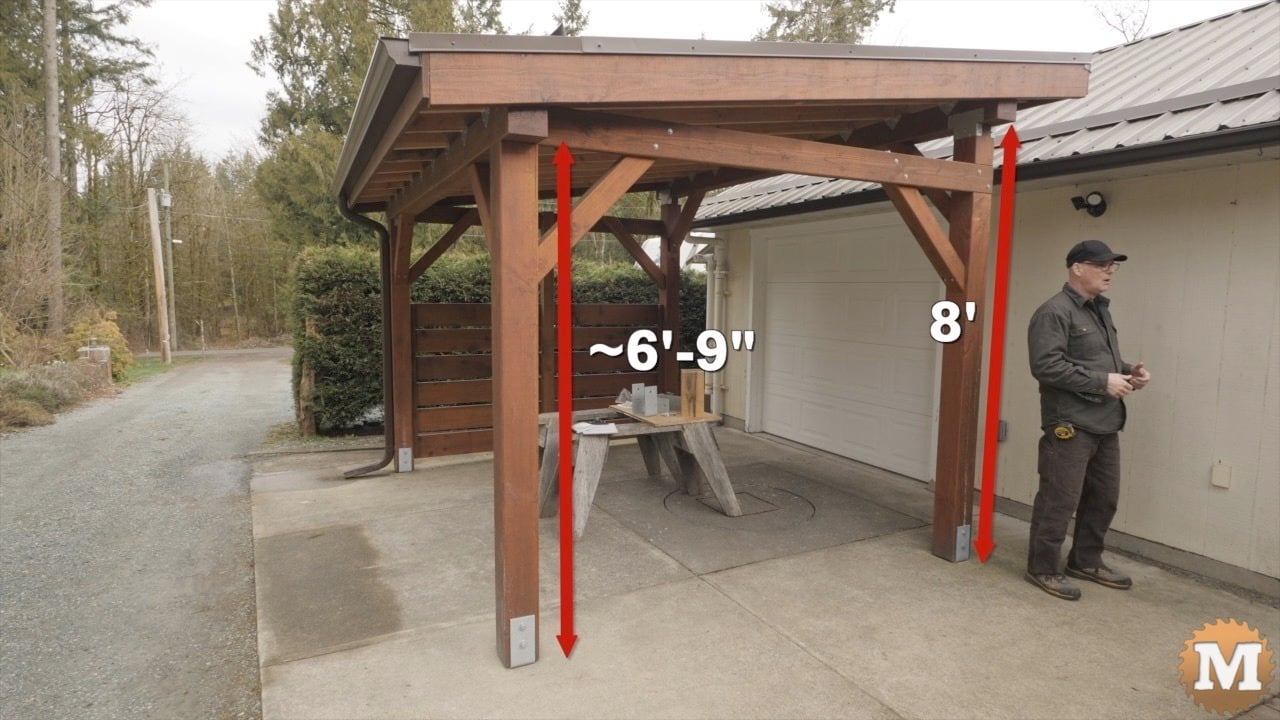
I also was trying to work with existing 6×6 posts and beam lengths I already had on hand. The 6×6 beams are 12 foot 9 inches long. The front posts are 8 feet tall and with an 8 degree roof slope the low end posts are a few inches under 7 feet. Overall, the height of the pavilion is around 9 foot 4 inches tall.

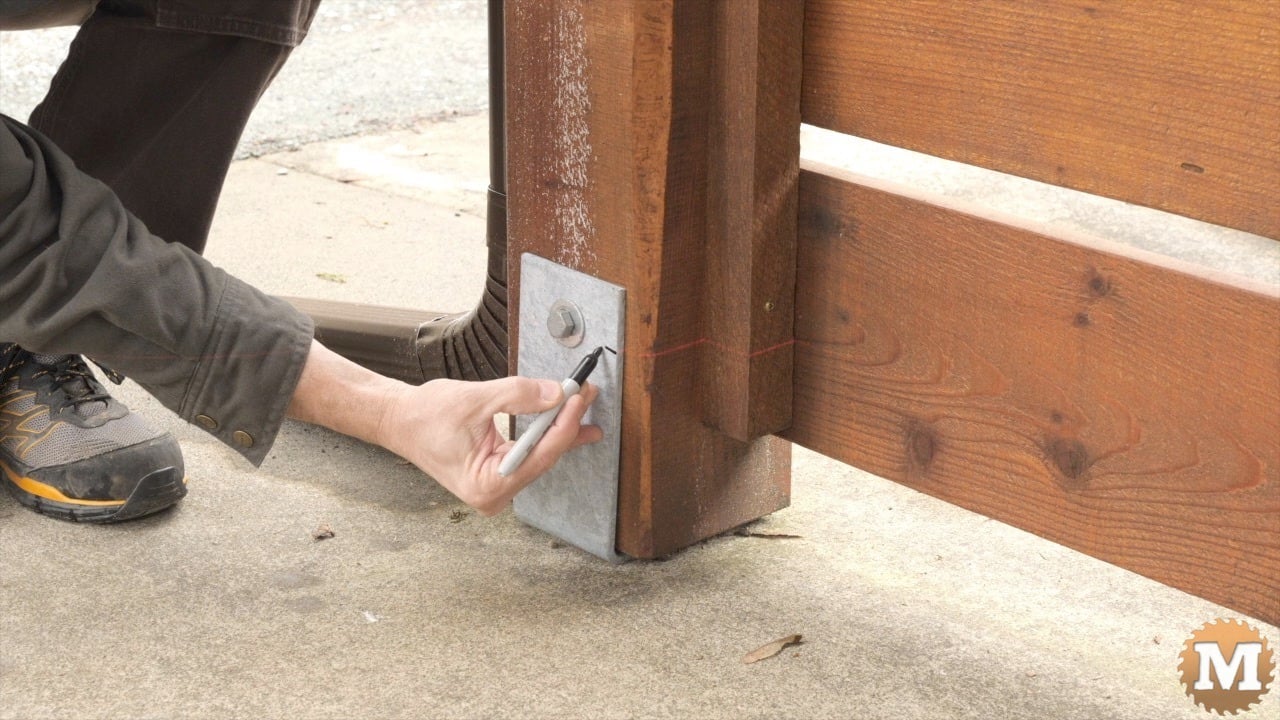
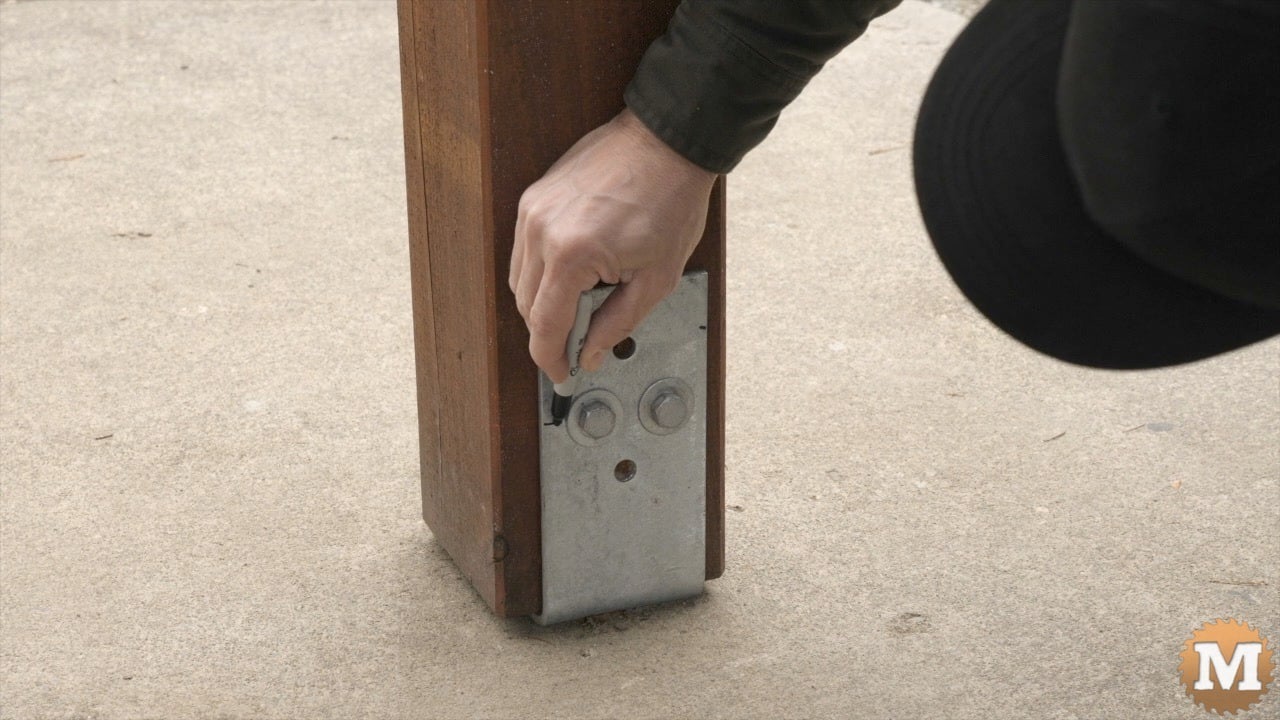
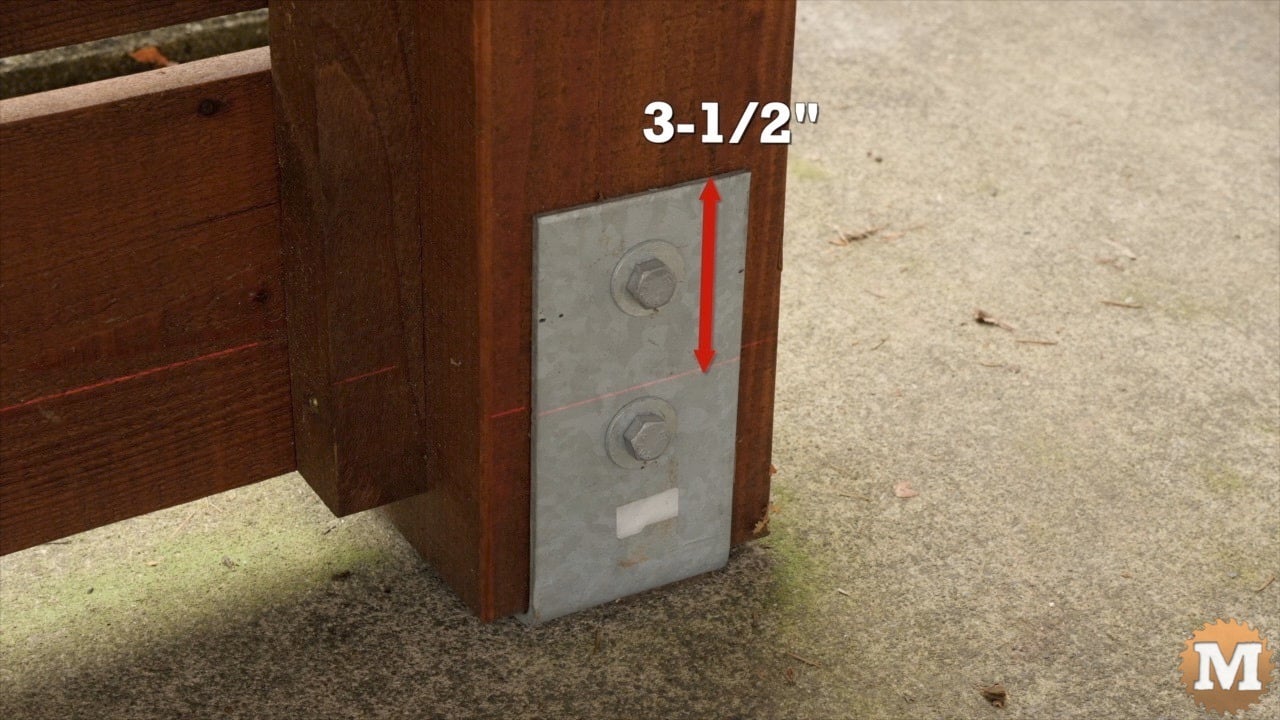
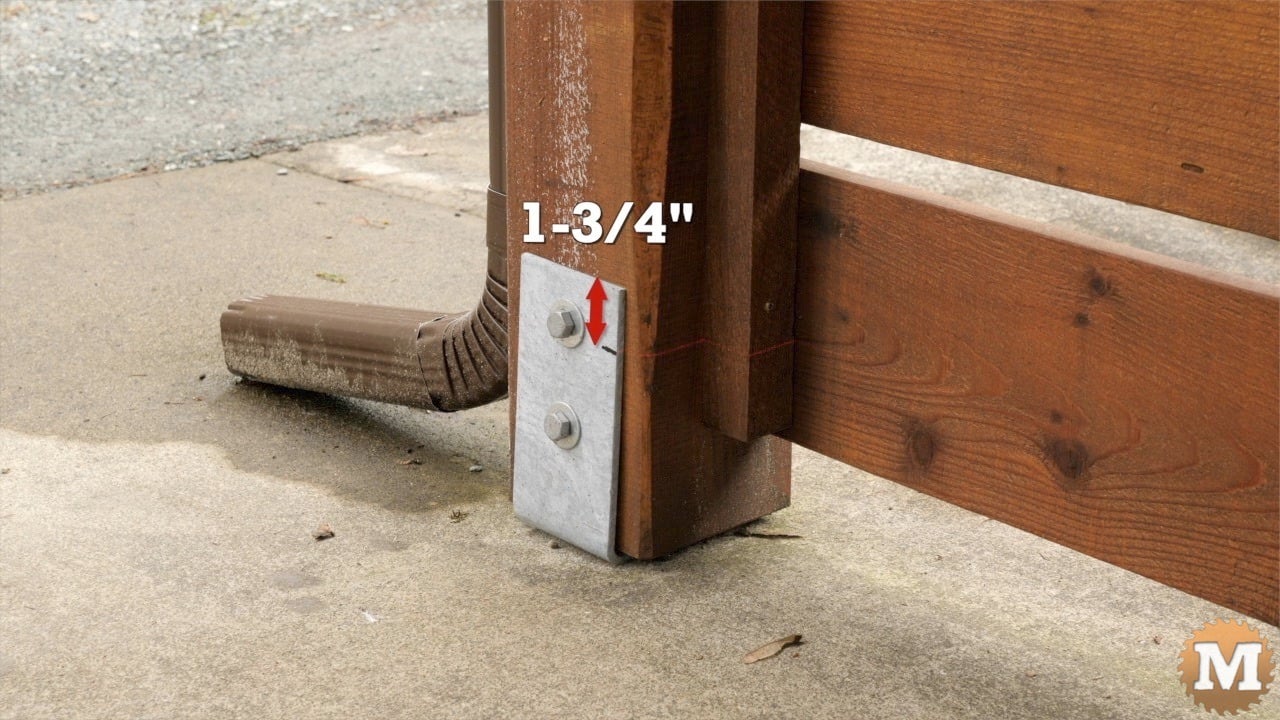
Post Saddles for the Lean-To Pavilion
These heavy gauge galvanized saddles I used have holes in the bottoms for the anchor bolts. This pad is about 4-5 inches thick so I used these bolts for securing the saddles. After the holes are drilled with a concrete bit and impact drill, the bolts are tapped in and tightened.
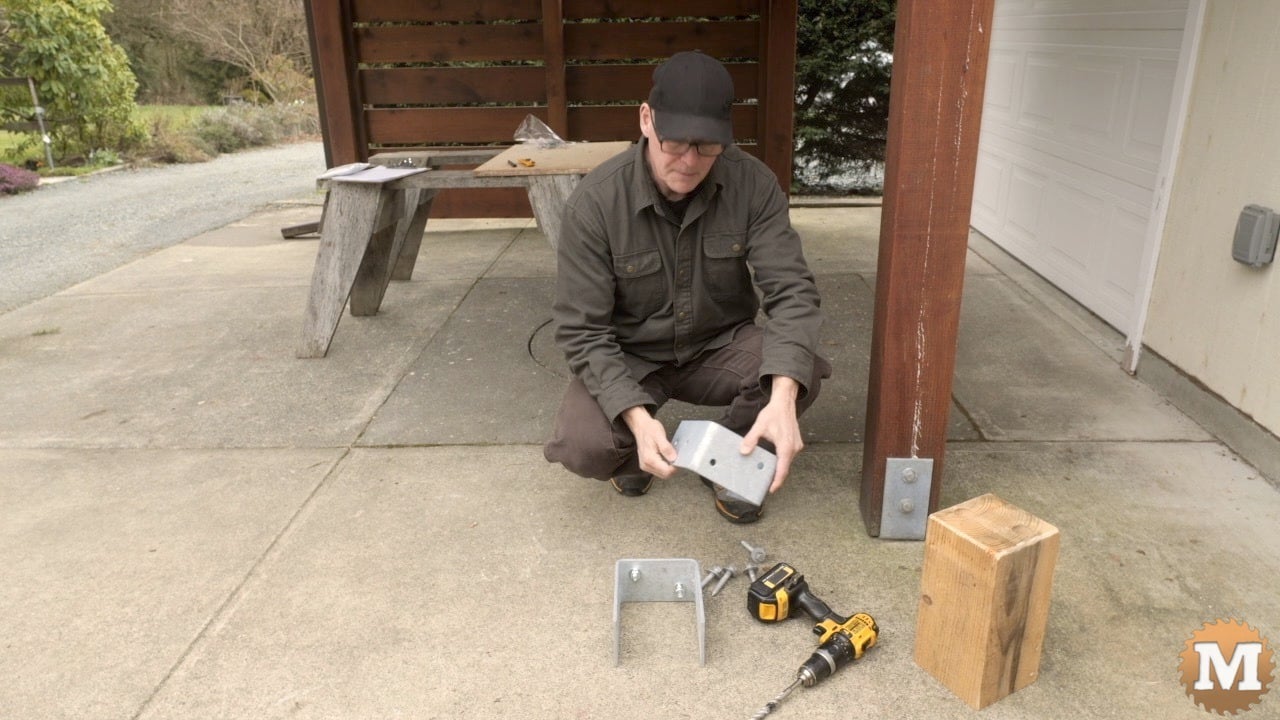

To allow for the bolts sticking up, I drilled into the end of each post with a forstner bit. I treated these ends to slow any moisture wicking up from the ground into the bottom of the posts.

The posts are secured to the saddles by drilling into the post then running in these 3-1/2″ lag bolts from each side.
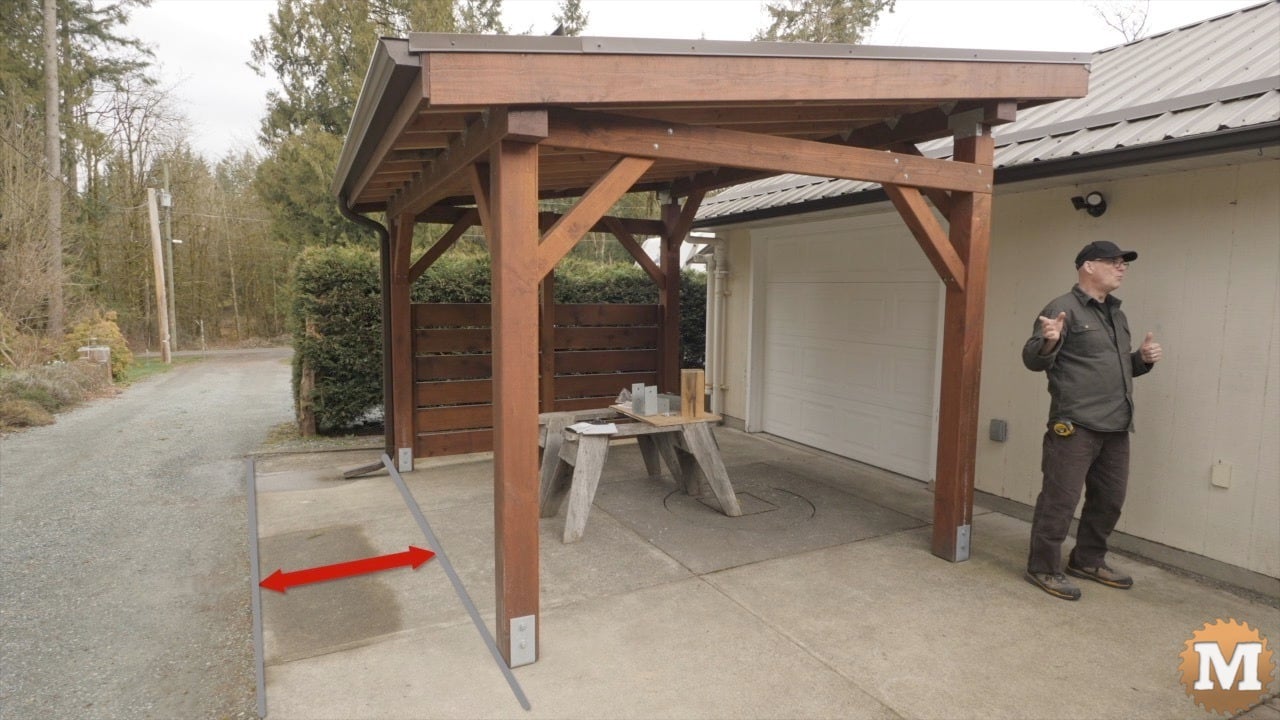
Accounting for the Concrete Pad Slope
This concrete pad slopes toward the driveway and the walkway between these buildings. So to keep the beams level I needed to determine the length of each post to account for these slopes.

I have a laser level to help with this but you could use a long straight board and a spirit level to achieve the same result.
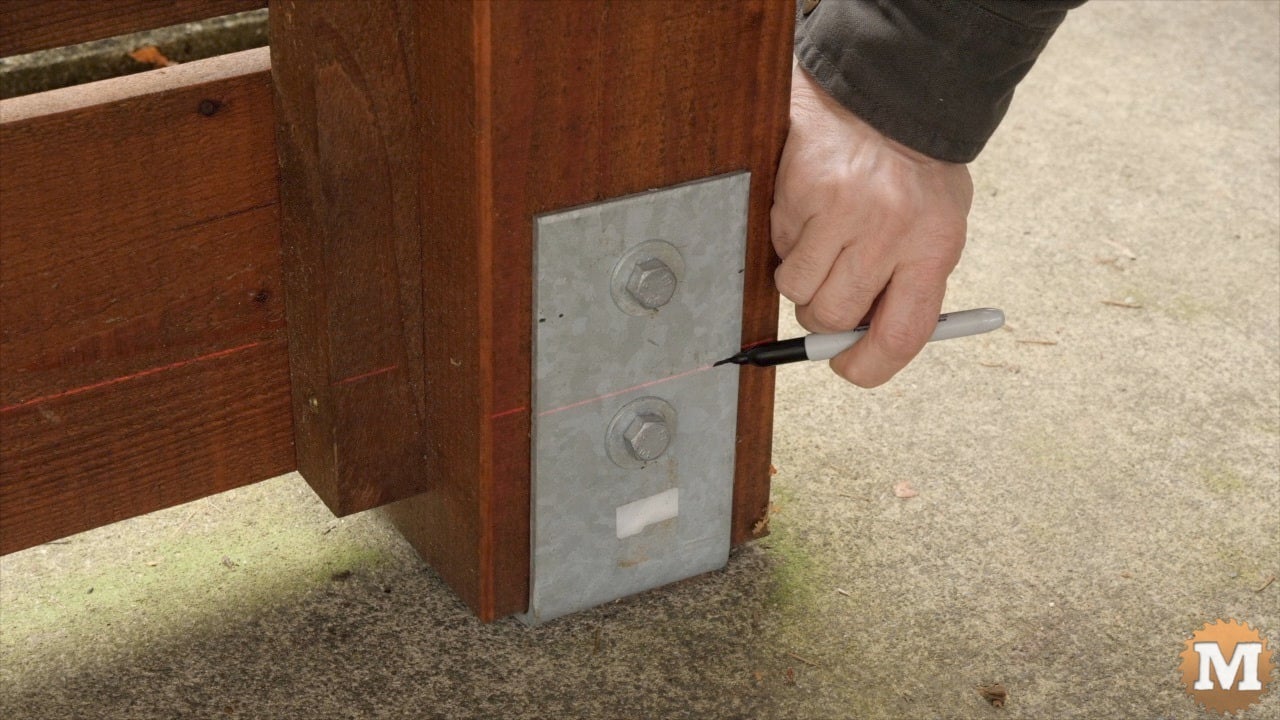
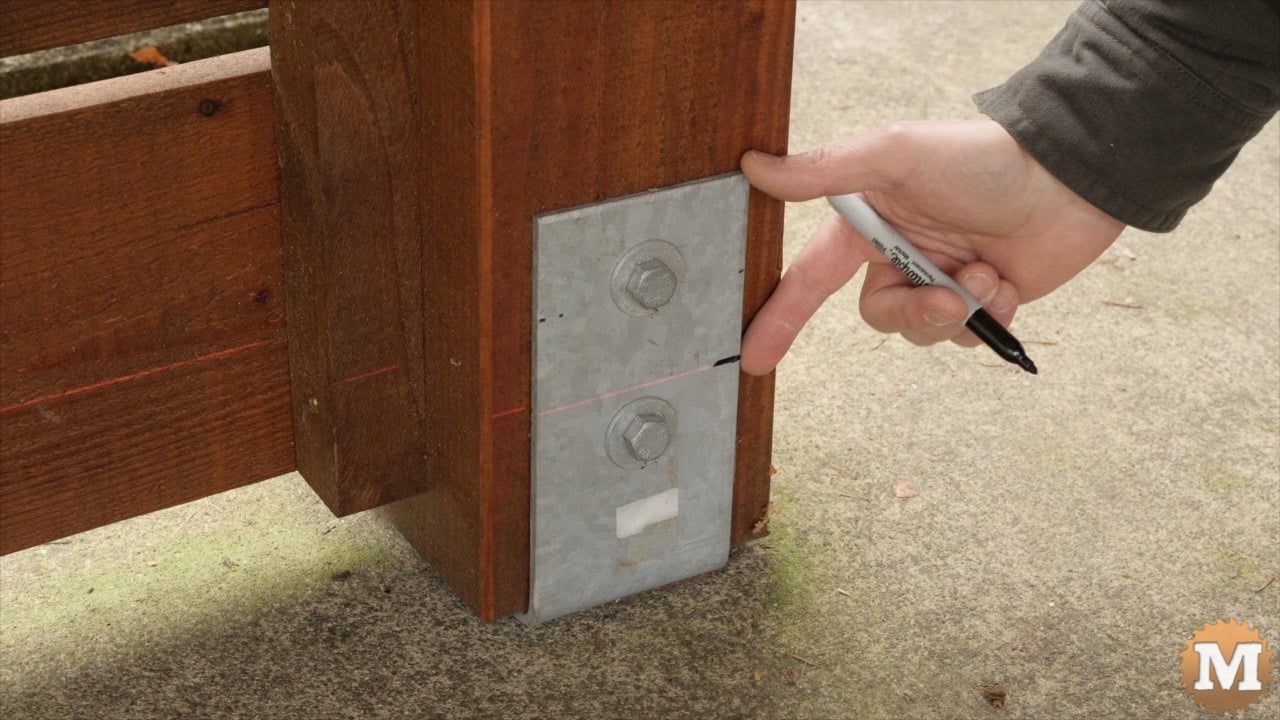
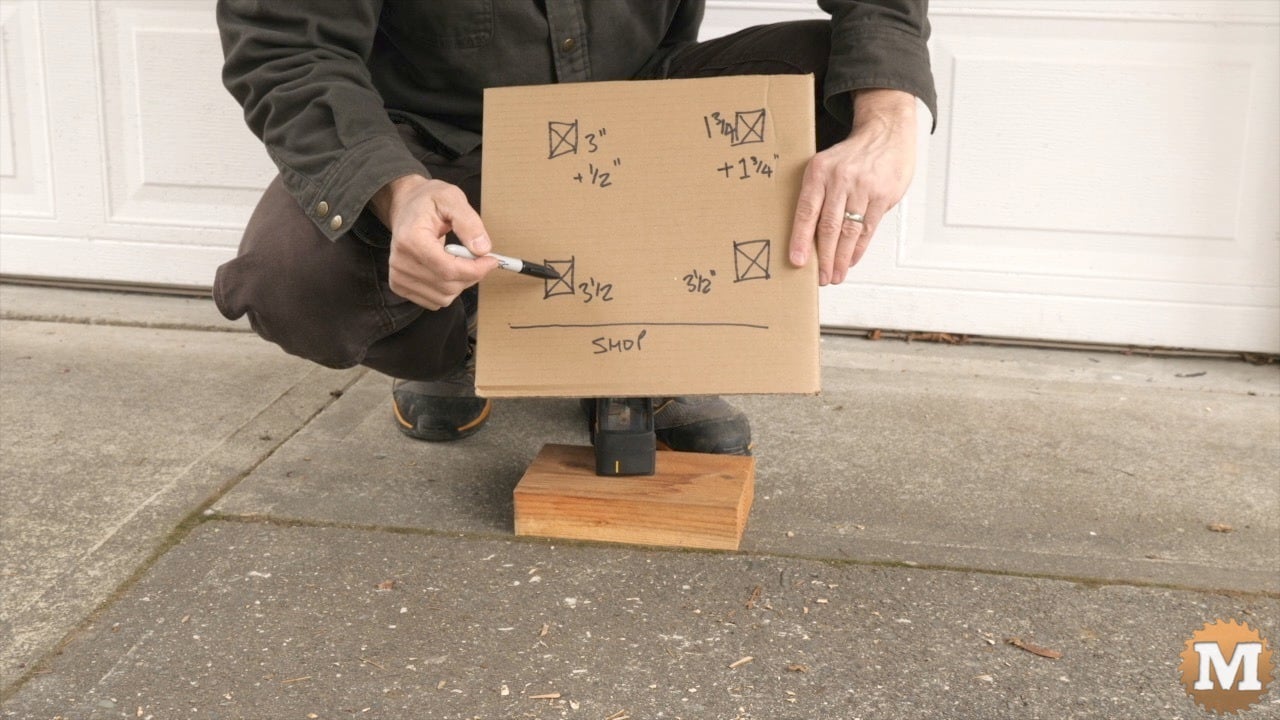
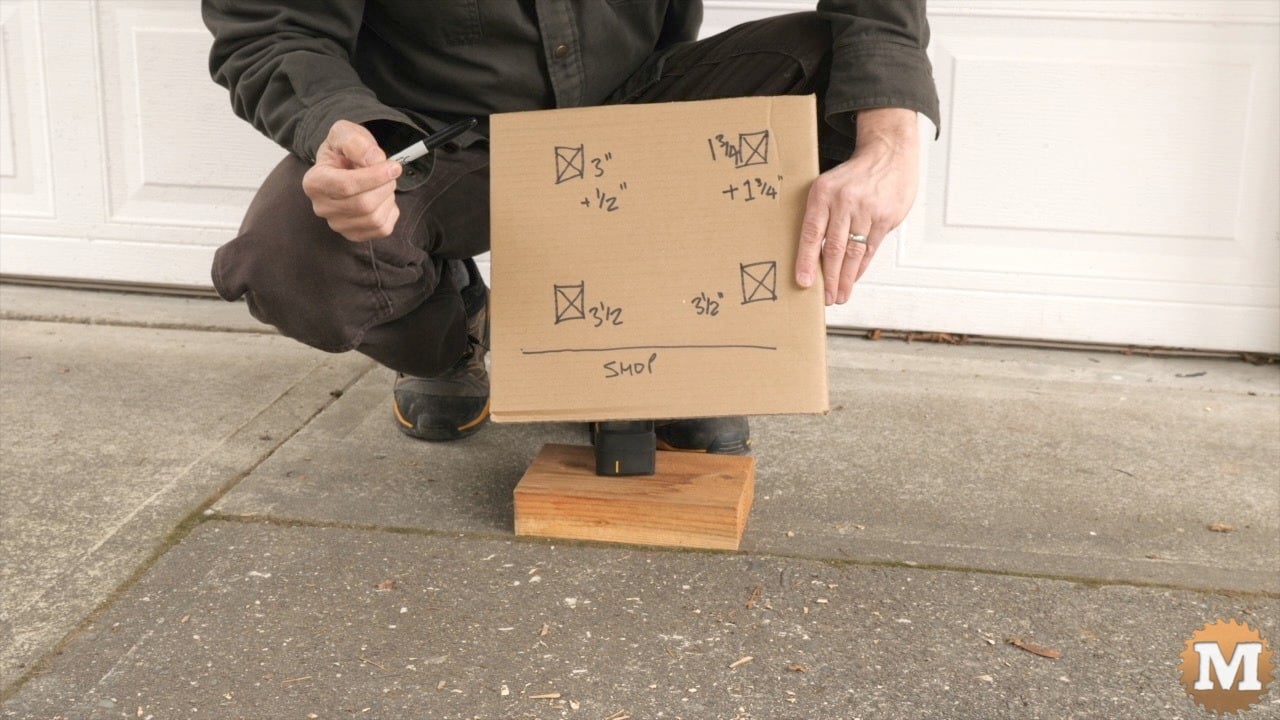
With the laser level I marked a point on each saddle. Then I measured down from the top of the saddle to this mark. I used the difference in these measurements to adjust the length of the posts. I found that the two tall posts near the shop were on the same level plane. The shorter posts needed to have length added to each (before cutting) to adjust for the slope so all the beams would be level.
Dados in the Tall Posts
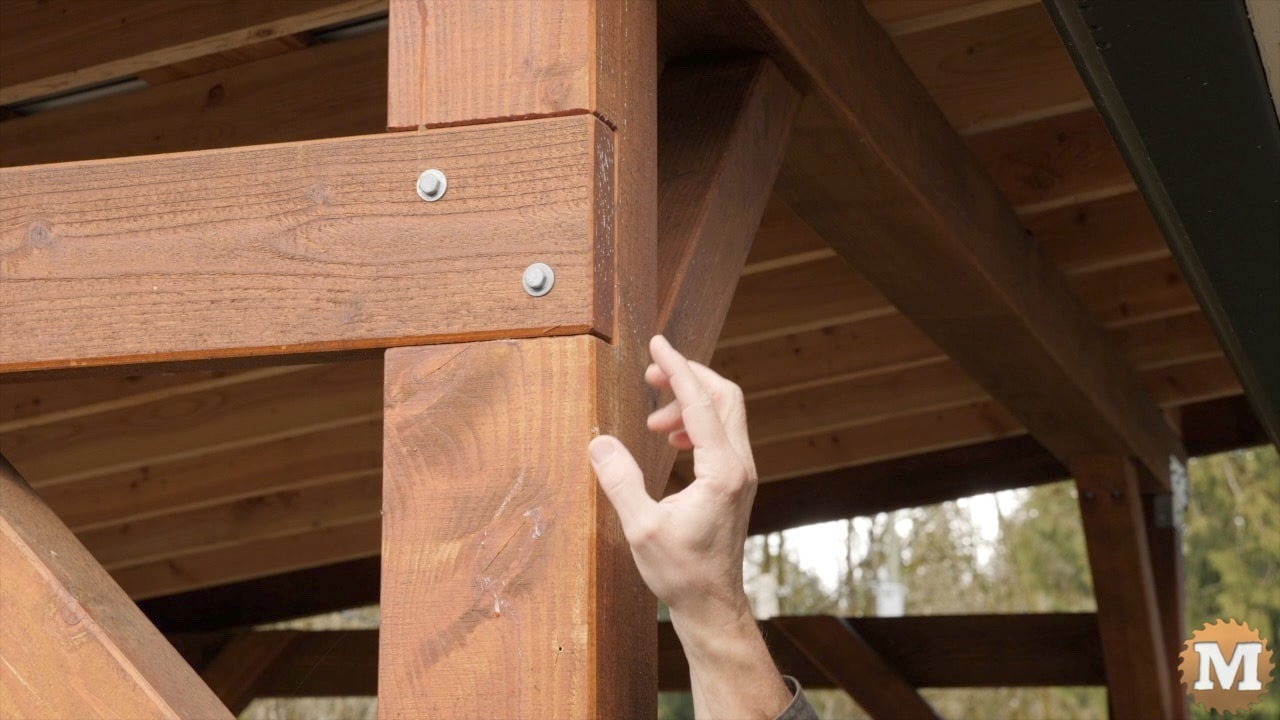
Also, the taller posts had a dado cut in to accept the side tie beam so it would be inset flush. The low end 6×6 beam also had a dado to accept the but end of the tie beam.
(Disclaimer: As an Amazon Associate I earn from qualifying purchases. Thank you for helping to support my content this way. )
These dados were cut with a series of cuts with a circular saw and then these wafers broken off with a mallet. The dado was then cleaned up with a chisel. I just love doing that.

