Make your own Aircrete Garden Boxes! This is PART 3.6 of my series, showing ways to make your lightweight garden boxes using my best aircrete recipe. You can build these forms and precast your own 48″, 36″, or 24″ reinforced lightweight concrete panels that link together to make long lasting and durable concrete garden boxes. #aircrete
See the Youtube Video and download the Plans.
For reference, Here is the weight of 3 cured panels made from regular concrete: . 48″ – 69lbs, 36″ – 50lbs, 24″ – 33lbs.
the Best Aircrete Recipe – a Lightweight Portland Concrete Formula #aircrete
This is another follow up post to Part 3 of my series on making garden box panels from lightweight concrete. And in this episode I’ll be pouring the best aircrete I have made.
I’ve been making these linkable concrete panels for rot-proof garden boxes for a few years now.
In Part 3, I worked on concrete blends to find a mix that was light, strong, and durable. And the aircrete that I made in that episode had some issues and it failed the durability test. And it also cracked and distorted as it cured and dried.

So in this video I’ll make another attempt at casting a strong and durable garden panel from air crete. And also try some colour additives to see have that looks. And it (spoiler alert) has worked out the best!
I’ll show the foaming agent, mixing the cement, pouring, and finally un-molding. Then look at the weight and durability results as compared to regular gravel-based concrete.
If you haven’t seen part 1 and 2 of this series then you might get more from this video if you watch them first. As I won’t be covering all the steps needed to make the forms and prep them for casting.
I’ll be using the plywood forms I built in part 1 of the series.
Best Aircrete Ingredients
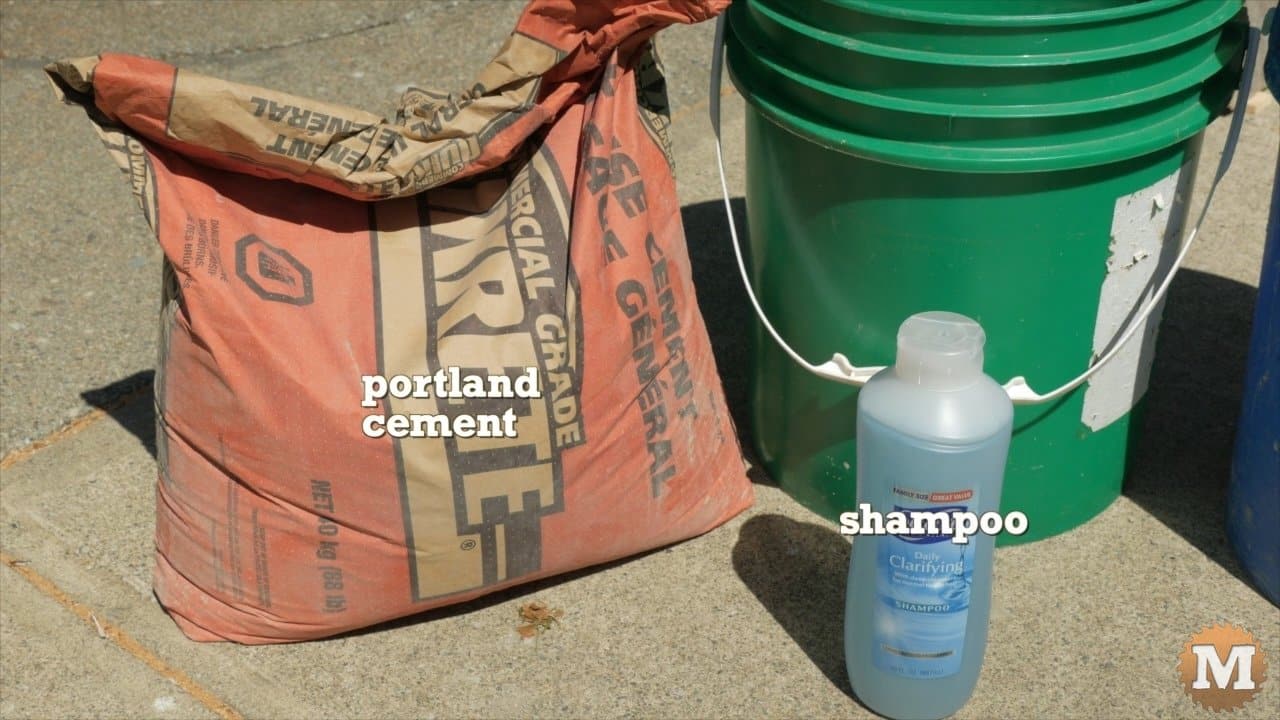
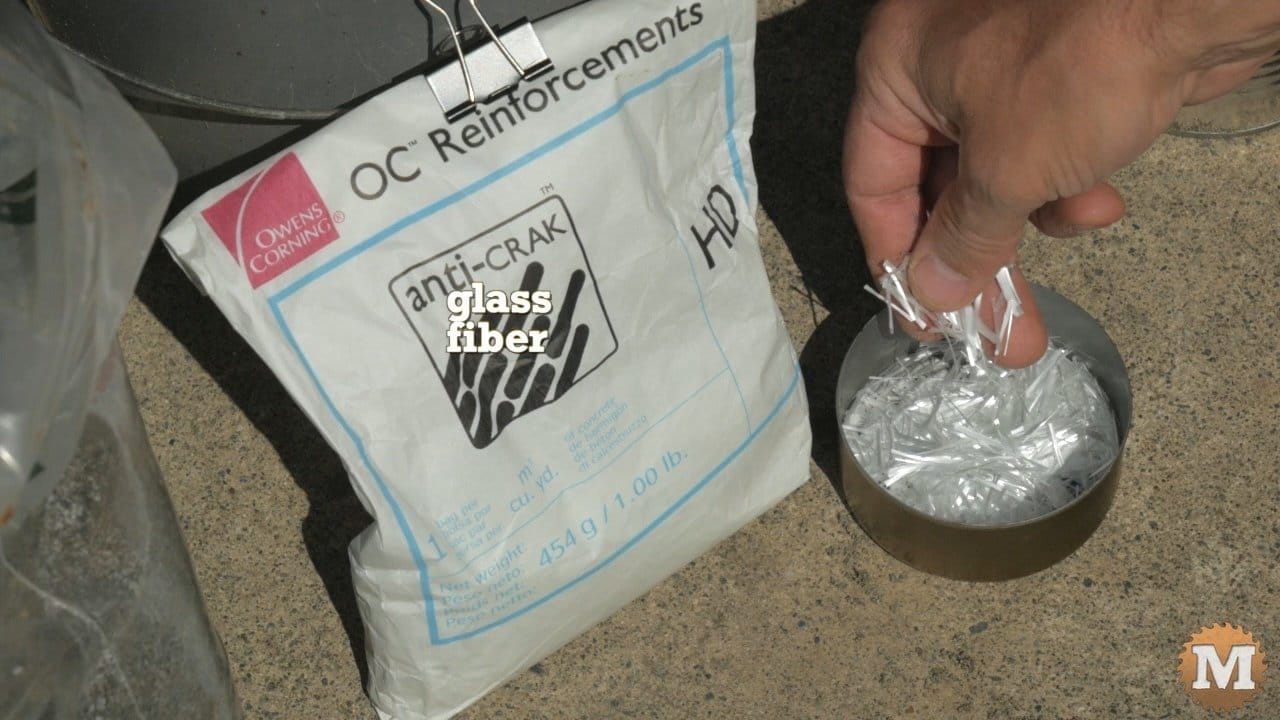
The aircrete is made from only a few ingredients: Portland cement, shampoo to generate a foam, and a little glass fiber for extra strength.
Make the Foam Dilution
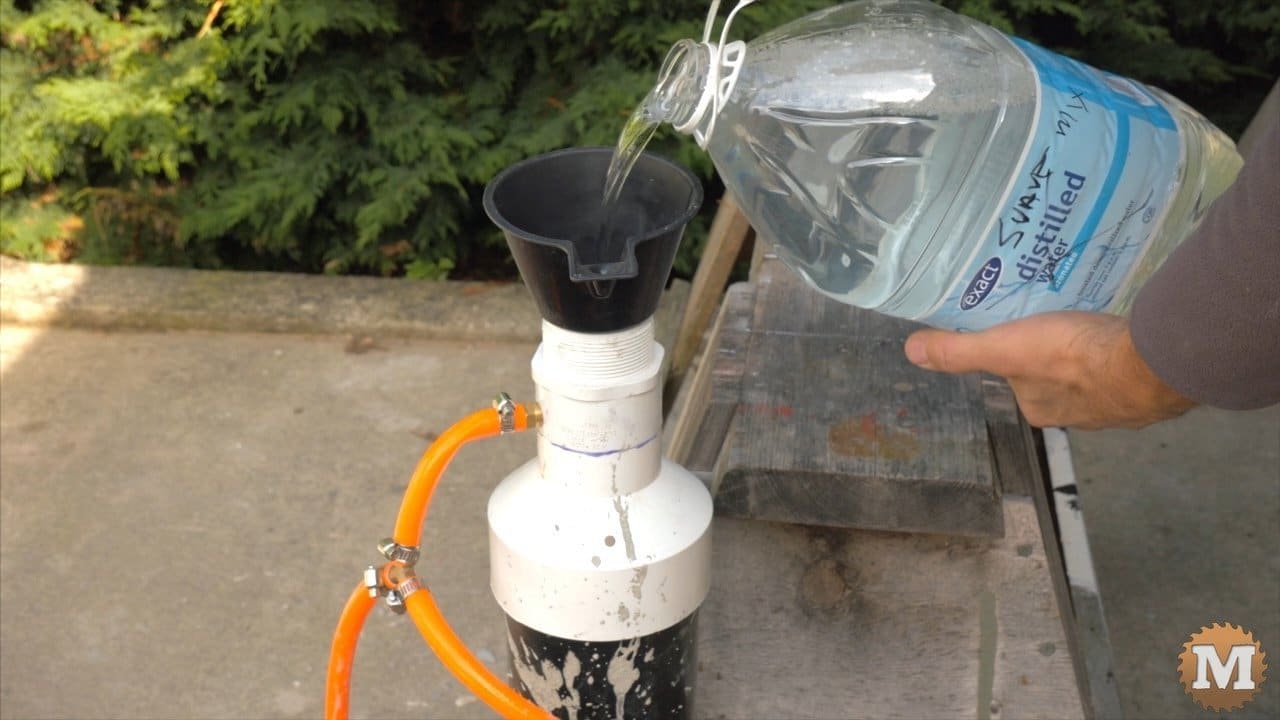
So I begin by diluting the shampoo in water. 15 fluid ounces of (a very specific) shampoo to 2.5 gallons of water.
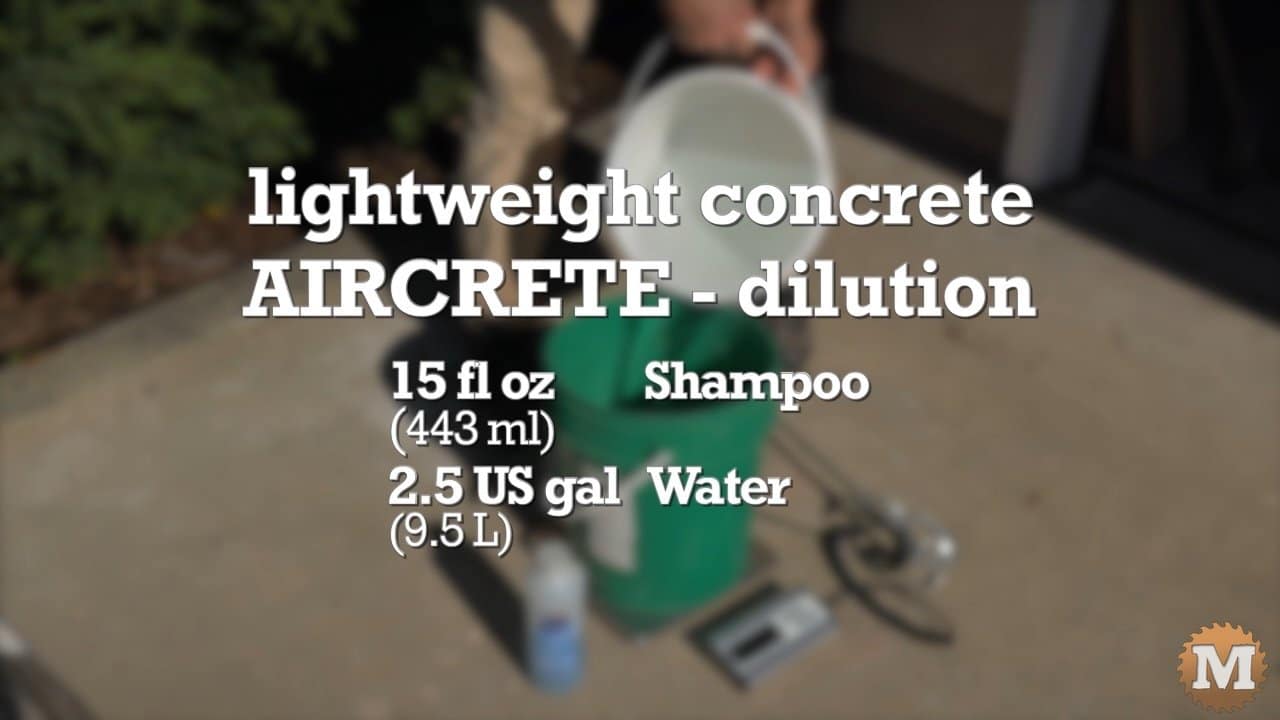
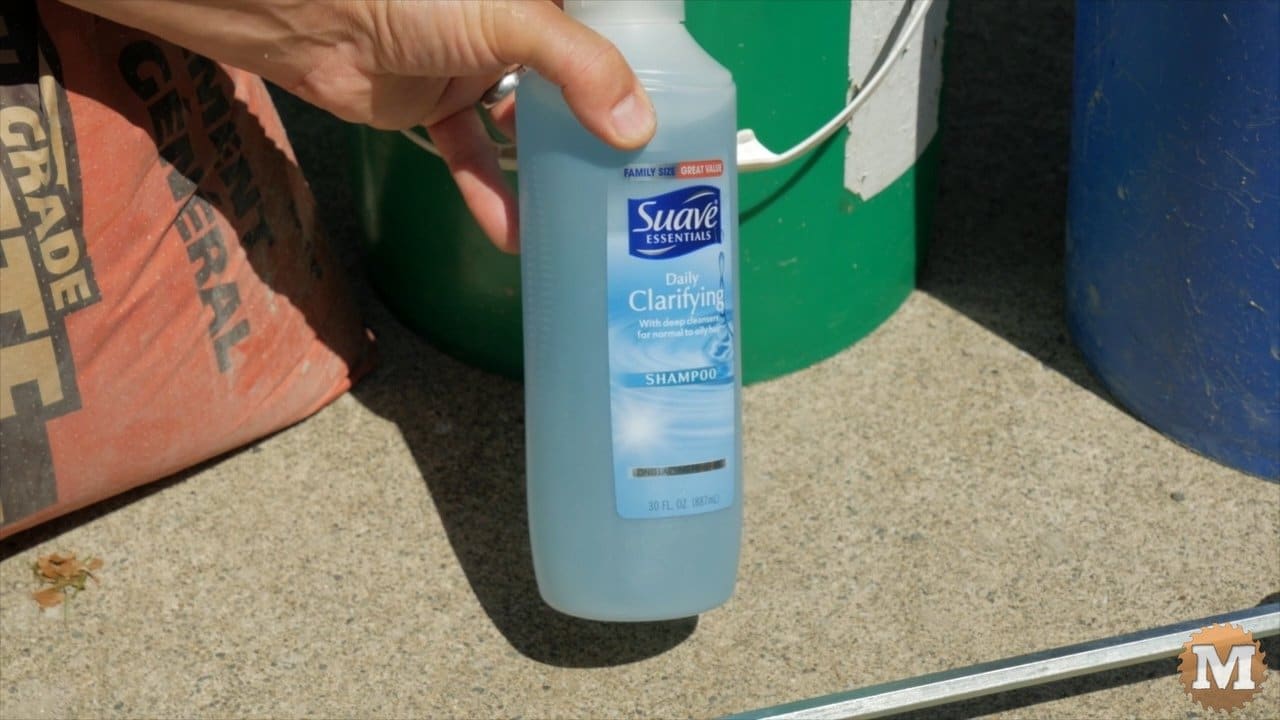
This will be the dilution that I’ll use to create the foam. I use Suave Daily Clarifying Shampoo as my foaming agent. This is the best (cheapest) option I’ve heard of.
DIY Simple Foam Creation – no foam generator used
I like it as it makes a very good dense foam, it’s cheap, and it’s widely available.
(Disclaimer: As an Amazon Associate I earn from qualifying purchases. Thank you for helping to support my content this way. )
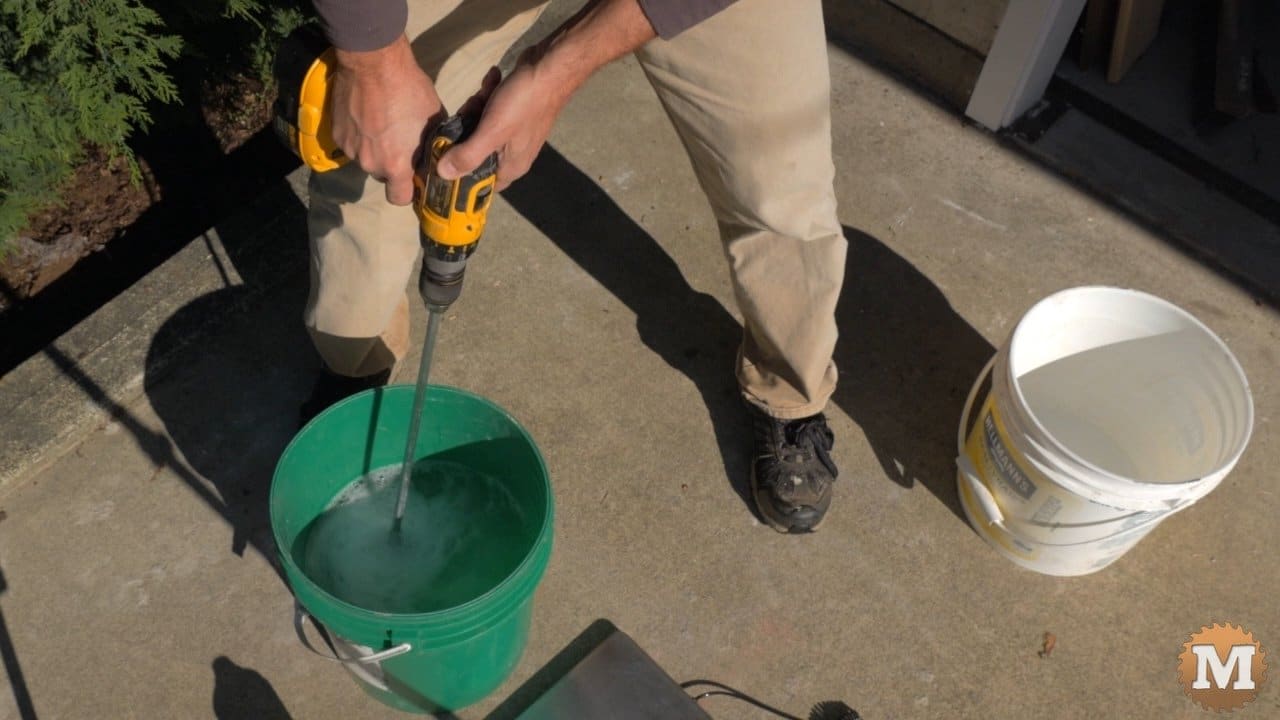
I stir this with a paint mixer attachment for my drill on a low setting — just to dissolve the shampoo in the water.

In Part 3 of this series I was able to make foam with window screen attached to an egg-beater type mixing attachment on my drill.

I simply poured some of the shampoo dilution in a pail and whipped it up into a foam with the mixer.
Foamate Foam Generator
This works if you don’t have an air compressor and foam making system. I was fortunate that Darwin from the HoneyDo Carpenter sent me his large Foam Mate to try.
It worked so well right out of the box that I’d recommend it to anyone who wants to get into making aircrete.

I simply poured the shampoo dilution into the tank, connected my air compressor hose and started making a dense shaving-cream-like foam instantly.

My Best Aircrete Recipe – 1st Test
I use a digital scale to weigh my gradients. This time around I use 15 pounds of portland cement, about 8 and a half pounds of water, 3/4 of a pound of foam and a pinch of fiber.

I slowly add the portland cement to the water while spinning the slurry with a paint mixing attachment on a drill. I want a smooth, well blended slurry here with no clumps or dry cement on the bottom or sides of the pail.

I’ll add the glass fibre and mix that in.

Then I stop and use an improvised stir stick from a wooden dowel to hand stir the cement mix. This helps free up any clumps.

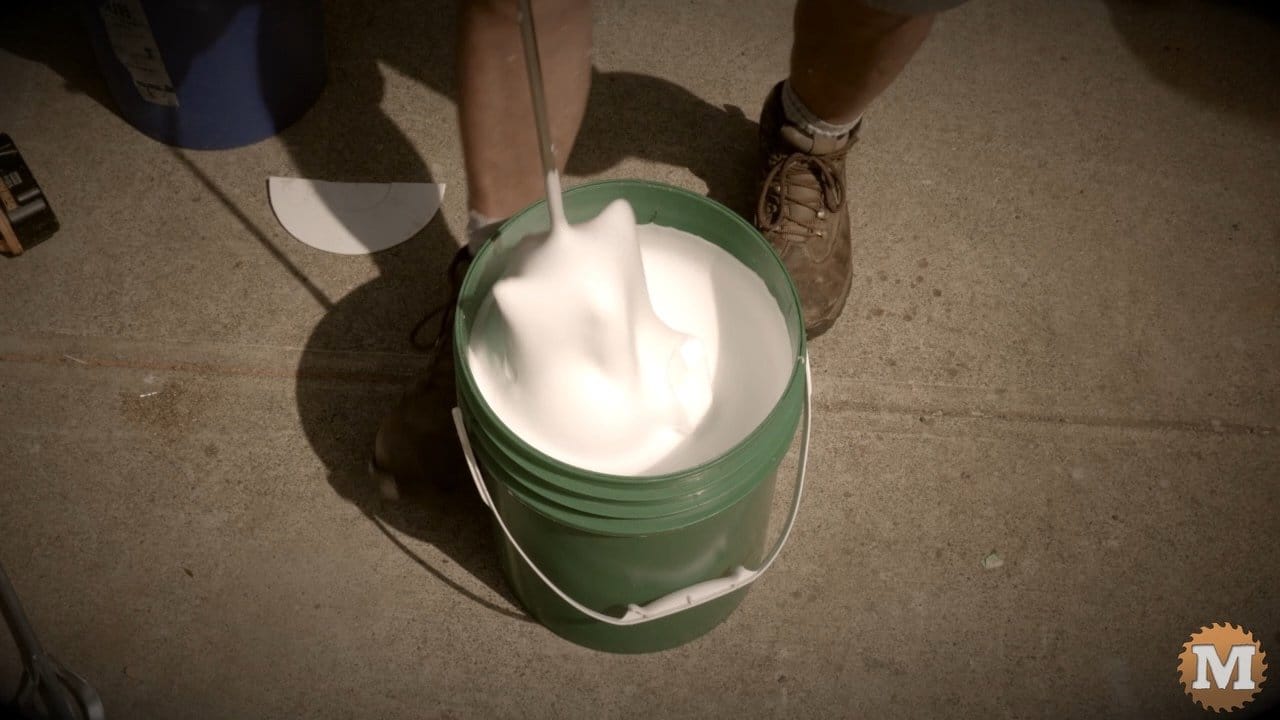
With the slurry now ready, I connect the air hose to the foam mate and start making foam. Once its flowing thickly I add some to the slurry pail.

Pour Aircrete into the Plywood Forms
I have a mark on my stir stick that approximates the amount of aircrete I need to fill one 36″ form. In this case, using a five gallon pail, I need the pail filled to the 8 inch mark as a minimum.
I’ll use my mixer to blend it all evenly. And hand-stir to make sure that everything was blending right to the bottom of the pail.

Then I poured the aircrete into the form — giving it a bit of a jiggle to help settle it into the corners.

Lay in the Wire Grid for extra strength
Once the aircrete begins to thicken, I gently lay in a galvanized wire reinforcing grid. Pressing it down so it settles right in the center. And smooth the surface with a trowel.


