Blending the Concrete Ingredients
Now I’ll use my drill with a mixing attachment to blend the dry ingredients, starting with the pea gravel and cement. I’ll add some sand then blend again.

I mixed the dry ingredients for about 30 seconds each time here.
Then I’ll dump that mix into the now empty white pail, to turn it over, and blend again.

Mix the High-Strength Concrete
I’ll add about half of my water and plasticizer to an empty pail and pour some of my dry mix on top. I’ll mix that some — then go in and hand stir it to make sure there’s no dry clumps in the bottom.


Then add some more dry mix and water and blend it again. Then the last bit of water and dry ingredients.
And finally some hand stirring to be sure it’s all well mixed and smooth.

Fill the Concrete Molds
Then into the shop, one more stir. The gravel has a tendency to settle so you don’t want to leave it alone for long. I’ll pour enough to fill a 36″ mold half way. I can tap my bench with a rubber mallet to bring any bubbles to the surface.


I can then lay in the wire grid, or ladder, if you like.
Another hand stir, then top up the mold, just an eighth inch or so shy of full. Then more vibrations from a mallet to bring bubbles up.
(Disclaimer: As an Amazon Associate I earn from qualifying purchases. Thank you for helping to support my content this way. )


I made a slightly bigger batch to fill two of the 24″ thin molds.
The recipe can be scaled up or down.
Recipe for Two 24″ Molds
And here’s the recipe to fill two 24″ thin molds:
16 lbs Pea Gravel
16 lbs Masonry Sand
10.6 lbs Portland Cement
3.55 lbs Water
1.4 fl oz Plasticizer
When the concrete began to solidify I covered the molds with plastic.
Remove the Pipes from the Molds
The next morning I uncovered the molds and removed the pipes. These pipes have a hole that accepts a nail to give a better grip while pulling and twisting.


And the pipes came out easily. These pipes are a smaller diameter than my original molds and they also are more flexible.
I’ll give the 36″ casting a spray of water before covering it again with plastic. Then I’ll pull the pipes from the 24″ molds.
And these pipes also came out well. The petroleum jelly works well for this feature of these concrete panels.
And these molds were also sprayed with water and covered with plastic.
Unmold the Thin Concrete Castings
Two days later I’ll unmold the castings. And as I do with the thicker original molds, I grip the mold underneath from the ends and rotate it over against the bench. Then gently work the mold free by lifting from one end and pressing with my other hand in toward the middle.


And being a shallower casting, they are easy to remove, and the wax applied to the mold also gives the panels a beautiful sleek finish that’s very smooth.
I set these new cast panels on the floor of my shop and wrap them in plastic.


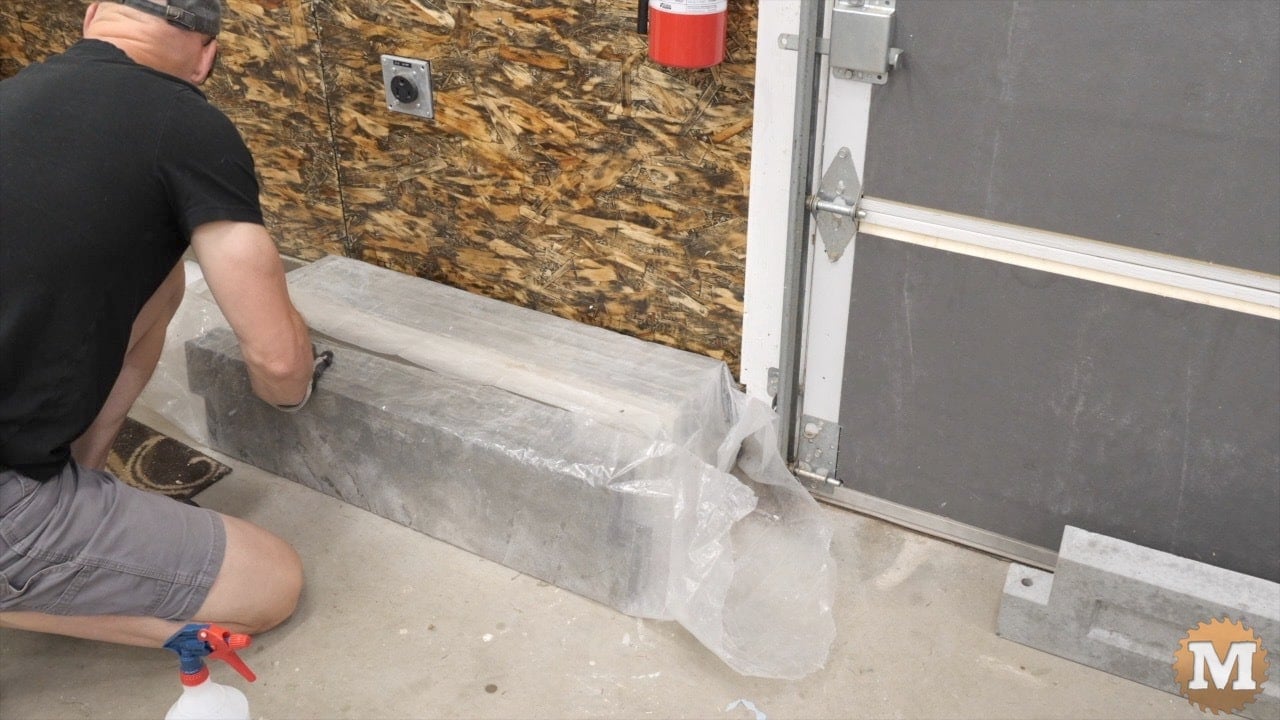
And the 24″ casting dropped out as well. These fresh castings I’d say are a medium grey colour. And as they cure and slowly dry they will lighten quite a bit. Maybe in the future I’ll try adding some cement dye to see how that looks with this mix.
I spray the castings with water to keep them damp while they cure for a few weeks.

