Here’s the blog post for the YouTube Video on making round end concrete casting for a raised garden bed using one of our patented ABS plastic molds.
I have a PDF summary of the concrete casting process and tools required for download. Get the Good Casting Practices guide.
Casting the Concrete Raised Garden Bed Panels

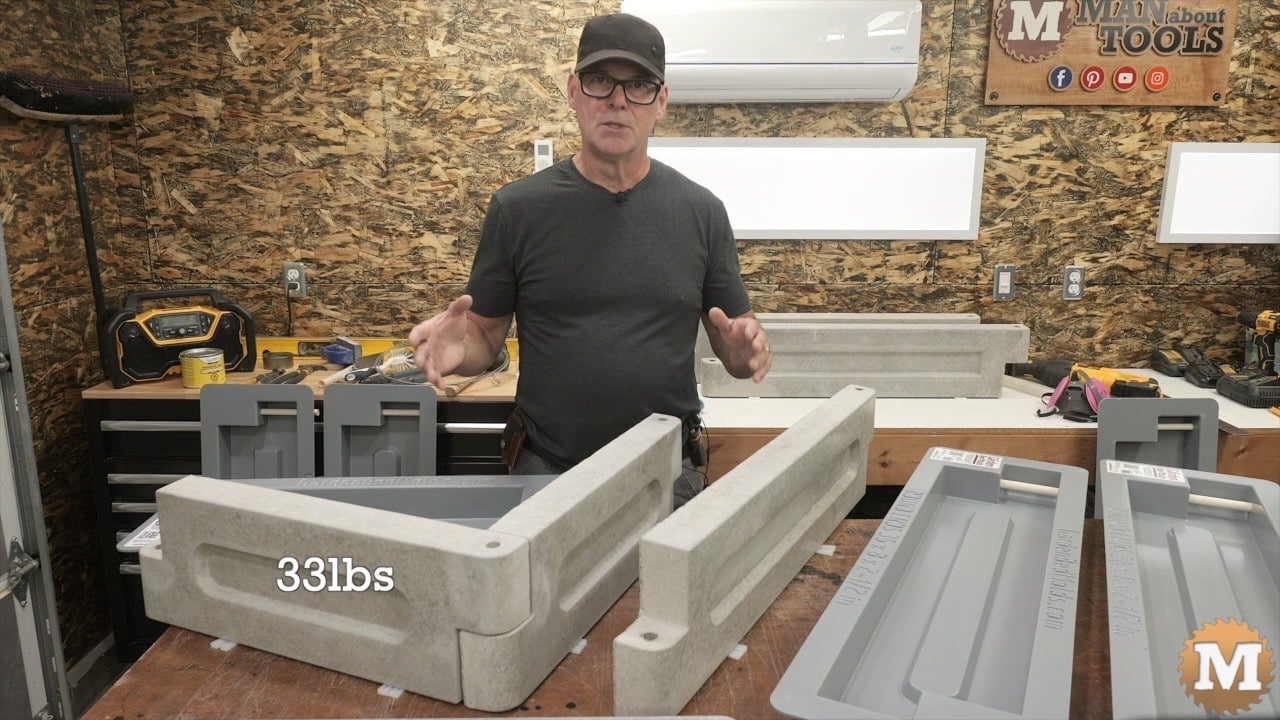
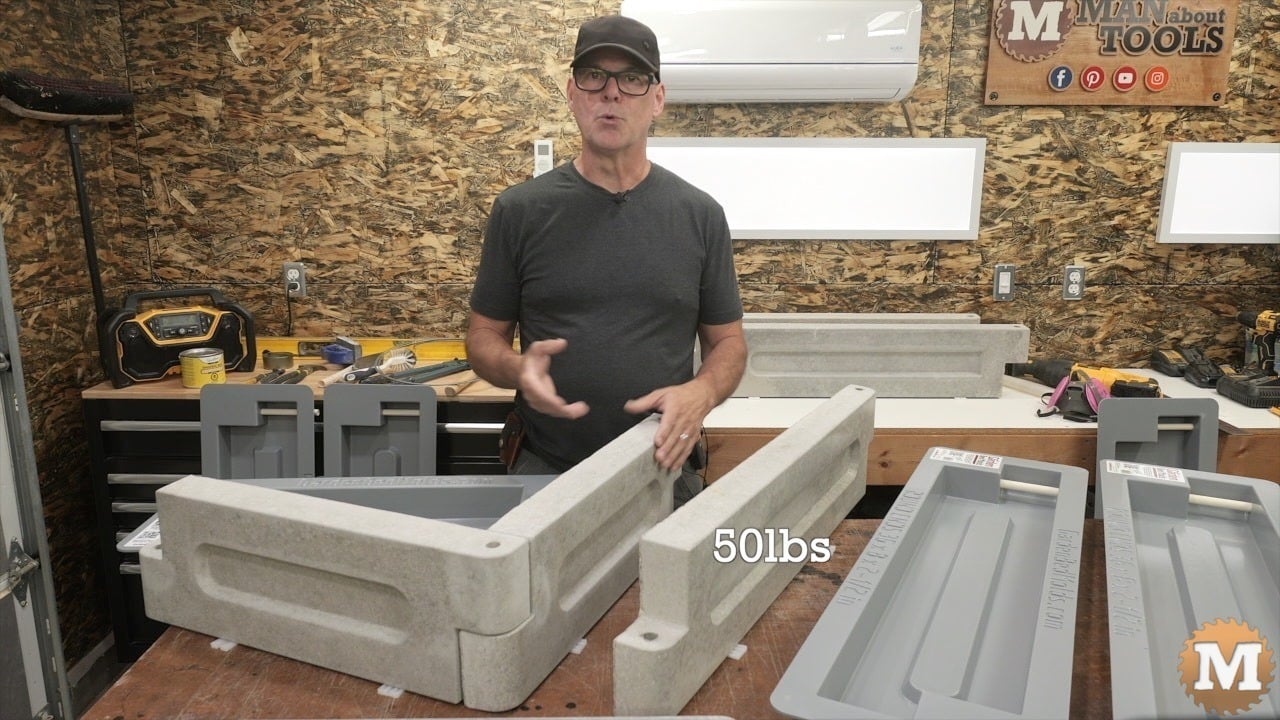
The 24″ mold produces a concrete casting that weights approximately 33 lbs and the 36″ panel produces one that weights approximately 50 lbs.
Background of the Garden Bed Mold Development
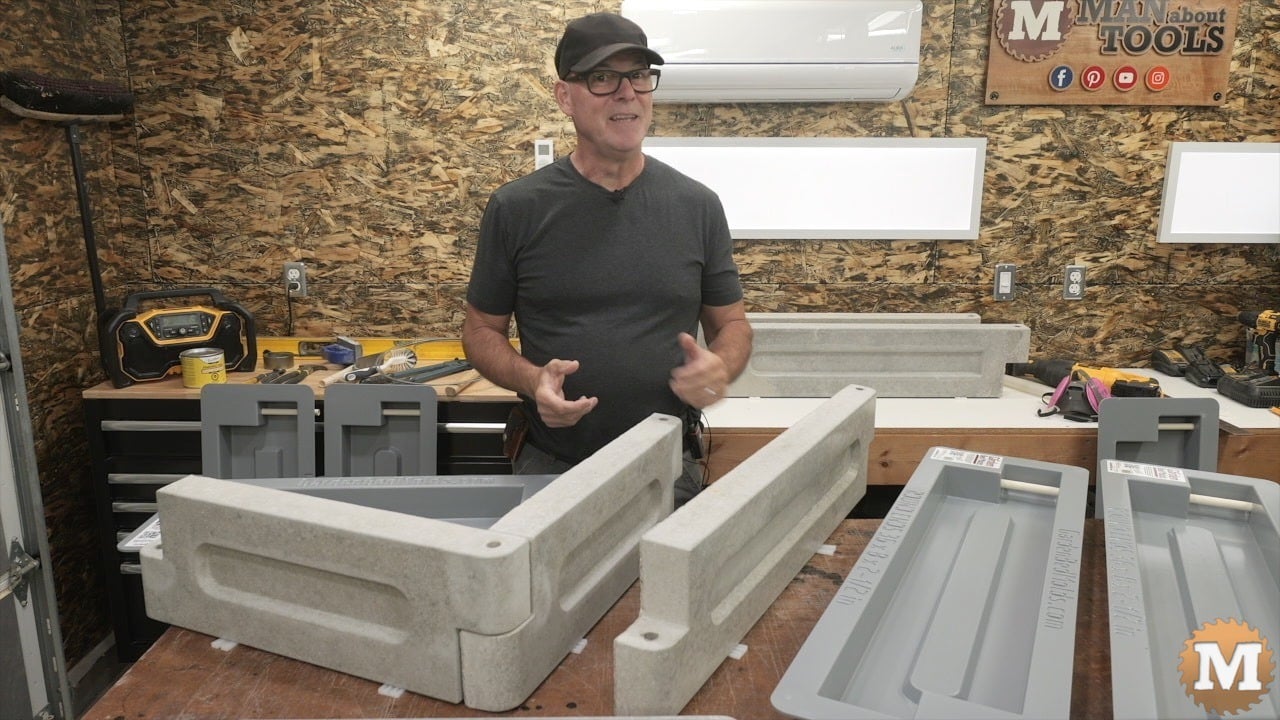
Hi everybody, I’m back with a brand new design for my concrete garden bed panels. And they’ve got curves!
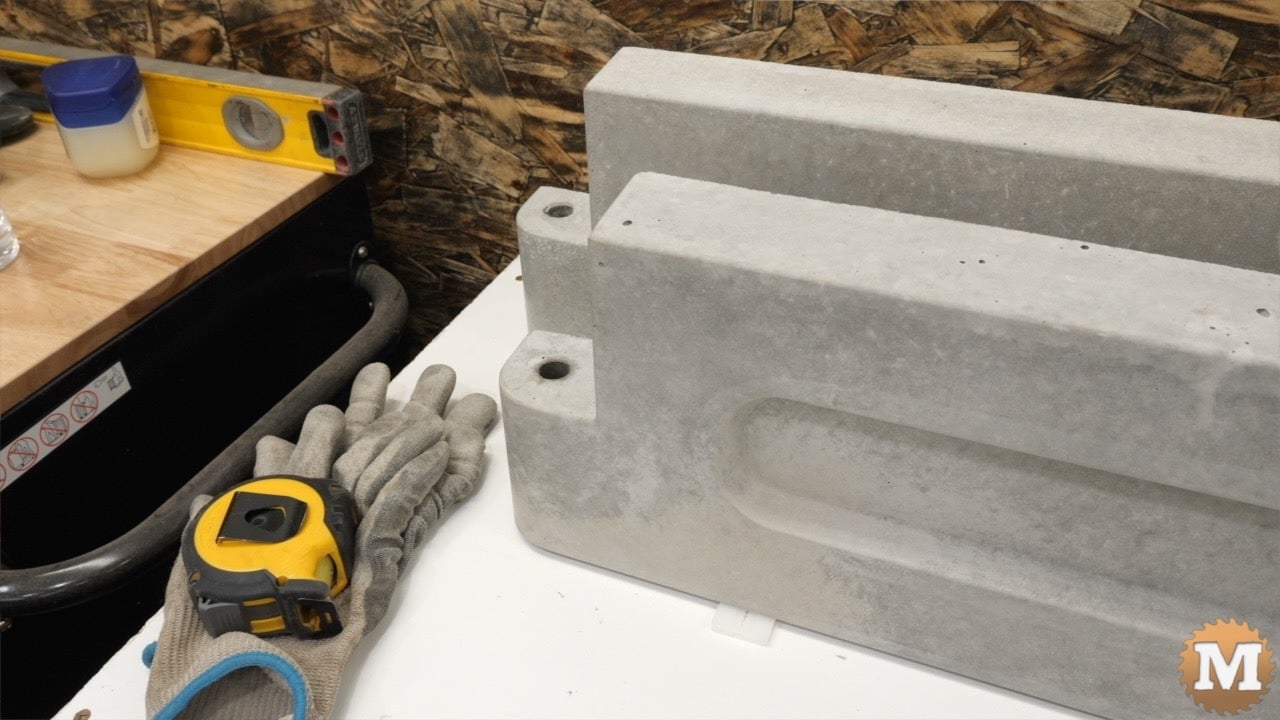
I have three new concrete molds that have curved ends and a rounded inset. I have a 24 inch and a 36 inch length with curves on each end. Plus, I have a 36 inch long transition mold that casts a panel with one round end and a square end like my original design.
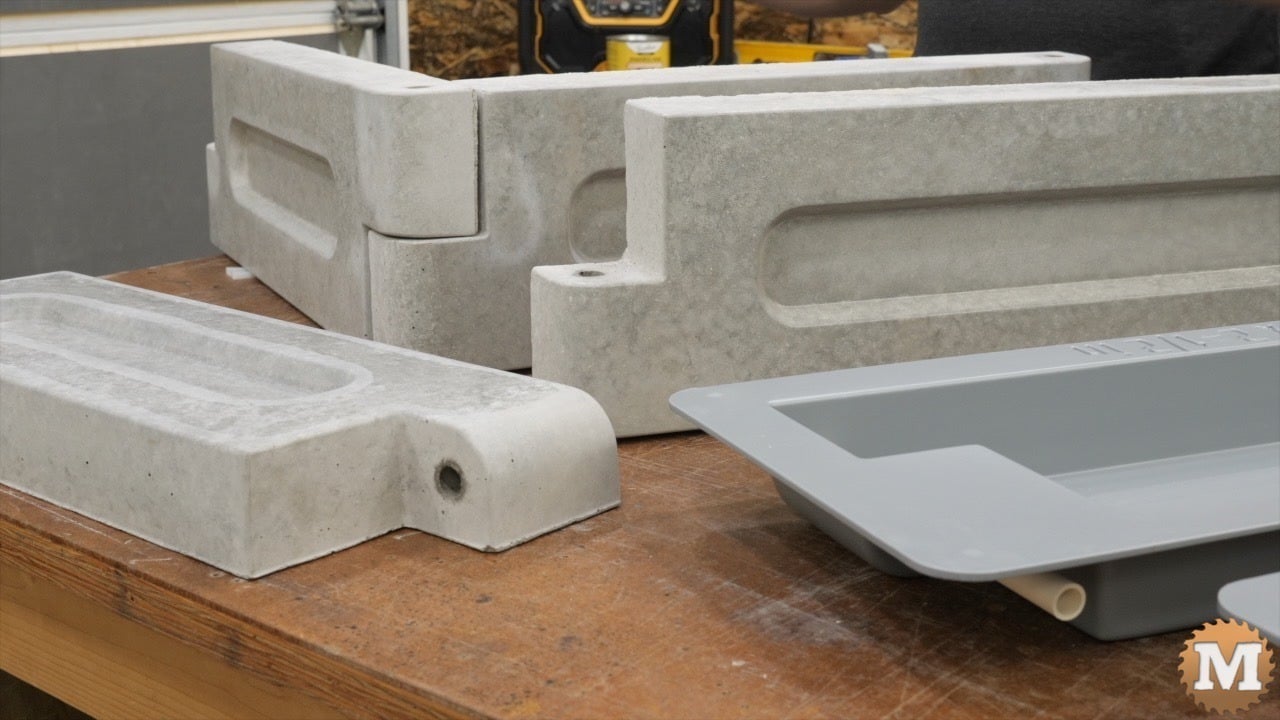
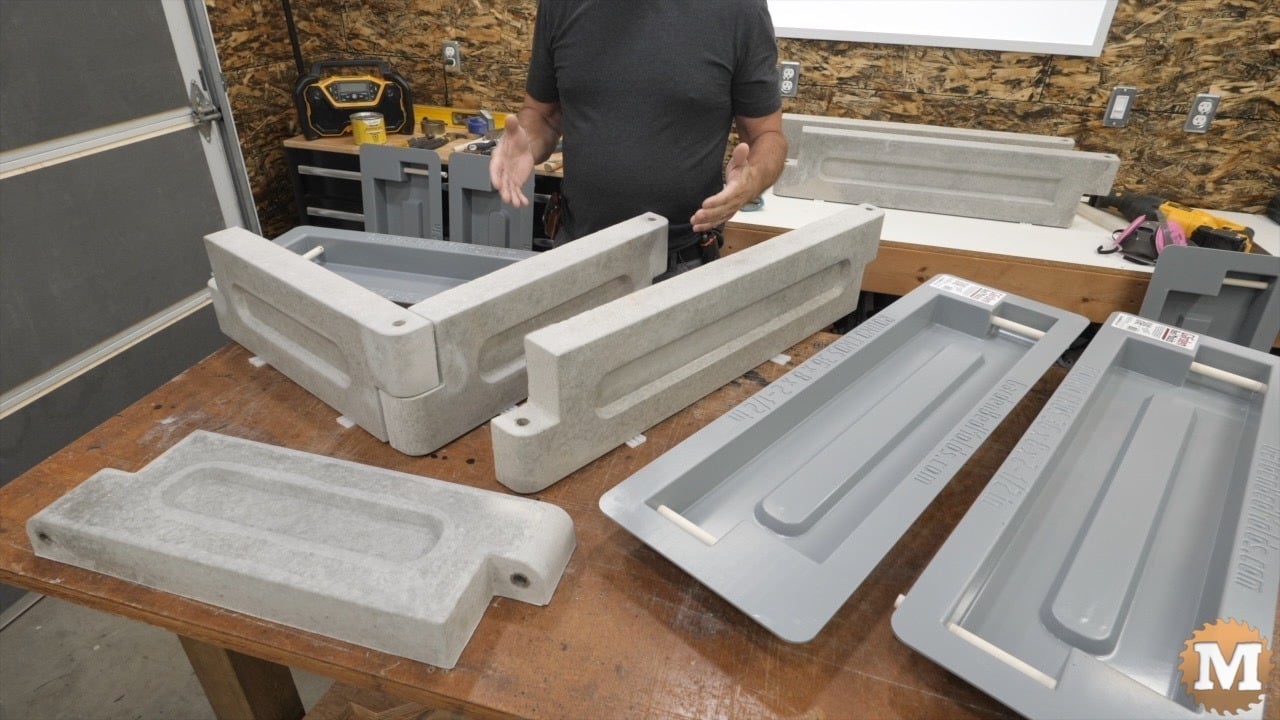
The transition mold allows you to link the new curved end panels to the square end original ones to make longer beds.
I have a PDF summary of the concrete casting process and tools required for download. Get the Good Casting Practices guide.
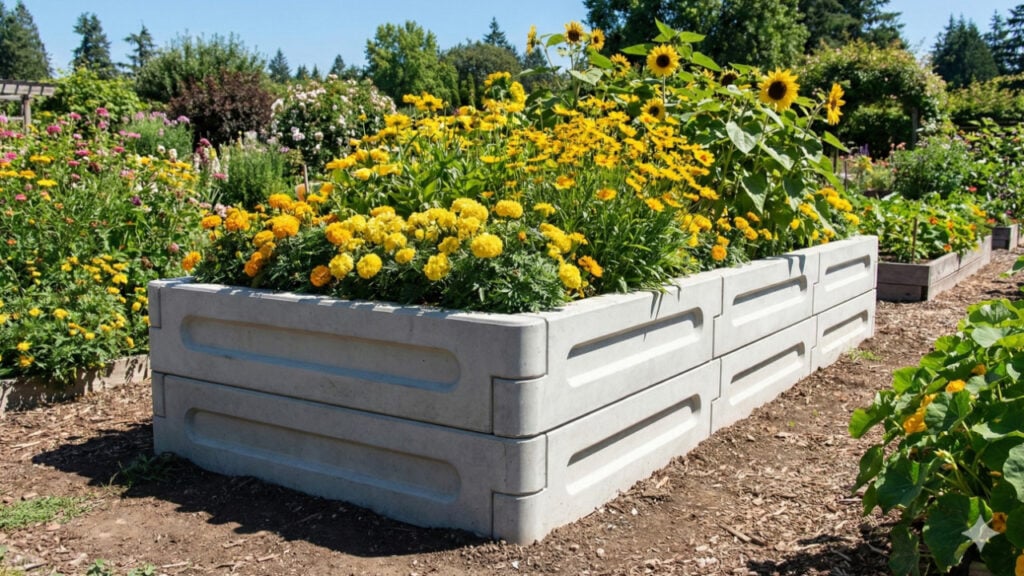
Here’s some of the new raised garden bed configurations that can be assembled with this new design.
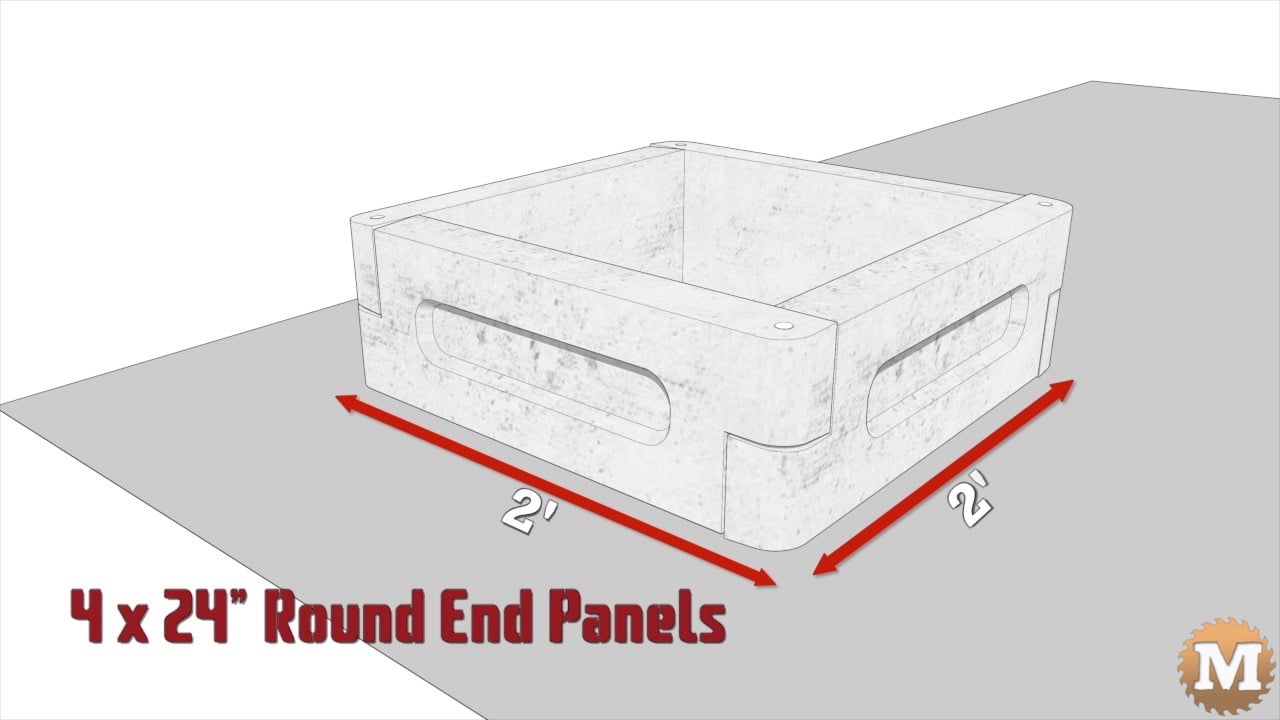
Round End Mold Bed Configurations
The simplest is four 24 inch panels in a square.
(Disclaimer: As an Amazon Associate I earn from qualifying purchases. Thank you for helping to support my content this way. )
Here’s two 24s and two 36es.

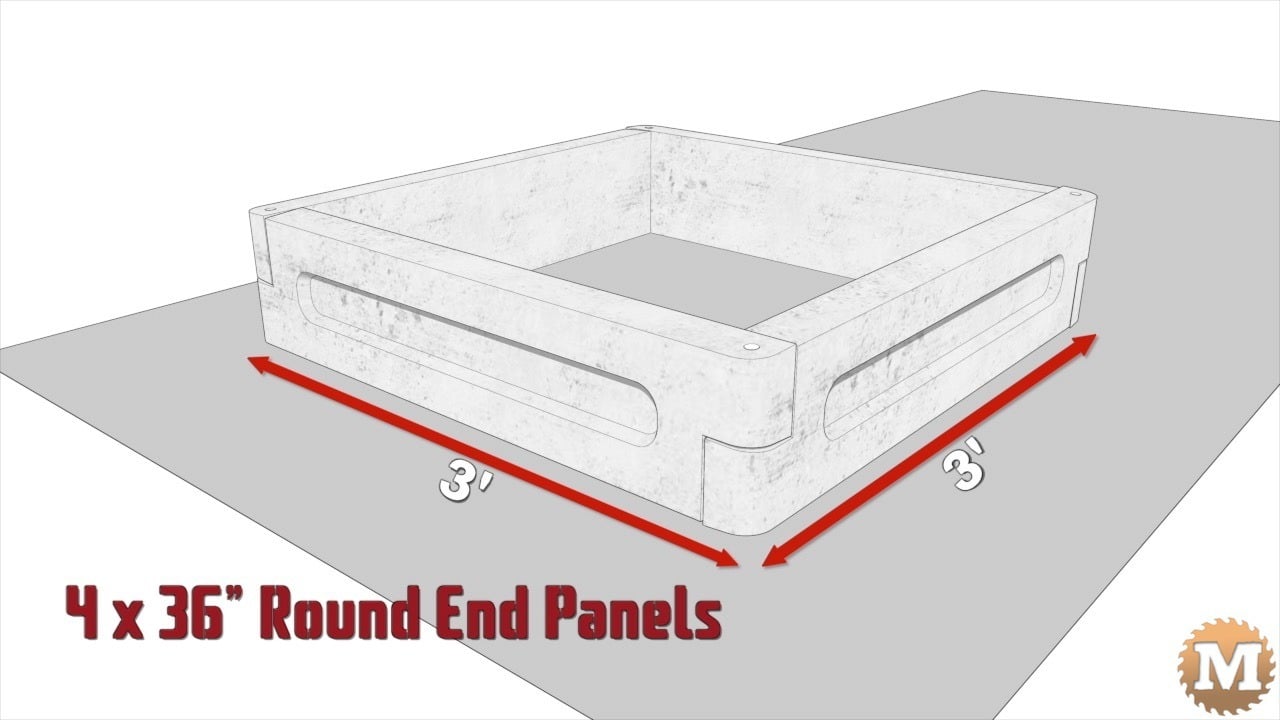
Or four 36 inch panels in a bigger square.
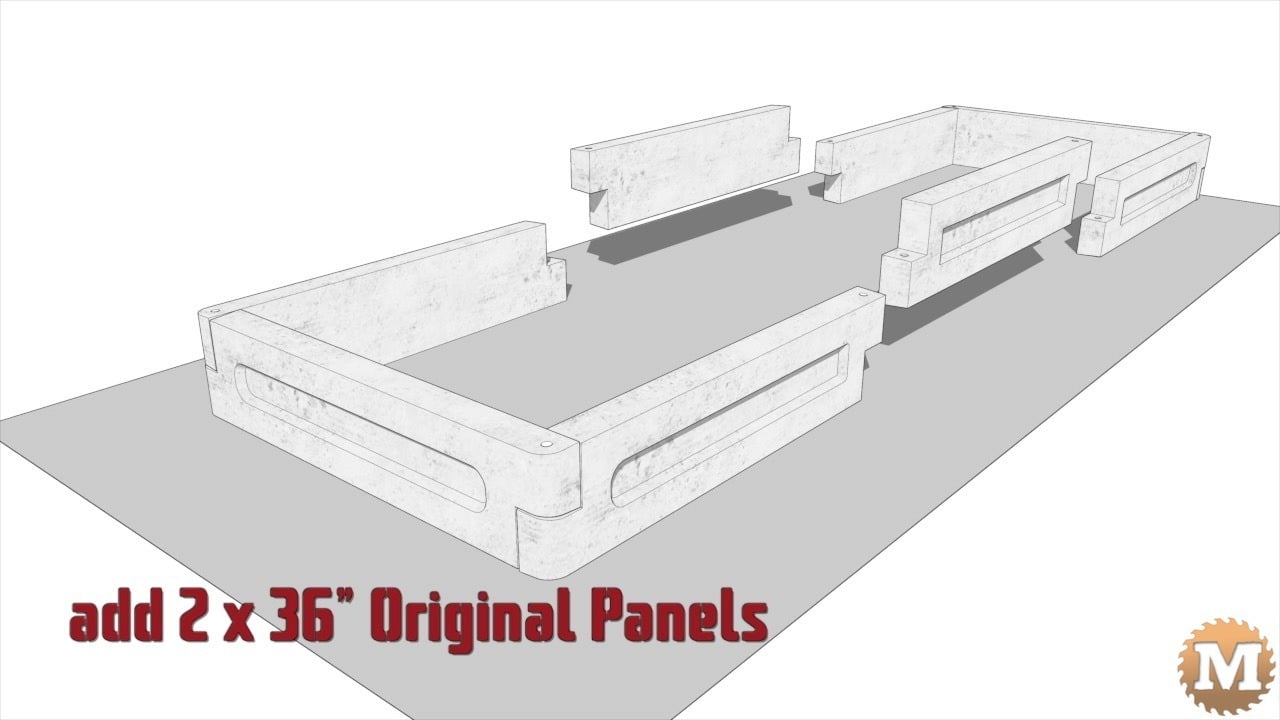
To make a longer bed you can use two 36 inch round ends with four of the transition panels.

Then with the addition of my original panels this bed can be made even longer. Here I’ve added two of the 36 inch originals.
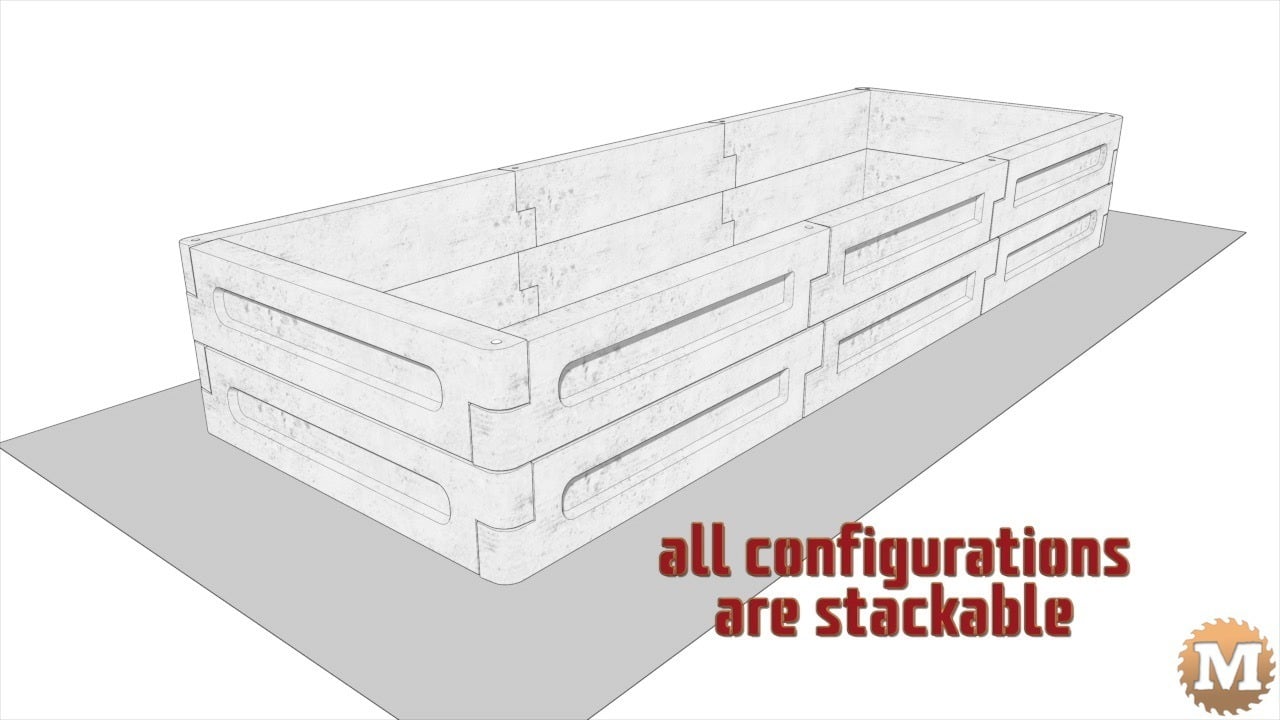
And they can be stacked to make deeper beds. (as I’ve covered in two previous videos)
Casting these new panels is done almost identically to my original design. Since I introduced these ABS plastic molds I have made some changes and improvements to the process to give even better results and I’ll focus more on those here.
I still will go through all the steps in case you are new to my channel and haven’t seen these concrete raised beds before.
Panel Weights
Using regular portland based concrete mix, the 36 inch panels weigh around 50 pounds. The 24 inch ones around 33 pounds.
Strong Workbench
You will need a stable, strong work table, or bench, that can support the weight for the number of panels you want to pour at a time.

My bench is made with 4 by 4 legs, 2 by 6 aprons and stringers, and a 1 inch thick plywood top. It’s also on wheels so I can move it around my shop.
The plans for this bench might still be available in this old web archive


Level Workbench
It’s crucial that your workbench be level side-to-side and lengthwise. If not, then you won’t have uniform concrete thickness in your mold. A spirit level and some wooden shims will be needed to ensure your workspace is level.


Ambient Temperature
Ambient room temperature is important in predicting how fast, or slow, your concrete will solidify and cure. For predicable results I like to pour between 70 and 80 degrees. So, a stretch of consistent warm weather or a heated (or cooled) shop or garage is required.


Separate Work Area
The newly poured concrete will need to sit undisturbed for a few days so, your work area has to be away from other activities. You don’t want to move your molds unless you really need to. Moving them risks cracking the new concrete.
Tools & Supplies Ready
Be sure to have all your tools and supplies at the ready before you start any casting. Here’s a detailed list of everything I use for pouring. I also have a written detailed description of this process you can download and print from my website. Download here.
Alright, on to making the new panels.
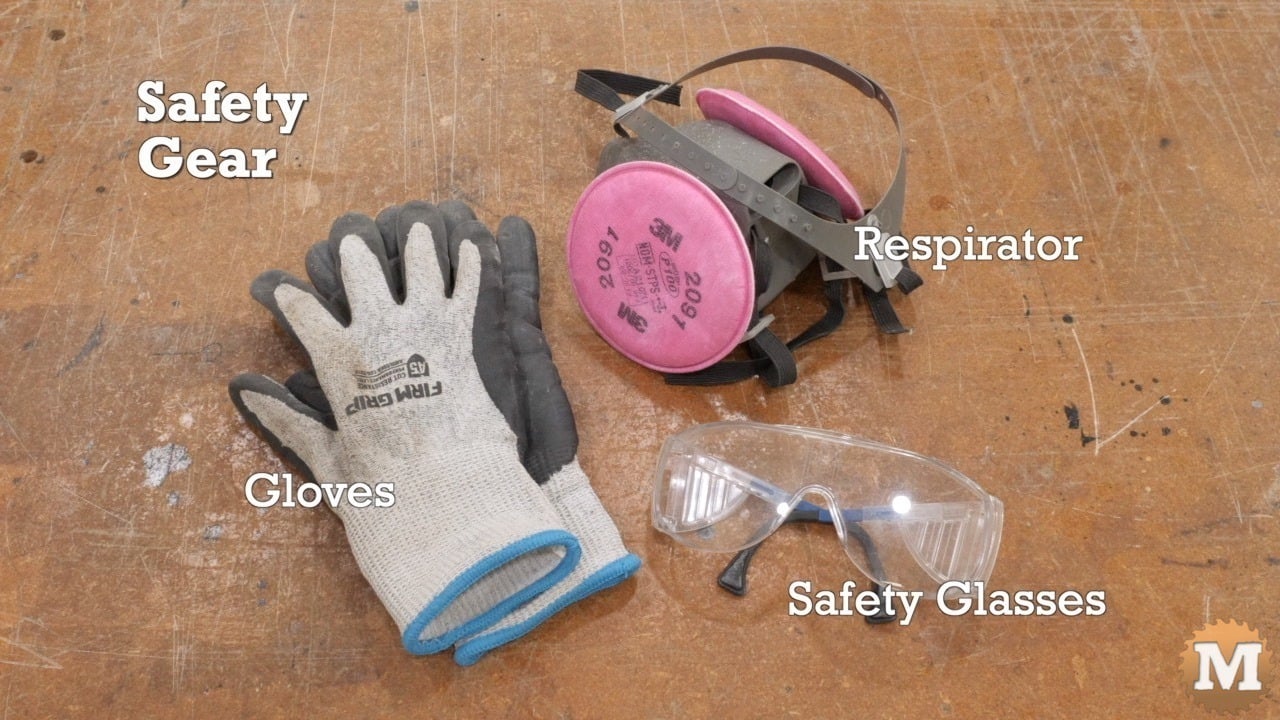
Safety Gear
My safety gear includes glasses, gloves, and a P100 respirator or dust mask. Concrete dust and wet concrete is corrosive so always wear your gear.

Concrete Mixing
For mixing, I use a wheelbarrow, shovel, small trowel, high strength concrete mix, cold clean water, and a pail. This wheelbarrow has seen some heavy use.

Concrete Vibration
To settle the mix I use a rubber mallet and sometimes a reciprocating saw without a blade.

Mold Prep Tools
The molds and pipes will need to be prepped before pouring concrete. Tools and supplies include wire cutters, pliers, a tape measure, small bolt cutters, galvanized wire, galvanized wire grid, and a short length of 1 inch diameter pipe or dowel. I like the cutters on the fencing pliers shown here.


Optional Panel Strengthening
This is to make the coil of wire that wraps around the pipes plus the grid that strengthens the concrete panel along it’s length. You may choose not to add these but, it doesn’t cost much or take any significant time to add a little extra insurance. So, I like to do it.

Release Agents
To help release the concrete casting, I apply a finishing wax to the plastic mold and petroleum jelly to the pipes. I use paper towel or a cloth to apply the wax and a small brush to apply the petroleum jelly. The wax seems to give a nice smooth finish to the casting and the petroleum jelly really makes pulling the pipes easier.


