Introduction If you have been following my garden builds, you know I love casting my own thin concrete panels for raised garden beds. In the past, I’ve used fast-setting CSA mortar mixes and custom Portland cement blends to get the strength needed for these 1.5-inch thick panels.
I have a PDF summary of the concrete casting process and tools required for download. Get the Good Casting Practices for Thin Panels guide.

While those custom blends work exceptionally well, I wanted to find a faster, easier, and cheaper method. I wondered: Will off-the-shelf 6000 PSI ready-mix concrete work just as well? In this post, I am testing a standard 6000 PSI high-strength blend in both my DIY wooden molds and ABS plastic molds to see if it can deliver a smooth, durable finish.
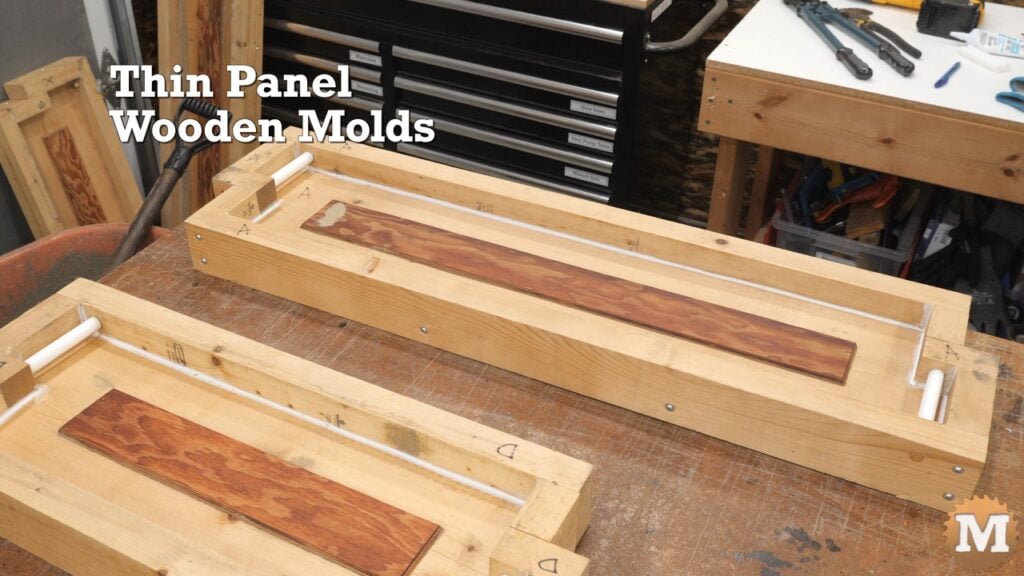
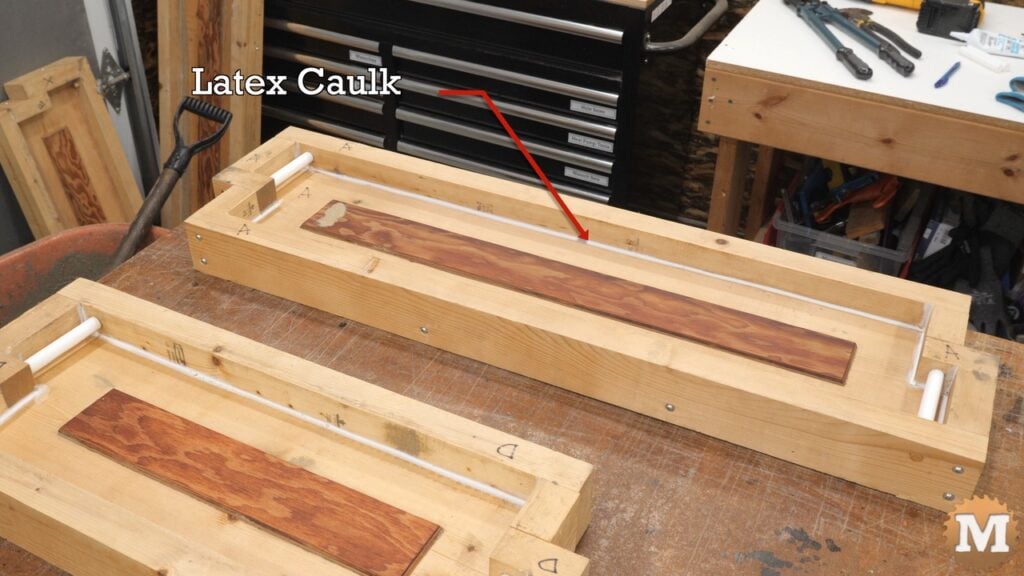
Preparing the Molds Whether you are using wood or plastic, proper preparation is key:
- Wooden Molds: Screw the side and end walls to the base, set the PVC pipes in place, and apply latex caulk to the inside corners. Finally, coat the cavity with a layer of mineral oil.
- Plastic Molds: Apply a finishing wax to the cavity of the mold and brush petroleum jelly onto the pipes for easy removal later.
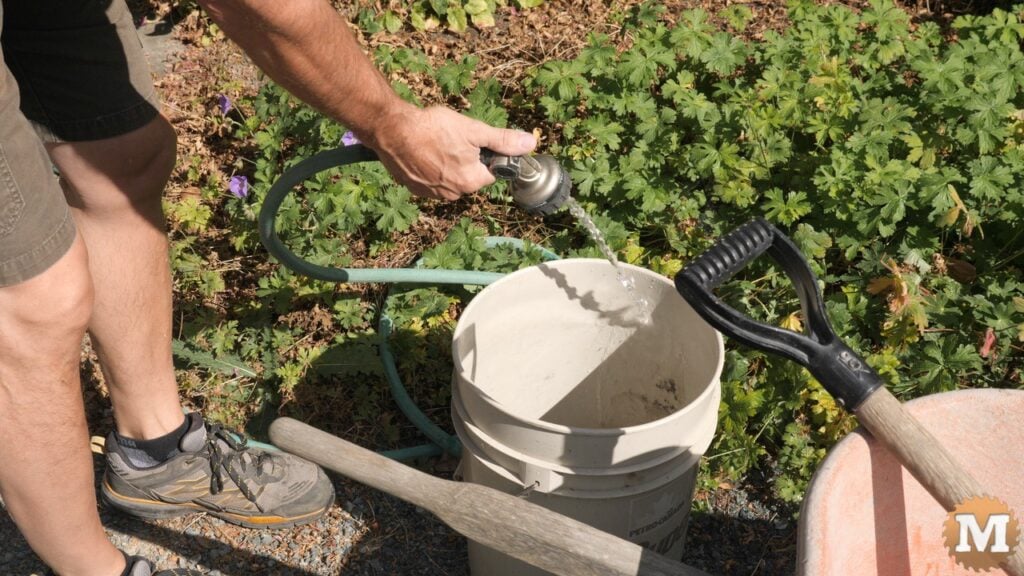
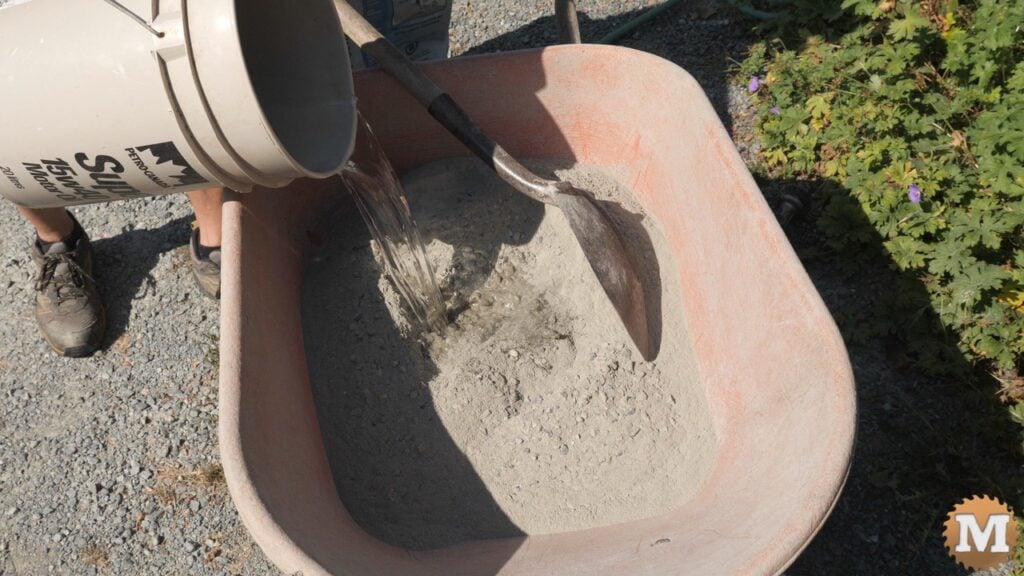
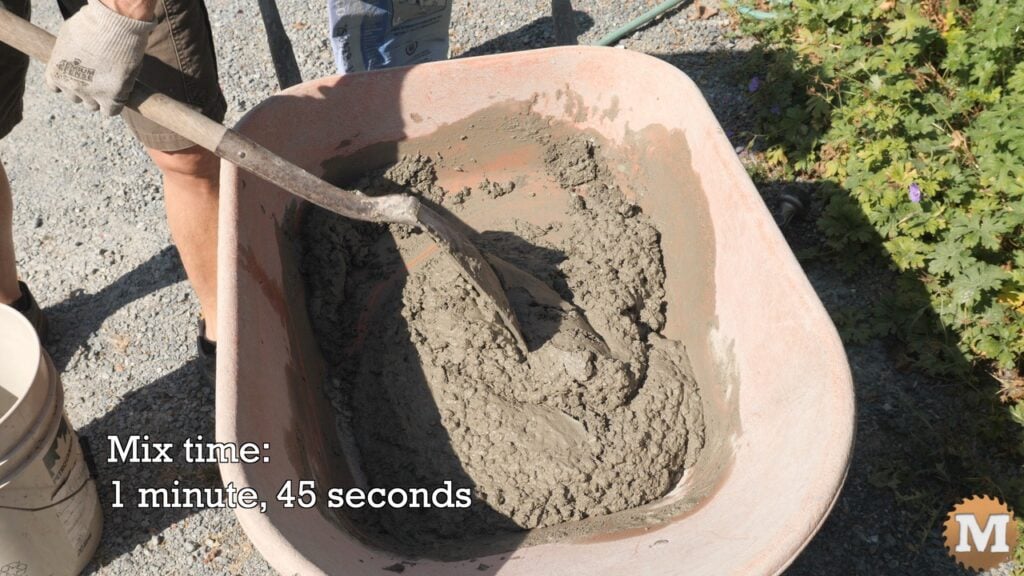
Mixing the 6000 PSI Concrete When working with this high-strength mix, water management is critical. I suspect this blend contains a water reducer, meaning it can go from feeling too dry to completely runny very quickly.
- Add the dry mix to a wheelbarrow.
- Slowly add cold water while blending with a shovel.
- Stop adding water when the mix is entirely wet but still holds some peaks when you stop working it. (Tip: Always hold back a little dry mix just in case you accidentally make it too wet!)
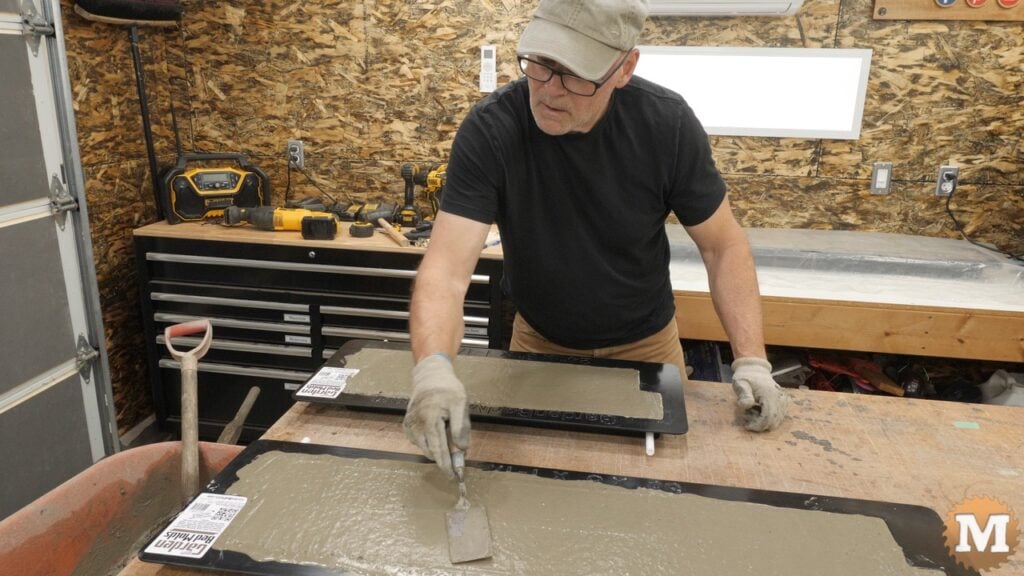
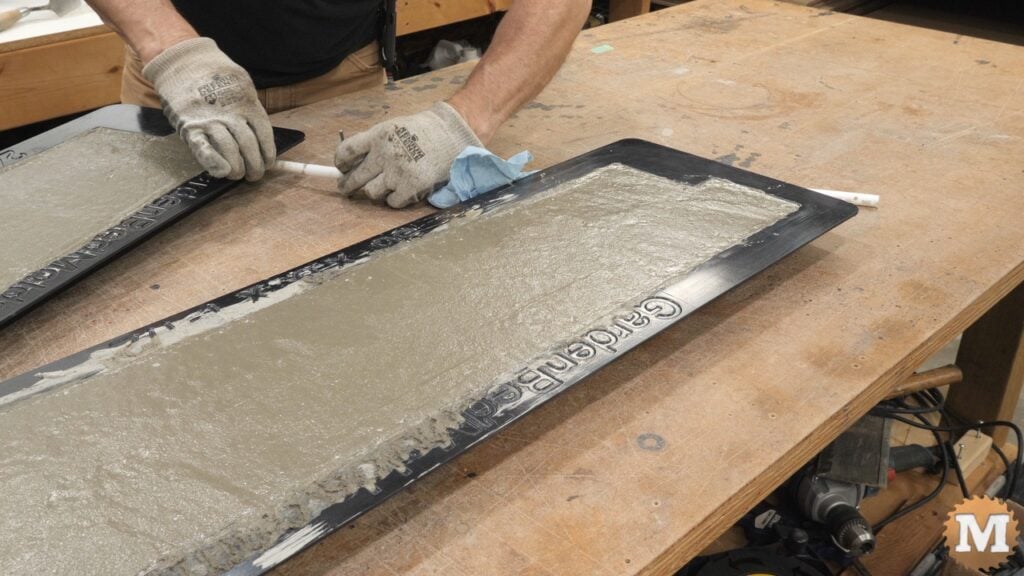
Pouring and Vibrating
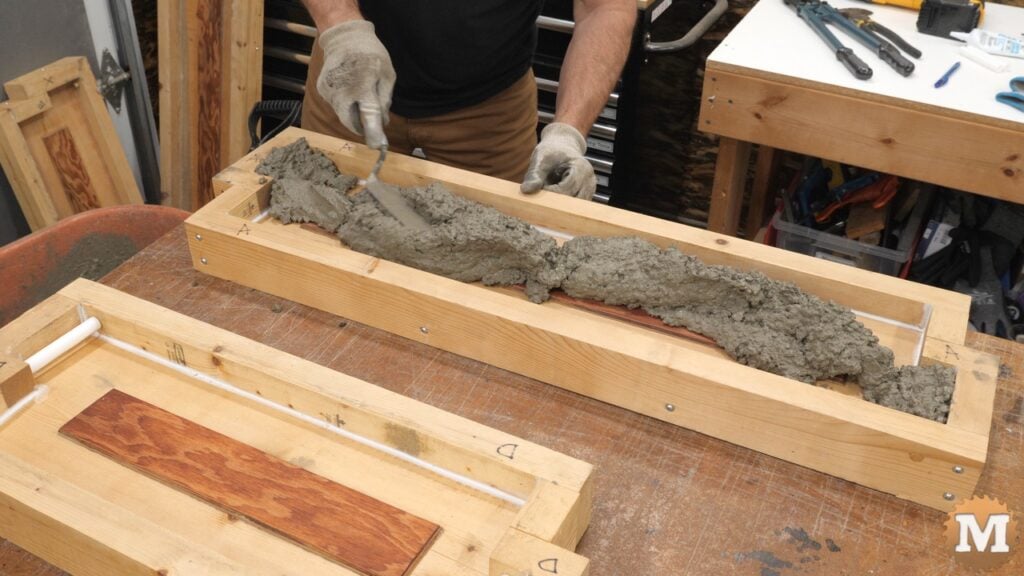
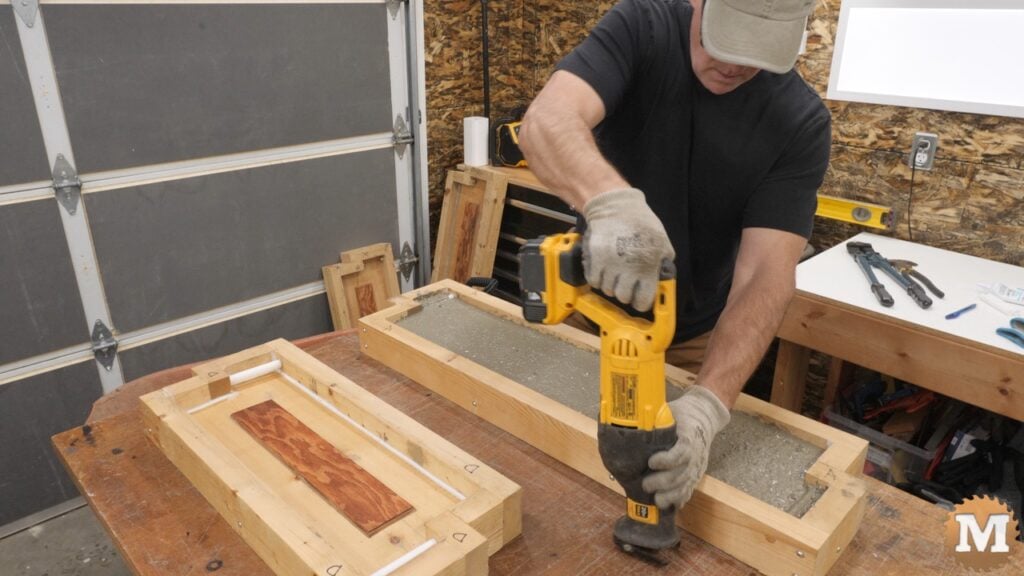
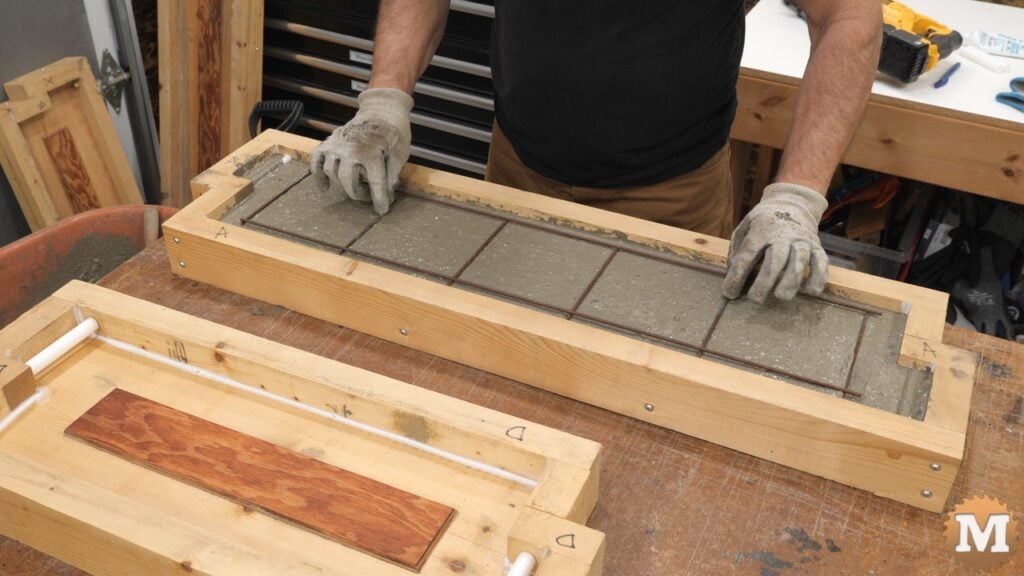
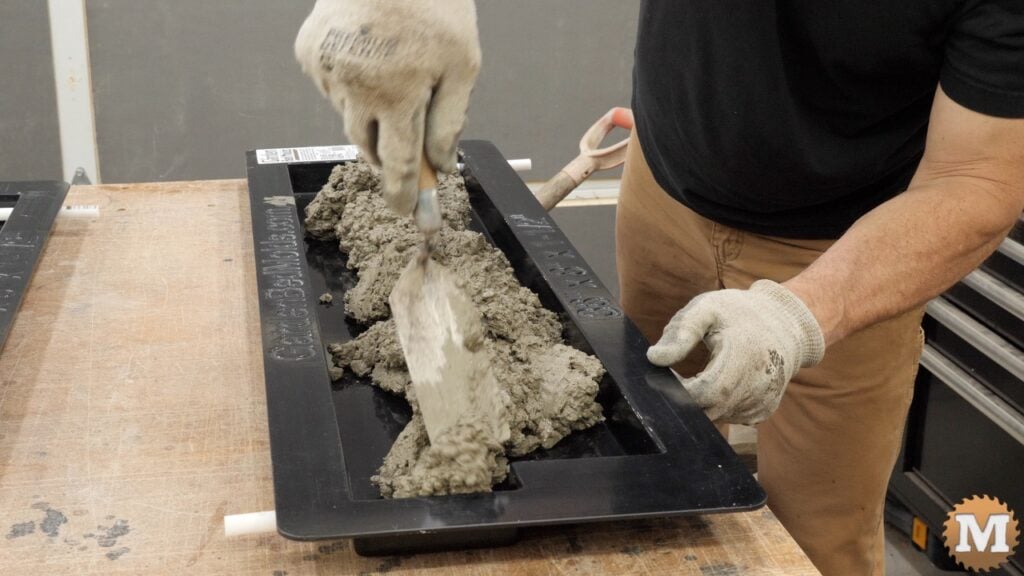
- Fill halfway: Use a small trowel to pack the wet concrete tightly around the pipes to prevent voids, then fill the mold halfway.
- Vibrate: Settle the mix using a rubber mallet or a reciprocating saw (without the blade) against the table to bring trapped air bubbles to the surface.
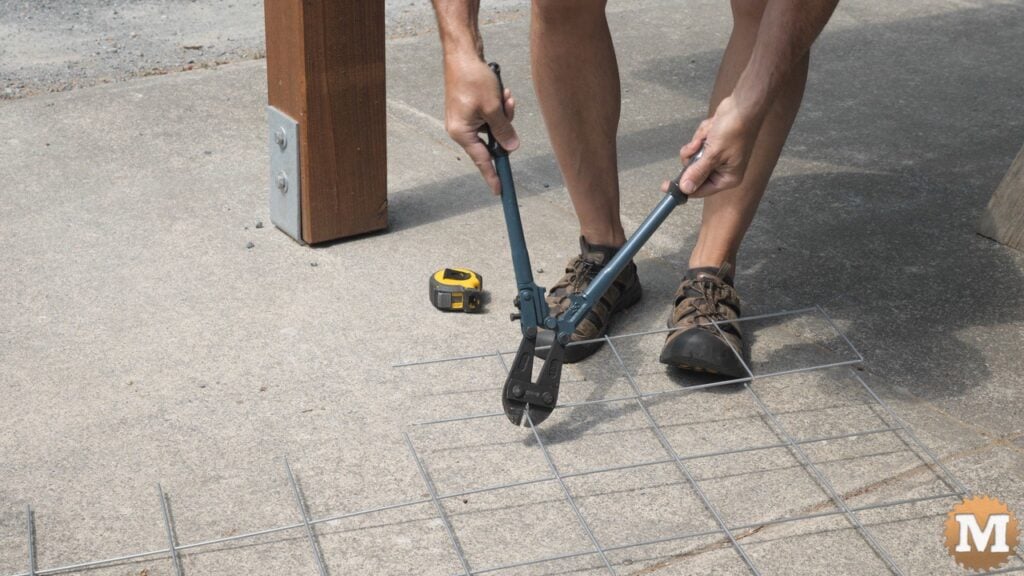
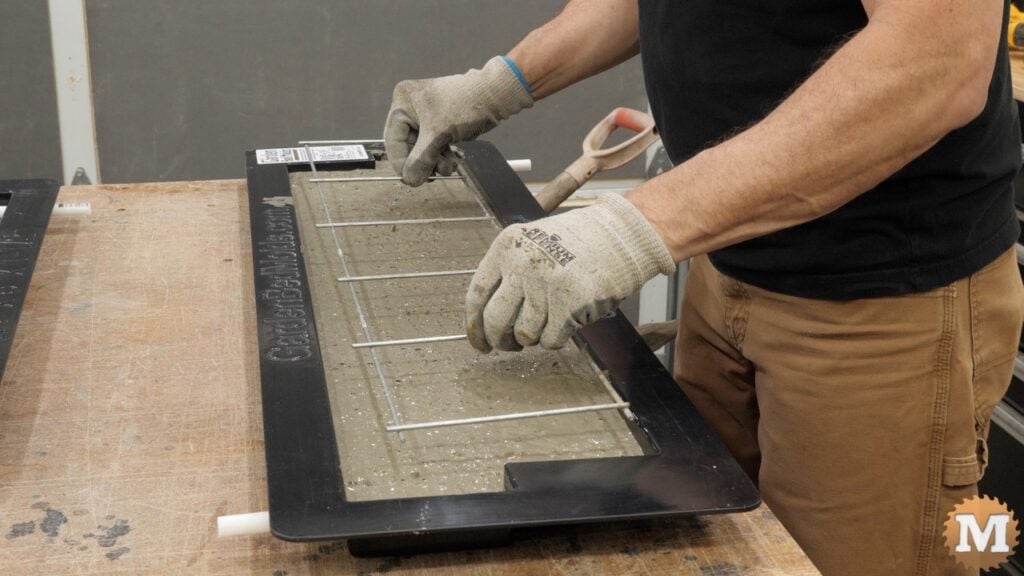
- Add reinforcement: Lay a custom-cut metal wire grid into the wet mix and press it down with a trowel.
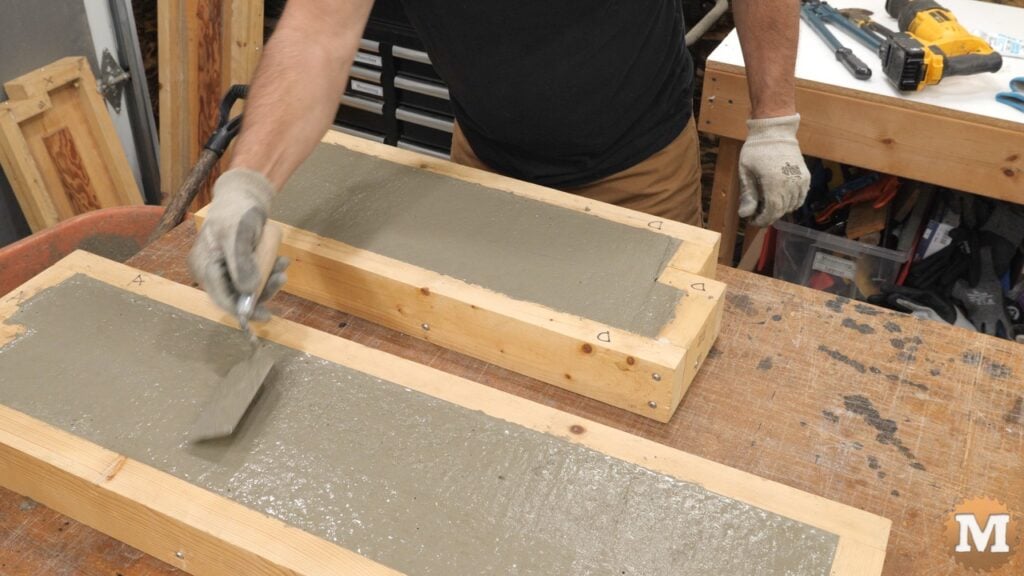
- Top it off: Add more concrete to fill the mold (slightly underfilling plastic molds by about 1/8th of an inch). Spread, vibrate one last time, and smooth the surface.
Curing and Unmolding For both the wood and plastic molds, I let the concrete sit and harden for a bit (about an hour for wood before covering with plastic, and 6 hours for the plastic before twisting out the pipes). Make sure they are covered with plastic and let them sit for 3 days at around 70°F (21°C) before unmolding. (The pipes stay embedded in the concrete for the wooden molds)
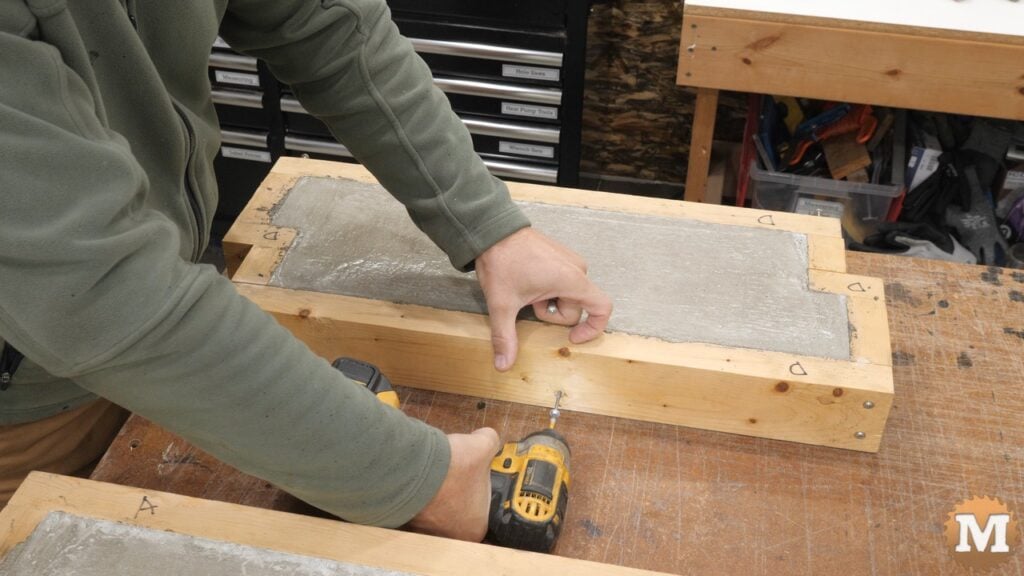
To unmold:
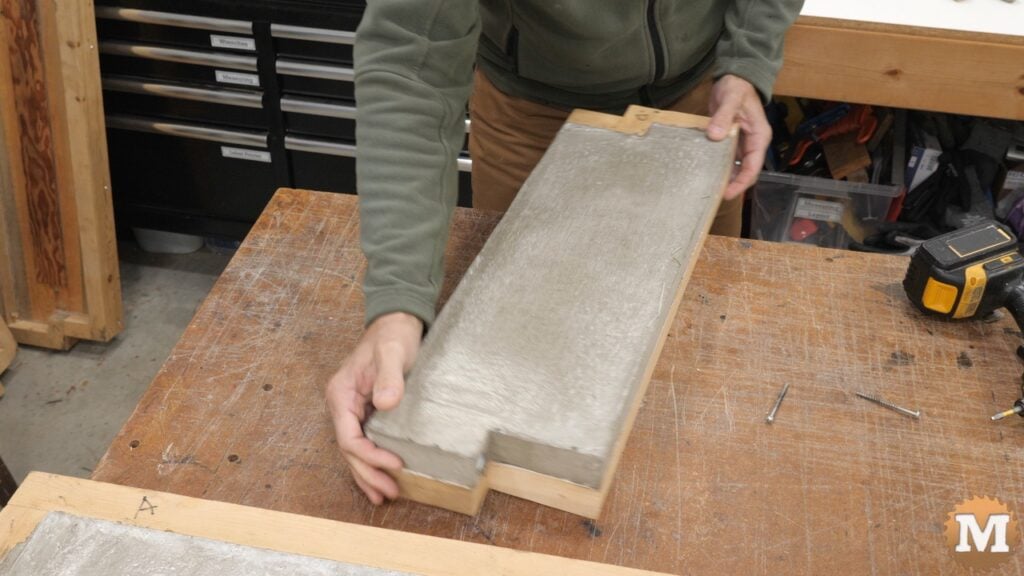
- Wood: Remove the screws, gently pry the base free, and use a twisting motion to slide the wooden end pegs off the embedded plastic pipes.
- Plastic: Gently flex the edges of the plastic flange. Lift from the ends and rotate the mold over, pressing the face against the edge of the bench so the full weight isn’t resting on the thin plastic flange.
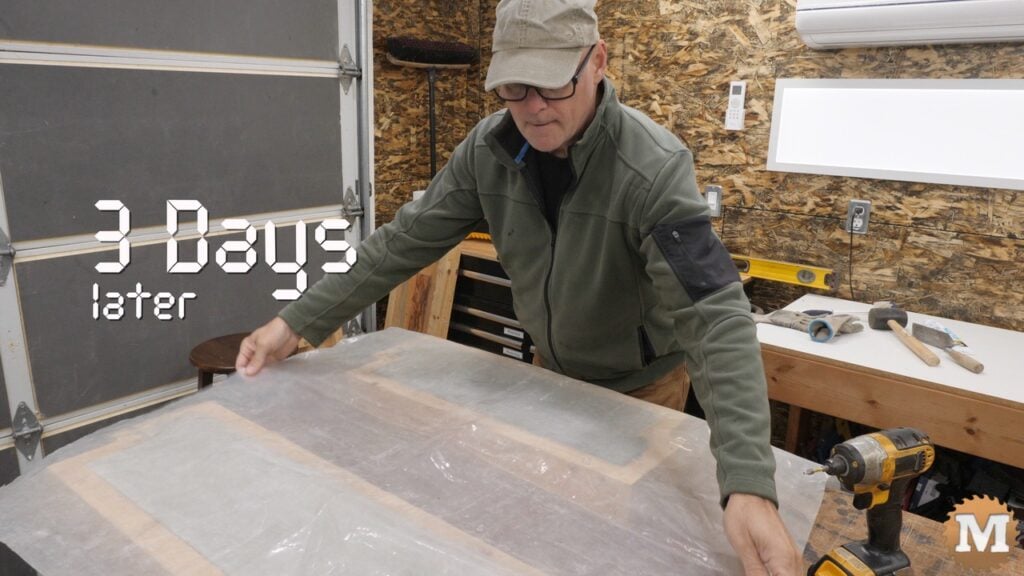


Once unmolded, wrap the castings in plastic and keep them damp in your shop for 3 weeks to cure to full strength.
(Disclaimer: As an Amazon Associate I earn from qualifying purchases. Thank you for helping to support my content this way. )
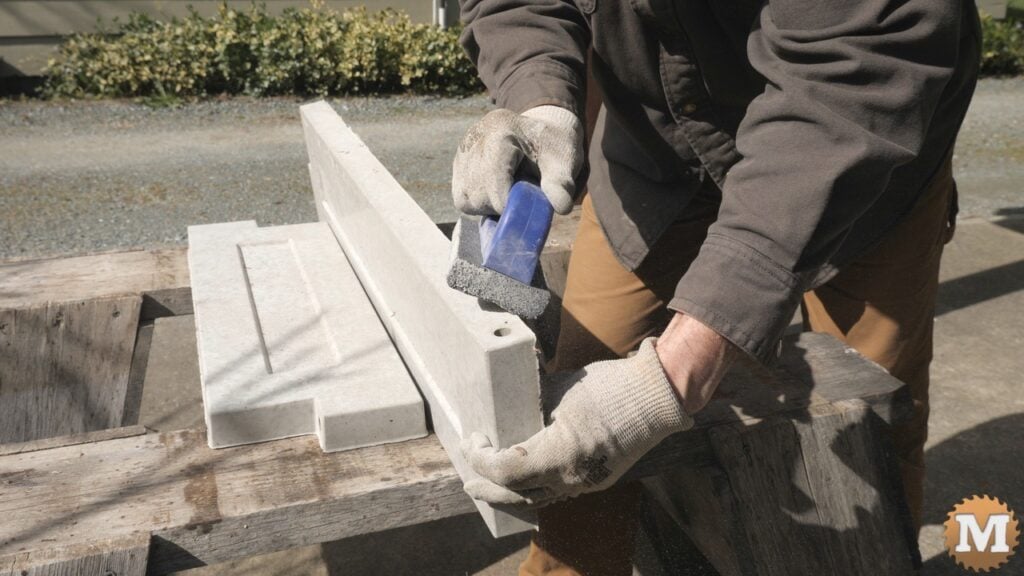
Finishing the Edges After the three-week cure, set the panels over sawhorses outside and use a concrete rub brick to dress any sharp edges. It only takes a few minutes and yields a perfectly smooth, safe edge for your raised beds.
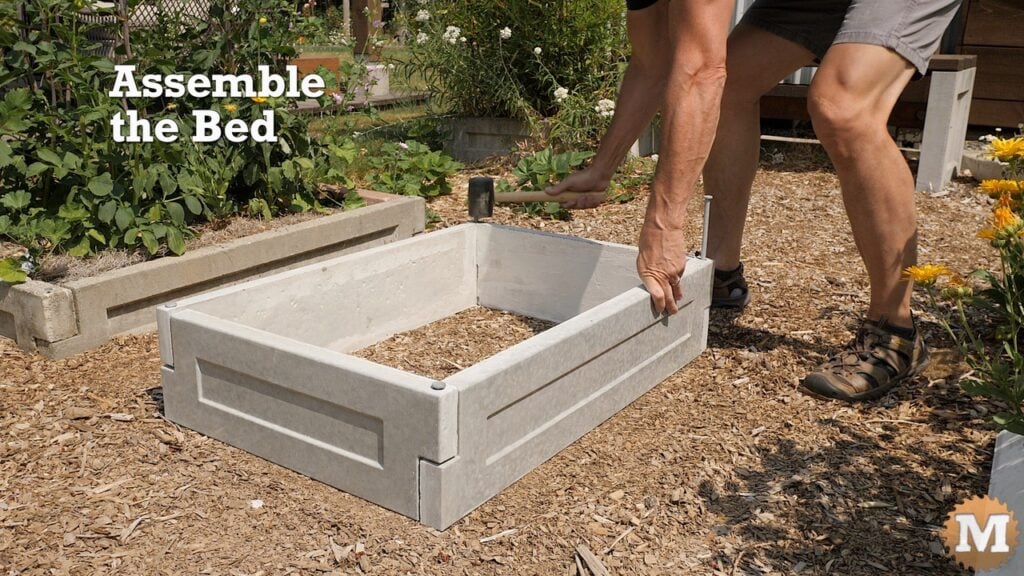
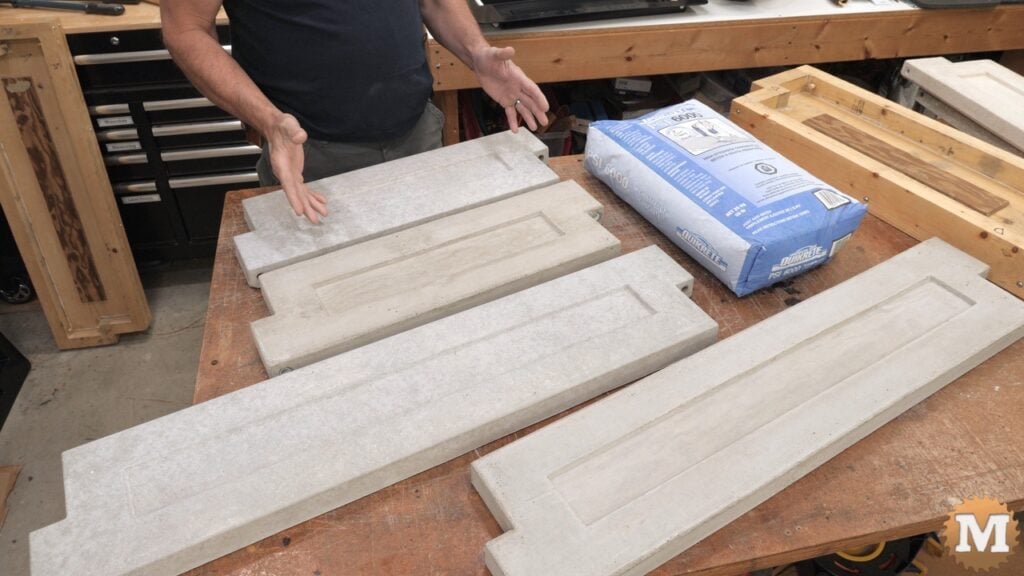
The Verdict The experiment was a massive success! For both the original wooden DIY molds and the ABS plastic molds, the 6000 PSI ready-mix concrete worked beautifully. The panels came out with a completely smooth surface, no visible voids, and sound structure around the pipes.
This is undeniably a faster, easier, and cheaper way to cast thin panels.
Note: If you can only find a 5000 PSI blend in your area, I suspect you will get very similar results. If you try it, let me know how it goes in the comments!
Want to build your own? Download my updated casting guide here!

